•
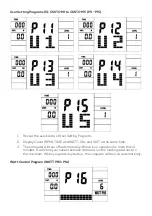
User Profile Programs: CUSTOM1
~
CUSTOM5(P11-P15)
o
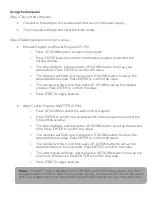
Press UP, DOWN button to select the user.
o
Press ENTER to confirm your choice and enter the time setting window.
o
The time display will flash, and then press UP, DOWN button to set up the
desired time to do the exercise. Press ENTER to confirm the value.
o
The distance will flash, and then press UP, DOWN button to set up the
desired distance value. Press ENTER to confirm the value.
o
The calories will flash, and then press UP, DOWN button to set up the
desired calories to be consumed. Press ENTER to confirm the value.
o
The first resistance level will flash, and then press UP, DOWN button to
set the desired load resistance. Press ENTER to confirm. Then repeat
above operation to set the resistance from 2 to 10.
o
Press START to begin exercise.
Value Ranges
Count
Shows your current speed. Range: 0.0
~
999 count.
Rpm
Shows the current rotate per minute. Range: 0
~
999.
Time
•
Shows the accumulative exercise time, range: 0:00
~
99M
~
59S.
•
The preset time range is 5:00
~
99M
~
00S.
•
The computer will start to count down from preset time to 0:00
with average time for each resistance level. When it reaches to
zero, the program will stop and computer alarm. If you do not
preset the time, it will run with one-minute decrement each
resistance level.
Dist
•
Shows the exercise accumulative distance.
Range: 0.0
~
999M
~
999KM
•
The preset distance range :1.0
~
99.0
~
999.
•
When the distance reaches 0, the program will stop and the
computer will alarm.
Calorie
•
Shows the exercise accumulative calories burnt.
Range: 0.0
~
99.9
~
999
•
The preset calories range :10.0
~
90.0
~
990.
•
When the calorie reaches 0, the program will stop and the
computer will alarm.
Resistance level
Shows resistance level. Range:1
~
16.
Watt
Shows the exercise watt, the interval should be 10, between 30-350.
Summary of Contents for FSAEMR500AA
Page 1: ...AUTOMATIC VARIABLE RESISTANCE MAGNETIC FLYWHEEL FULL MOTION ROWING MACHINE MR 500A FSAEMR500AA...
Page 2: ......
Page 6: ...OVERVIEW...
Page 7: ......
Page 12: ...Step 2 Attach the Foot Pad 19 to the Front Stabilizer 11 and Rear Stabilizer 74...
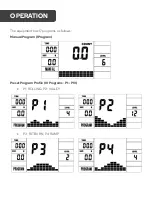
Page 22: ...P5 MOUNTAIN P6 INTERVAL P7 CARDIO P8 ENDURANCE P9 SLOPE P10 RALLY...
Page 27: ...Adaptor Input Voltage AC 100 240V Output Power DC 9V 1A SPECIFICATIONS...


