29
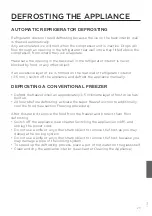
DEFROSTING THE APPLIANCE
711788
Refrigerator does not need defrosting because the ice on the back interior wall
is thawed automatically.
Any accumulated ice will melt when the compressor unit is inactive. Drops will
flow through an opening in the refrigerator rear wall into a tray fitted above the
compressor, from where they will evaporate.
Make sure the opening in the back wall in the refrigerator interior is never
blocked by food or any other object.
If an excessive layer of ice is formed on the rear wall of refrigerator interior
(3–5 mm), switch off the appliance and defrost the appliance manually.
AUTOMATIC REFRIGERATOR DEFROSTING
DEFROSTING A CONVENTIONAL FREEZER
• Defrost the freezer when an approximately 3–5 millimetre layer of frost or ice has
built up.
• 24 hours before defrosting, activate the super freeze function to additionally
cool the food (see section Freezing procedure).
After this period, remove the food from the freezer and protect them from
defrosting.
• Switch off the appliance (see chapter Switching the appliance on/off ) and
unplug the power cord.
• Do not use a knife or any other sharp object to remove the frost, as you may
damage the cooling system.
• Do not use a knife or any other sharp object to remove the frost, because you
may damage a pipe of the cooling system.
• To speed up the defrosting process, place a pot of hot water on the glass shelf.
• Clean and dry the appliance interior (see chapter Cleaning the Appliance).
Summary of Contents for 2037 000
Page 1: ...IT ISTRUZIONI DETTAGLIATE PER L USO DEL FRIGO CONGELATORE...
Page 34: ......
Page 35: ......
Page 37: ...EN DETAILED INSTRUCTIONS FOR USE OF UPRIGHT REFRIGERATOR AND FREEZER...
Page 70: ...34 711788...
Page 71: ......
Page 73: ...FR NOTICE D UTILISATION D TAILL E POUR UN R FRIG RATEUR CONG LATEUR ARMOIRE...
Page 107: ......
Page 109: ...ES INSTRUCCIONES DETALLADASPARA EL USO DEL REFRIGERADOR Y CONGELADOR...
Page 143: ......
Page 145: ...DE AUSF HRLICHE GEBRAUCHSANLEITUNG F R K HL UND GEFRIERGER TE...
Page 179: ......
Page 181: ...RU...
Page 182: ...2 711813 0 i...
Page 183: ...3 711813 4 4 5 7 8 9 10 12 13 15 19 20 24 FreshZone 25 25 25 26 26 26 27 28 29 31...
Page 184: ...4 711813 i...
Page 185: ...5 711813...
Page 186: ...6 711813 R600a...
Page 187: ...7 711813 16...
Page 188: ...8 711813...
Page 189: ...9 i 711813 3 5...
Page 191: ...11 711813 6 6...
Page 192: ...12 711813 A 1 2 3 4 5 6 CrispZone 7 8 B 9 10 SpaceBox 11 12 A B 1 5 6 10 2 9 11 12 7 8 3 4...
Page 193: ...13 711813 A B B A...
Page 194: ...14 711813 save 16 i 24...
Page 195: ...15 711813 9 0 75 13...
Page 196: ...16 711813 CRISPZONE...
Page 197: ...17 5 711813...
Page 198: ...18 O 711813 30 IonAir...
Page 199: ...19 711813 i PIZZA i...
Page 200: ...20 711813 i...
Page 204: ...24 FreshZone 711813 FreshZone 30 60 FreshZone...
Page 205: ...25 711813 i 24 2 24 i...
Page 206: ...26 711813 18 C 10 12 8 10 6 8 4 6 4 3 2 1...
Page 207: ...27 711813 3 5 3 5 24...
Page 208: ...28 711813 3 5...
Page 209: ...29 A 711813...
Page 210: ...30 711813...
Page 211: ...31 711813...
Page 213: ...CN...
Page 214: ...2 711811 0 C i...
Page 215: ...3 711811 4 4 4 6 7 8 9 11 12 14 18 19 23 24 24 24 25 25 25 26 27 28 30 S...
Page 216: ...4 711811 2 LED i...
Page 217: ...5 711811 8 R600a...
Page 218: ...6 711811 16...
Page 219: ...7 711811...
Page 220: ...8 i 711811 3 5...
Page 222: ...10 711811 6...
Page 223: ...11 711811 A 1 2 LED 3 4 5 6 7 8 B 9 10 11 12 A B 1 5 6 10 2 9 11 12 7 8 3 4...
Page 224: ...12 711811 A ECO B A A B A...
Page 225: ...13 711811 A A save A 16 C A i A 24 A...
Page 226: ...14 711811 9 0 75L 13KG...
Page 227: ...15 711811...
Page 228: ...16 5 711811...
Page 229: ...17 711811 0 30 C A IONAIR...
Page 230: ...18 711811 PIZZA i i...
Page 231: ...19 711811 i...
Page 235: ...23 711811 30 60...
Page 236: ...24 711811 i 24 A 1 2 24 A i...
Page 237: ...25 711811 18 C 10 12 8 10 6 8 4 6 4 3 2 1...
Page 238: ...26 711811 3 5 mm 3 5 mm 24...
Page 239: ...27 711811 3 5mm...
Page 240: ...28 A A 711811...
Page 241: ...29 LED LED LED 711811...
Page 242: ...30 711811...
Page 243: ......


