8
APPENDIX
(Operation manual for the recorder with the Model 8346 TC/SYNC card installed)
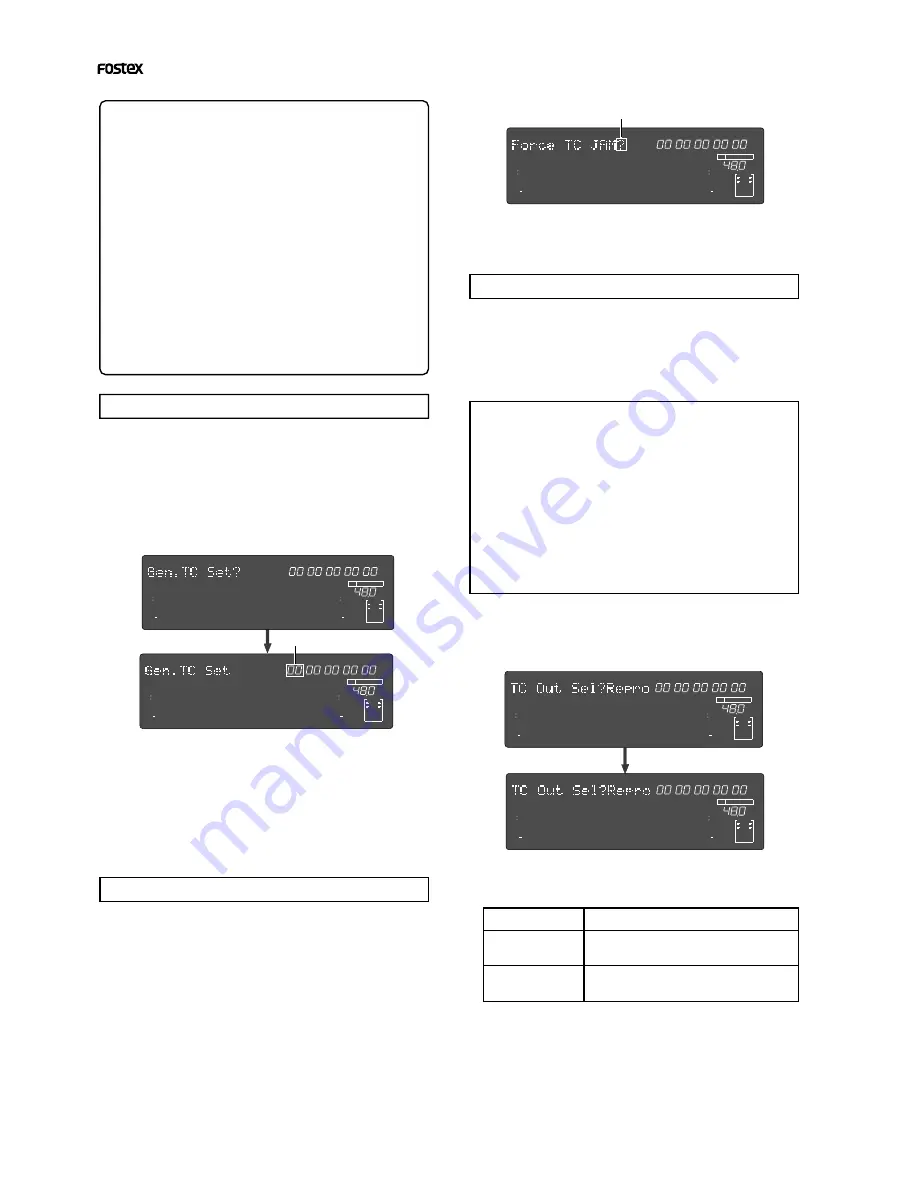
Force jamming to external time code
Selecting the output time code
Output setting
Repro
Gen.
Reproduced time code
Internal generator time code
1. Select “TC Out Sel?” (“?” flashes) of the Generator
Setup mode and press the [EXECUTE/YES] key.
The current output setting flashes (the default setting is
“
Repro
”).
<CAUTION>
• While time code is output, the recorder's vari pitch
and word sync functions are prohibited.
Note that the time code output setting is available
only when an "
Async"
mode (“
adat: Async
” or
“
SPDIF: Async
”) is selected in the “
D. in?
” menu of the
Setup mode.
Also note that if you execute a program change, etc.
the generator stops time code generation.
• The “
TC Out Sel?
” setting returns to the default
“
Repro
” when turning the power off.
3. After the setting is completed, press the
[EXECUTE/YES] key.
4. Press the [EXIT/NO] key (or the [STOP] button) to
exit the Generator Setup mode.
Output time code
Editing the internal generator time code
<How to record time code>
After setting the time code recording mode de-
scribed above, record time code by the follow-
ing procedure.
1. Press the [EDIT] key while holding down the [SHIFT]
key to turn TC READY on (the TC READY indicator
will flash).
2. Press the [PLAY] button while holding down the
[RECORD] button (the TC READY indicator will light).
Unlike audio signal recording, you do not need
to arm a track for time code.
Also note that recording time code does not con-
sume the hard disk space.
To erase all the time code information, see "
Eras-
ing the recorded time code
" described later.
2. Use the Shuttle dial to move the editing point
(which is flashing), and use the Jog dial to set the
numeric value.
Up to 23H 59M 59S **F (** = current frame rate - 1) can
be set.
3. After editing is completed, press the [EXECUTE/
YES] key.
2. Use the Jog dial to select “Repro” or “Gen.”.
The time code output from the
[TIME CODE OUT]
terminal changes according to the setting.
1. Select “Gen TC Set” of the Generator Setup mode
and press the [EXECUTE/YES] key.
The current internal generator time code is displayed
and you are now ready to edit the time.
Editing the internal generator time code can be done
only when the time code recording mode (described
above) is set to “
Free Run
”.
Force jamming to external time code can be done
only when the time code recording mode (described
above) is set to “
Free Run
”. Note that the following
description assumes that the 8346 is receiving ex-
ternal time code.
1. Select “Force JAM” (“SURE?” flashes) of the
Generator Setup mode and press the [EXECUTE/
YES] key.
The force jamming to the external time code starts and
the display shows the time code value in real-time.
If the 8346 does not receive external time code correctly,
the warning message “
Void LTC In!
” appears when
pressing the [
EXECUTE/YES
] key.
When the time code recording mode (described
above) is set to “
Free Run
” or “
24H Run
”, the 8346
can output the internal generator time code or re-
corded time code. Note that it does not output time
code when the time code recording mode is set to
“
Rec Run
” or “
Ext Run
”.
F
S
M
H
∞
42
OL
0
30
24
18
12
9
6
3
kHz
24
FS
BIT
SF
24
∞
42
OL
0
30
24
18
12
9
6
3
GEN
23
22
21
20
19
18
17
16
15
14
13
12
11
10
9
8
7
6
5
4
3
2
1
CLOCK
INT
F
S
M
H
∞
42
OL
0
30
24
18
12
9
6
3
kHz
24
FS
BIT
SF
24
∞
42
OL
0
30
24
18
12
9
6
3
GEN
23
22
21
20
19
18
17
16
15
14
13
12
11
10
9
8
7
6
5
4
3
2
1
CLOCK
INT
F
S
M
H
∞
42
OL
0
30
24
18
12
9
6
3
kHz
24
FS
BIT
SF
24
∞
42
OL
0
30
24
18
12
9
6
3
GEN
23
22
21
20
19
18
17
16
15
14
13
12
11
10
9
8
7
6
5
4
3
2
1
CLOCK
INT
F
S
M
H
∞
42
OL
0
30
24
18
12
9
6
3
kHz
24
FS
BIT
SF
24
∞
42
OL
0
30
24
18
12
9
6
3
GEN
23
22
21
20
19
18
17
16
15
14
13
12
11
10
9
8
7
6
5
4
3
2
1
CLOCK
INT
F
S
M
H
∞
42
OL
0
30
24
18
12
9
6
3
kHz
24
FS
BIT
SF
24
∞
42
OL
0
30
24
18
12
9
6
3
GEN
23
22
21
20
19
18
17
16
15
14
13
12
11
10
9
8
7
6
5
4
3
2
1
CLOCK
INT
Flashing
Flashing
Flashing


