background image

11.  

[STATUS] / [EDIT] key


Holding down this key for a second or more enters the 


status mode. In this mode, you can switch among status 


display pages as well as you can edit parameters (see 


page 15). 


In the brightness adjustment mode, meter selection mode 


or status display mode, this key acts as the [EDIT] key (see 


page 15). Pressing this key briefly exits the current mode 


while pressing this key for a second or more enters or 


exits the parameter editing mode.

12.  

1/4-inch [PHONES] jack        


You can connect stereo headphones with the 1/4-inch 


plug for monitoring. 

13.  

Headphones level control


This control is used to adjust the output level of both the 


1/4-inch and mini [PHONES] jacks.

14.  

[LIMITER] switch (ON, OFF, LINK)


This switch enables or disables the limiter function. 


The limiter can work individually or in link, as described    


below.


The limiter circuit is inserted after the MASTER fader.  

15.  

[MASTER] faders (L and R)


These faders control stereo left and right buss output 


levels. The scale position in orange shows the reference 


position. These faders are push-locked type. Pressing a 


fader puts it to the up position. Pressing it again puts it to 


the down position (flat position). 

16.  

[MIC]


A slate microphone is built in. While holding down the 


[SLATE] switch to the “MIC” position, the slate 


microphone is active and the signal from the microphone 


is sent to the stereo buss. 

17.  

HPF controls (1 through 3)


Each control sets the high pass filter function.


These controls are push-locked type. Pressing a control 


puts it to the up position. Pressing it again puts it to the 


down position (flat position).

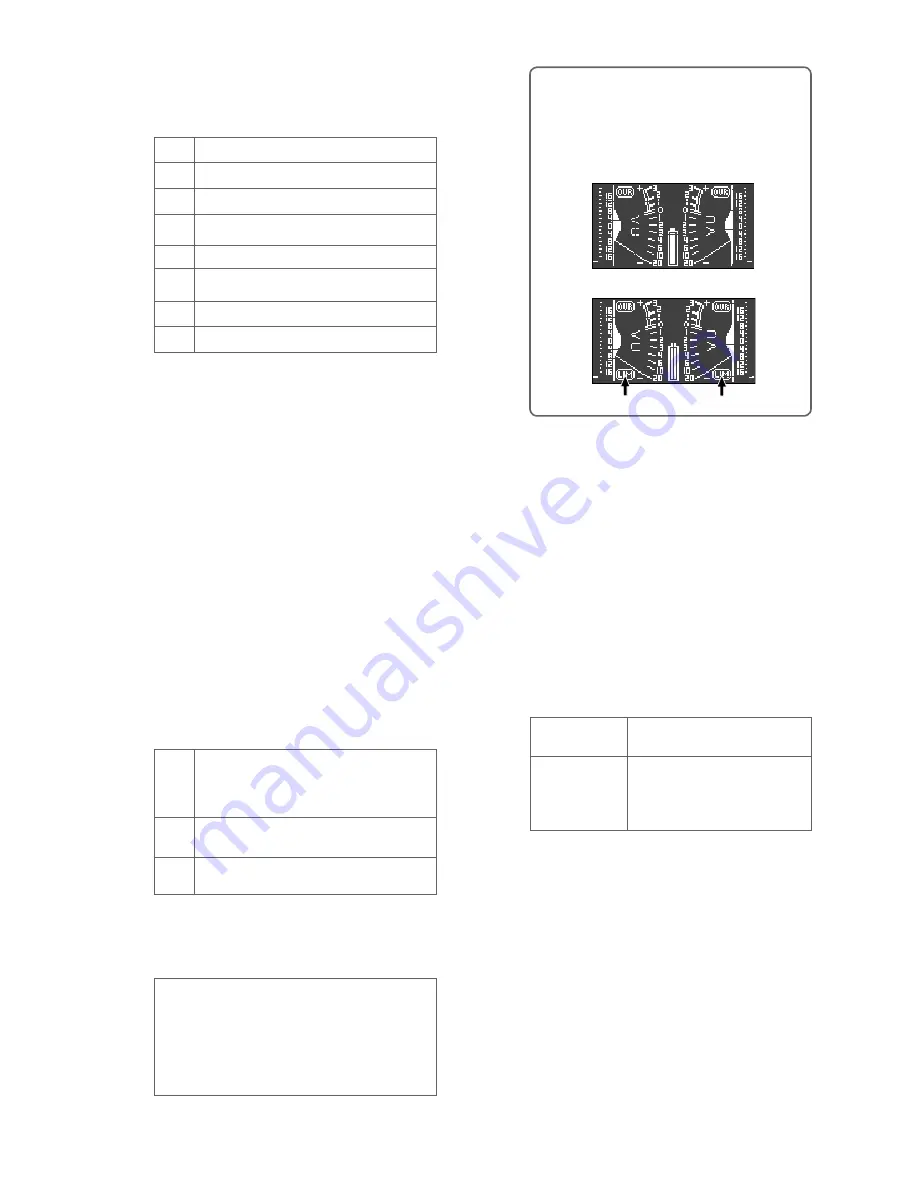
<Memo>: 

When you select the [LIMITER] switch to 

ON or LINK, the meter display shows “LIM” (pointed 

by arrows below). When the limiter is working, “LIM” 

flashes. The following shows display examples of the 

stereo meter display.

<Factory preset values>

• Attack time: Approximately 5 milliseconds (fixed)
• Release time: Approximately 200 milliseconds (fixed)
• Threshold: +12 dB (can be changed to +6 dB)
• Ratio: 5:1 (can be changed to 3:1) 

RTN

L

ST

Signals input to the [RTN] connector.

A signal output from the [MAIN OUT L] connector in mono.

Signals output from the [MAIN OUT L and R] connectors in 

stereo.

R

L+R

A signal output from the [MAIN OUT R] connector in mono.
Signals output from the [MAIN OUT L and R] connectors 

in mono (L component of MS).

MS

MS decoded signals are output.

AUX

Signals input to the [AUX IN] connector.

L-R

R component of MS is output in mono. 

ON

OFF

The limiter function is enabled. Each of the left and right 

limiters works independently. 

The limiter function is disabled (the limiter circuit is by-

passed).  

LINK

The limiter function is enabled with the left and right 

channels linked. If either of left and right channel signals 

exceeds the threshold, both the left and right channel 

limiters work in the same way.

The limiter parameters are factory-preset as shown be-

low. 

You can change the threshold level and ratio from the 

output status display (see page 18).

When the switch is set to OFF

When the switch is set to ON or LINK

10.  

Monitor select switch


This switch selects the signal monitored by the 


headphones connected to the [PHONE] jacks (1/4-inch   


and mini).

“LIM” icon

18.  

Input trim controls (1 through 3)


Each control adjusts the input gain of the corresponding 


input channel. When the input select switch is set to MIC, 


you can adjust the gain between -70 dBu and -30 dBu. 


When the input select switch is set to LINE, you can 


adjust the gain between -20 dBu and +4 dBu.


It is recommend to adjust the control so that the PEAK 


indicator does not light in red at the maximum input level. 


These controls are push-locked type. Pressing a control 


puts it to the up position. Pressing it again puts it to the 


down position (flat position). 

19.  

Channel faders (1 through 3)


Each fader controls the signal level sent to the stereo buss. 


The scale position in orange shows the reference position.

ON

By turning the control right from the Off 

position, it clicks and the HPF circuit gets 

active. Depending on the position, the roll-

off frequency changes between 40 Hz and 

300 Hz (-12 dB/oct).

OFF

 (leftmost position)

The HPF circuit is bypassed.

11

“LIM” icon

Summary of Contents for FM-3

Page 1: ...metering 7 Preparationofmonitoring 8 Masterfaderreferencesetting 8 Inputsetting 8 Blockdiagram 9 Namesandfunctions 10 Frontpanel 10 Leftsidepanel 12 Rightsidepanel 13 Display 14 Adjustingthedisplaybrightness 14 Selectingthemetermode 15 Selectingthestatusdisplay 15 Inputstatusdisplay 16 T12powersupplymodesetting 16 Outputstatusdisplay 17 Limiterparametersetting 18 Meterstatusdisplay 19 Parameterset...

Page 2: ...lightning flash with arrowhead symbol within an equilateral triangle is intended to alert the user to the presence of uninsulated dangerous voltage within the product s enclosure that may be of sufficient magnitude to constitute a risk of electric shock to persons The exclamation point within an equilateral triangle is intended to alert the user to the presence of important operating and maintenan...

Page 3: ...replacement of the obsolete outlet 10 Protect the power cord from being walked on or pinched particularly at plugs convenience receptacles and the point where they exit from the apparatus 11 Only use attachments accessories specified by the manufacturer 12 Use only with the cart stand tripod bracket or table specified by the manufacturer or sold with the apparatus When a cart is used use caution w...

Page 4: ...lug theAC adaptor and remove batteries and consult your dealer or the nearest FOSTEX service station Do not drop the unit or give it a strong shock The internal circuits display or panels may be damaged To prevent possible electric shock and damage to the unit do not remove the cover or reach the inside of the unit Precautions on installation Do not install the unit in the following conditions In ...

Page 5: ...h input channels provides the trim control and two color peak indicator for optimum level adjustment Frequently used controls such as the input trim controls channel faders monitor related switches etc are placed on the front panel for central control Theinputtrim HPFandmasterlevelcontrolsarepush lockedtype Youcanmakethemflatwiththepanelso thattheyarenotaccidentallyrotated Youcanviewthepositionsof...

Page 6: ...se eight new alkaline or fully charged nickel hydride batteries of the same model and same capacity Note Insertthebatteryboxtothebatteryboxcompartmentinthe correctdirectionbymatchingthe symbolonthebatteryboxtothe symbolonthepaneloftheunit Symbol Battery box Memo You can set the battery type alkaline or nickel hydride to be used from the meter display By default it is set for alkaline batteries If ...

Page 7: ...t on internal battery power set the switch to INT When you operate the unit on external power set it to EXT When you turn on the unit for the first time the display shows the stereo VU meters as shown below When you operate the unit on internal on external bat tery power confirm that the battery power is sufficient by checking the battery indicator on the meter display You can check the power volt...

Page 8: ...w Normallythisisthereferenceoutputposition 4 Afteradjustingthereferencelevel switchthe SLATE switchto OFF Input setting 1 Setthe MASTER faderstothereferenceposition 2 Receiveinputsignalsandadjustthetrimcontrolof eachchannel Adjustthetrimcontrolappropriatelysothatthepeak indicatordoesnotlightinredatthemaximumsoundlevel 3 Raiseupthechannelfaderofeachchannel graduallyuntilthemetershowstheproperlevel ...

Page 9: ...Block diagram 9 ...

Page 10: ...dicator This indicator flashes when the battery voltage falls below the threshold while you operate the unit on battery power see page 20 In normal condition this indicator is unlit 9 POWER switch INT OFF EXT This switch turns the unit on or off When you operate the unit on external power using the optionalAC adaptor or external battery set it to EXT When you operate the unit on internal battery p...

Page 11: ... changed to 6 dB Ratio 5 1 can be changed to 3 1 RTN L ST Signals input to the RTN connector Asignaloutputfromthe MAINOUTL connectorinmono Signals output from the MAIN OUT L and R connectors in stereo R L R Asignaloutputfromthe MAINOUTR connectorinmono Signals output from the MAIN OUT L and R connectors in mono Lcomponent of MS MS MS decoded signals are output AUX Signals input to the AUX IN conne...

Page 12: ...al battery Connector XLR 4 32 type male 1 2 3 4 GND NC NC DC 10 24V 1 2 3 4 GND Lch HOT Lch COLD Rch HOT 5 Rch COLD 1 2 3 GND HOT COLD 1 2 3 4 GND NC NC DC7 2 to 24V 4 Input select switches LINE MIC Each switch should be set appropriately according to the input signal source DM P48 No microphone power is supplied When you con nect a dynamic microphone set the switch to DM 48 volt phantom power sup...

Page 13: ...NES jack You can plug headphones with a mini plug You can monitor the same signal as the PHONES jack in the front panel simultaneously Connector ø3 5 mm stereo mini phone jack 4 SUB OUT level select switch This switch selects the output reference level of the SUB OUT connector You can select the level from 4 dBu 0 dBu 20 dBu and 60 dBu 5 Battery compartment You can set the battery box that houses ...

Page 14: ...unit If you initialize the flash memory using the system status display it is reset to the default setting see page 20 Display Memo When the brightness adjustment bar is shown pressing the key long enough sets the brightness to OFF while pressing the key returns the brightness to the previous level before entering the brightness adjustment mode When the brightness is set to any level lower than th...

Page 15: ...e setting remains even after you turn off the unit If you initialize the flash memory using the system status display it is reset to the default setting see page 20 1 Press the METER key long enough to enter the meter select mode The meter mode icon is shown at the bottom of the display 2 Press the or key to select the desired meter mode 3 Immediately after selecting the desired meter mode press t...

Page 16: ...enabled default 2 Press the key to change to and press the EDIT key long enough TheT12 power supply function is now disabled The display returns to the previous condition If you press the key while the icons are flashing they are changed to Flashing Microphone power supply switch status Memo The T12 disabled enabled setting remains even after you turn off the unit The following icons are shown acc...

Page 17: ...is shipped When the LIMITER switch is set to OFF the param eter boxes for the threshold and ratio show When the LIMITER switch is set to ON or LINK the parameter boxes for the threshold and ratio show the current parameter values You can edit the parameter values by following the pro cedure described in the next page OFF ON LINK OFF THRE RATIO 10 60 4 The following icons are shown according to the...

Page 18: ...key you can alternately flash the THRE and RATIO values To edit the threshold level flash theTHRE value To edit the ratio flash the RATIO value 3 While the THRE value or the RATIO is flashing use the or key to select the desired value YoucanselecttheTHREvaluebetween and while you can select the RATIO value between and Flashing 4 After selecting the desired value press the EDIT long enough to stop ...

Page 19: ...fault The meter display shows only VU metering The peak me tering is not shown VU meter reference level The default value is 0 dB You can select between 0 dB and 7 dB in 1 dB steps Memo It is recommended to change the reference level appropriately when an external audio device connected to the outputs of the unit has enough headroom Normally set it to 0 Memo If you set the reference level other th...

Page 20: ... ommended to exchange batteries when the EMPTY indicator starts flashing INT DC EXT DC Alkali Ni MH Audio mute Alert for battery exchange EMPTY indicator flashing condition approximately 30 minutes before batteries are completely exhausted Less than 8 7 V Please change battery is shown as alert for battery exchange Memo When peak level exceeds the lighting level OVER is lit on the stereo meter dis...

Page 21: ...outputlevel 10dBVor 40dBV switchable AnalogInputs INPUT1throughINPUT3 Connector XLR 3 31type transformerbalanced LINEinput Inputimpedance 10kΩormore Nominalinputlevel 20dButo 4dBu Maximuminputlevel 29dBu MICinput Inputimpedance 2kΩormore Nominalinputlevel 70dButo 30dBu Maximuminputlevel 5dBu AUXIN Connector XLR 5 51type electronicallybalanced Inputimpedance 20kΩormore Nominalinputlevel 4dBu Maximu...

Page 22: ...Approx 9 0 hours Approx 7 5 hours Measurementcondition 0ºCtemperature saturatedhumidity Measurement condition 20º C temperature 60 humidity Battery type Alkakine LR6 Ni MH SANYO eneloop OFF DM ON P48 x 3 Ni MH SANYO 2700mAh Approx 3 5 hours Approx 2 5 hours Approx 6 0 hours Approx 7 5 hours Approx 9 0 hours Approx 7 0 hours Measurement condition 45º C temperature 60 humidity Battery type Alkakine ...

Page 23: ...23 External dimensions ...

Page 24: ...ghton Essex IG10 3NY U K TEL 44 20 8418 0778 FAX 44 20 8418 0624 AUSTRIA NAME ATEC Audio u Videogeraete VertriebsgesmbH ADD Im Winkel 5 A 2325 Velm Austria TEL 43 2234 74004 FAX 43 2234 74074 BELGIUM NAME General Audio ADD Raymond Pelgrimslaan 101 B 1702 Groot Bijgaarden Belgium TEL 32 2 4630650 FAX 32 2 4661500 DENMARK NAME Benum Nordic A S ADD Meterbuen 18 Skovlunde 2740 Denmark TEL 45 4451 8900...

Page 25: ...esulting from accident misuse abuse or neglect 7 Damage resulting from failure to perform routine maintenance and or calibration procedures 8 Damage resulting from failure to follow instruction in the owner s manual 9 Damage resulting from repair or attempted repair or by someone other than a Fostex America Service technician or a technician at an authorized Fostex America service station 10 Damag...

Page 26: ...nt particularity to allow Fostex America to inspect or adjust the problem 3 All accessory items appurtenant to that problem LIMITATIONS OF IMPLIED WARRANTIESAND EXCLUSIONS OF CERTAIN DAMAGES Unless considered unenforceable or unlawful under applicable law A All implied warranties including warranties of merchantability and fitness for a particular purpose are limited in duration to term of this wa...

Page 27: ...FOSTEXCO 3 2 35 Musashino Akishima shi T okyoJapan 196 0021 PRINTED IN JAPAN JULY 2009 8289659000 495307 ...

Reviews: