41
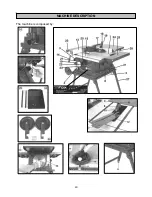
1. Workbench
2.
ON / OFF switch
3.
Hangers for the tray of machine’s cable
4. Transport
handle
5.
Rubber stops x 2
6.
Mitre gauge rail
7.
Spare blade tray
8.
Riving knife and laser pointing device
9.
ON / OFF switch for the laser
10.
Adjusting screws x 2
11.
Screw to get at the batteries x 2
12. Bench
inlay
13. Rip
fence
14.
Rip fence locking lever
15.
Rip fence graduation scale
16. Mitre
gauge
17. Protective
cap
18.
Extraction inlets, one on the carter, one on the back side
19.
Handle for the adjustment of blade’s height
20.
Blade locking lever
21.
Blade inclination handle
22.
Blade inclination indicator
23. Blade
inclination scale
24.
Workbench’s back extension
25.
Side extension x 2
26.
Locking devices for side extensions x 4
27. Folding
base
28.
Back extension bearings x 2
29.
Fasteners and transport wheels x 2
30. Adjustable
feet
31. Pusher
32. Spare
blade
33.
Blocking parts for the pusher
34.
Dust collection aspiration pipe
1.
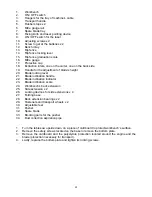
Turn the table saw upside down on a piece of cardboard to protect workbench’s surface.
2.
Remove the safety screws located on the base to remove the bottom plate.
3.
Remove the cardboard and the polystyrole protection located around the engine and the
blade (protection necessary for transport).
4.
Lastly, replace the bottom plate and tighten its locking screws.
Summary of Contents for F36-521
Page 3: ...3 FIGURE ILLUSTRATIVE ...
Page 4: ...4 ...
Page 5: ...5 ...
Page 17: ...17 La macchina è composta da DESCRIZIONE DEL BANCO SEGA ...
Page 40: ...40 The machine is composed by MACHINE DESCRIPTION ...
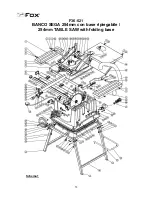
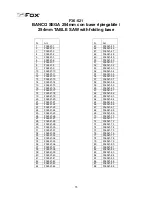
Page 53: ...53 F36 521 BANCO SEGA 254mm con base ripiegabile 254mm TABLE SAW with folding base Schema 1 ...
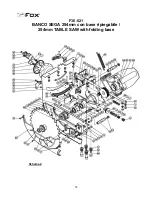
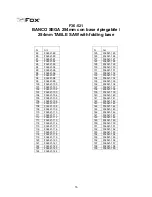
Page 54: ...54 F36 521 BANCO SEGA 254mm con base ripiegabile 254mm TABLE SAW with folding base Schema 2 ...


