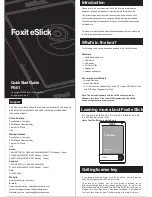
Getting started
SD slot – To insert your SD Card.
Power button –To turn eSlick's power on or off.
Indicator – Lights up in red while charging, and flashes green
when the device is being operated.
Navigator and Center button – To select an item or scroll around
the screen, or can act as a shortcut key.
Headset jack – To connect the earphones.
USB connector – To connect the USB cable.
Delete button – To delete the file you selected.
Return button – To return to the previous screen or close the
book you are reading.
Menu button – To show the main menu.
Music button – To go to the music menu.
1
2
3
4
5
6
7
8
9
10
Back view
Label – To show the relevant info and SN number for eSlick
device.
Reset button – To clear any pending errors and reset the eSlick
device.
Battery cover – To cover the battery.
-/+
Volume buttons – To adjust the volume or page
magnification.
11
12
13
15
14
Front view
/
SD
1
2
3
4
5
6
7
8
9
10
11
12
13
14
15
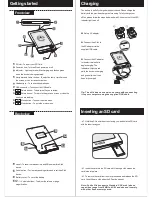
Charging
u
Set up AC adapter.
v
Connect the eSlick to
the AC adapter via the
supplied USB cable.
w
Connect the AC adapter
to the electrical outlet to
begin charging. The
indicator will light up red
while the device is charging
and goes off when it has
been fully charged.
The battery is not fully charged when purchased. Please charge the
battery with the provided charger before using. To fully charge your
eSlick, please follow the steps below and wait 3-4 hours or until the LED
indicator light turns off.
1
2
Tip: The eSlick device can also be charged by connecting
it to your computer using the supplied USB cable.
Inserting an SD card
p
Hold the eSlick with the screen facing you, and hold the SD card
with the label facing you.
p
Insert the card into the SD card slot. Hearing a click means the
card locks into place.
p
To remove the card from the slot, press down and release the SD
card. You will hear a click when the SD card pops out.
Note: Foxit eSlick supports Standard SD Cards (whose
capacities range from 4 MB to 4 GB) and does not comply
with other flash memory cards.

