background image

13

E N G L I S H •

User's Manual

ATTENTION: Inappropriate use and modifica-
tions may cause severe damage to the user and 
the equipment.

OPERATION INSTRUCTIONS


SAFETY RECOMMENDATIONS

 IMPORTANT: Use only the high-pressure 

hose included with the equipment for its opera-
tion, do not operate with used hoses or other 
equipment.
• Never aim the pressure washer to animals or 
people.
• Never drink alcohol or use drugs while operat-
ing the pressure washer.
• Never operate this pressure washer while on 
the water.
• Never operate the pressure washer without 
water supply. 

OPERATION
TURN-ON
This unit is intended for use with cold water 
only! Do not use hot water in this pressure 
washer.
1. Connect the pressure washer to the electric 
outlet at the place, as shown in the installation 
recommendations.
2. Open the water supply, remember that you 
must have an adequate flow and pressure for 
the pressure washer.
3. Pull the trigger of the gun so that the water 
begins to flow through the pump and hoses, un- 
til water flows steadily through the gun, with 
this, we will make sure that there is no air in 
the system.
4. Set the switch in the on position (ON), with- 
out pulling the gun, this will begin to work and 
will stop once reaching working pressure.
5. Pull the trigger of the gun, and the engine 
will operate again supplying jet water for clean- 
up work.

AUTO POWER ON/OFF
This pressure washer is equipped with an auto-
matic on and off system.  The pressure washer 
will turn on each time you pull the trigger of the 
gun and will stop once you release such trigger. 
It is recommended that you hold the trigger for 
at least 1 minute during use, each time you turn 
on the engine, to lengthen the useful life of the 
motor and pump.

PURGE
It is recommended to always remove the air in 
the pump before and after using the pressure 

washer, as outlined in Step 3 of the turning on 
process.

SAFETY TRIGGER
This pressure washer is equipped with a safety 
trigger on the triggering gun. When you are not 
using the pressure washer, use the safety lock to 
prevent accidental operation of the high- pres-
sure flow.

ADJUSTABLE NOZZLE
The adjustable nozzle allows you to use any va-
riety of patterns of dew, from a fan to a direct 
jet knapsack sprayer (jet). The nozzle can be 
adjusted from 0 to 65 degrees.

When using the pressure washer to clean wood 
decks, siding, vehicles, etc. always start with the 
fan, starting to spray from a minimum of 36” 
away to avoid damage to the surface of the 
material being cleaned. Always begin to spray 
on a test surface in an area free of people and 
objects.

USING DETERGENTS
THE PRESSURE WASHER WILL DISPENSE DE-
TERGENT ONLY AT LOW PRESSURE. USE THE 
ADJUSTABLE SPRAY NOZZLE TO APPLY DETER- 
GENTS AND TO RINSE CLEAN.
Biodegradable detergents are specifically for- 
mulated to protect the environment and your 
pressure washer. These detergents will not clog 
the filter and will protect the internal parts of 
the pressure washer for a longer life.

Step 1: Open the cover of the detergent reser-
voir by twisting it off.
Step 2: Fill the detergent reservoir with any ap-
proved liquid detergent. Close the cover.
Step 3: Pull out on the end of the adjustable 
nozzle to put the pressure washer into low-
pressure mode.
Step 4: To clean the working area, push in on 
the end of the adjustable nozzle to return it to 
high-pressure mode. Spray high-pressure water 
onto the work area to rinse off the work area 
and any remaining detergent.
To apply the detergent cleanser to your work-
ing area, turn the pressure washer switch to the 

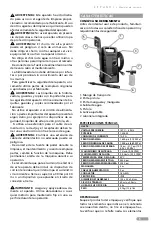
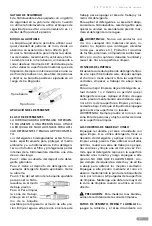
Water filter

Hose connector

Summary of Contents for HL316

Page 1: ...ontenidas en este manual antes de operar esta herramienta WARNING Read understand and follow the safety rules in this manual before operating this tool HL316 Hidrolavadora eléctrica Electric pressure washer Manual de Usuario y Garantía User s Manual and Warranty ...

Page 2: ... Instrucciones de operación Mantenimiento Solucionador de problemas Especificaciones técnicas Notas Garantía 9 9 9 10 10 11 12 13 13 13 14 16 3 3 3 4 5 5 7 7 8 8 14 16 CONTENIDO CONTENT SÍMBOLOS SYMBOLS PELIGRO ADVERTENCIA PRECAUCIÓN Indica un riesgo personal o la posibilidad de un daño Herramientas tipo II Doble aislamiento protege las herramientas eléctricas Lea el manual de usuario Lea las inst...

Page 3: ...e choque eléctrico No abuse del cable No usar nunca el cable para llevar levantar o desenchufar la herramienta eléctrica Mantenga el cable lejos del calor acei te cantos vivos o piezas en movimiento Los cables dañados o enredados aumentan el riesgo de choque eléctrico Cuando maneje una herramienta eléctrica en el exterior use una prolongación de cable adecua da para uso en el exterior El uso de un...

Page 4: ...uptor no acciona encendido y apagado Cualquier herramienta eléctrica que no pueda controlarse con el interruptor es peligrosa y debe repararse Desconecte la clavija de la fuente de alimenta ción y o de la batería antes de efectuar cual quier ajuste cambio de accesorios o de alma cenar las herramientas eléctricas Tales medidas preventivas de seguridad reducen el riesgo de arrancar la herramienta ac...

Page 5: ...i se le da un mal uso No debe dirija el chorro contra cualquier ser vivo equipo eléctrico activo o al aparato mismo No dirija el chorro de agua contra si mismo u otras personas para limpiar la ropa o el calzado Desconecte de la fuente de alimentación antes de llevar a cabo el mantenimiento La hidrolavadora no debe utilizarse por infan tes o por personal sin conocimiento del uso de los mismos Para ...

Page 6: ...hol o consuma drogas mien tras opera la hidrolavadora Nunca opere esta hidrolavadora mientras este sobre el agua Nunca opere la hidrolavadora sin el suministro de agua OPERACIÓN ENCENDIDO Después de conectar la hidrolavadora al sumi nistro de agua fría proceda de la siguiente ma nera 1 Conecte el equipo a la red eléctrica del lugar como lo muestran las recomendaciones de ins talación 2 Abre la lla...

Page 7: ...encienda la hidrolavadora Jale del gatillo para operar la unidad La arandela de presión mez clará el detergente con el agua ADVERTENCIA Nunca use productos con clo ro o cualquier otro material corrosivo in cluidos los líquidos que contengan solventes como gas aceites etc Productos tri sodicos de fosfato amoníaco o limpiadores ácidos base Estos pro ductos químicos dañarán la unidad y causar da ños ...

Page 8: ...L Es importante conectar tu equipo a una toma de agua que suministre el caudal de agua necesa rio para su operación en caso contrario podrías perder tu garantía Para conocer el caudal de salida de su instala ción de agua siga las siguientes instrucciones Necesario 1 cubeta con capacidad de 19 litros 1 cronómetro Cómo lo hago 1 Pon la cubeta debajo de la llave y ábrela Con el cronómetro toma el tie...

Page 9: ...MOTOR HACE RUIDO PERO FALLA AL ENCEN DER Potencia de entrada insuficiente Verifique que el voltaje de la conexión sea igual a la indicada en la etiqueta de datos Perdida de potencia por el uso de una extensión eléctrica Verifique las características de la ex tensión eléctrica Inactividad de la herramienta por un periodo largo Contacte su centro de servicio más cerca no Problemas con el sistema de ...

Page 10: ...f an extension cord is necessary a cord with adequate size conductors should be used to prevent excessive voltage drop loss of power or overheating The table below shows the cor rect size to use depending on cord length and nameplate amperage rating of tools In case of doubt use the next heavier gauge Always use UL listed extension cords SIZE RECOMMEND EXTENSION CABLES PERSONAL SAFETY Stay alert w...

Page 11: ...uali fied repair personnel Service or maintenance performed by unqualified personnel could re sult in a risk of injury SPECIFIC SAFETY RULES FOR PRESSURE WASHERS This appliance is not intended for use by persons Including children with reduced physical sen sory or mental capabilities or lack of experience and knowledge unless they have been given supervision or instruction concerning use of the ap...

Page 12: ... is missing The elements used for packaging may be easily re cycled ASSEMBLY 1 Place the hose and gun holder accessories on both sides of the piece of equipment 2 Assemble the lance to the gun 3 Join the high pressure hose to the gun using a 17 mm or adjustable wrench not included with your washer 4 Insert the other end of the pressure hose into the water outlet on the front of the piece of equipm...

Page 13: ...the useful life of the motor and pump PURGE It is recommended to always remove the air in the pump before and after using the pressure washer as outlined in Step 3 of the turning on process SAFETY TRIGGER This pressure washer is equipped with a safety trigger on the triggering gun When you are not using the pressure washer use the safety lock to prevent accidental operation of the high pres sure f...

Page 14: ...tance from the cleaning area CEMENT PATIOS STONE AND BRICK Rinse cleaning and surrounding area with fresh water If using detergent fill the detergent reservoir and apply to the area being cleaned at low pressure Rinse at high pressure using the fan spray in a sweeping motion keeping the tip of the spray nozzle at least 3 6 inches from the cleaning surface Maintain a further distance from the clean...

Page 15: ...of oil is needed Check all hoses and accessories for damage prior to use Check the water intake filter periodically for deposits Clean this filter regularly for maxi mum performance ATTENTION Follow the maintenance sched ule included at the end of this user manual the failure to comply with the maintenance plan established may cause severe damage to your equipment and void your warranty TROUBLESHO...

Page 16: ...r MOTOR STARTS EVEN WITH GUN TRIGGER IS RELEASED Nozzle clogged Clean nozzle High pressure system or pump hydraulic circuit not watertight Contact your nearest Autho rized Service Center If the engine turns on and does not come back on during the operation wait for 2 to 3 minutes before turning the tool on again the overload function has been activated If the problem is recurring more than once co...

Page 17: ...17 Manual de usuario User s manual Notas Notes ...

Page 18: ...18 Notas Notes ...

Page 19: ...19 E N G L I S H User s Manual Notas Notes ...

Page 20: ...t has been fixed or modified by unauthorized or unqualified person Urrea Herramientas Profesionales S A de C V garantiza este producto por el termino de 1 año en sus piezas componentes y mano de obra contra cualquier defecto de fabricación a partir de la fecha de entrega Fecha de venta ____ ____ ____ Producto ___________________ Marca ______________________ Modelo ____________________ ____________...

Reviews: