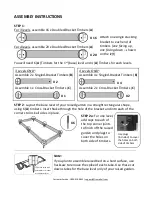
ASSEMBLY INSTRUCTIONS
STEP 3
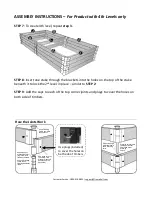
: To create 2nd level, use the 4 (
A
), 2 (
B
), 1 (
C
) and the stacking stakes – as
shown below.
STEP 4
: Insert one stake through the brackets into the holes on the top of the stake
beneath it to lock the 2
nd
level in place – similar to
STEP 2
.
STEP 5
: To create 3rd level, use the 4 (
A
), 2 (
B
) and the stacking stakes – as shown
below.
Customer Service: 1800-914-9835 | support@frameitall.com
Insert one (
C
)
timber in the
middle of 2
nd
level
to create 4 x 4
partition
A
A
A
A
C
B
B
STEP 6
: Add the caps to
each of the top corner joints
and plugs to cover the holes
on both side of timbers.
HAPPY GARDENING!!
A
A
A
A
B
B
Use plugs (included) to
cover the holes on both
side of timbers
Use plugs to cover
the holes – two
plugs are required
per bracket (1 on
each side)
Use a Finishing
Cap to complete
the top level.
Use an Anchor
or Stacking Joint
for ground level
frames or borders.
Use only Stacking
Joints when
creating additional
levels.
When creating a
multi-level frame
use a Stacking
Joint.
Stacking Joints fit into
the tops of Anchor
Joints and other
Stacking
Joints
How the Joints Work


