STEP 8
:
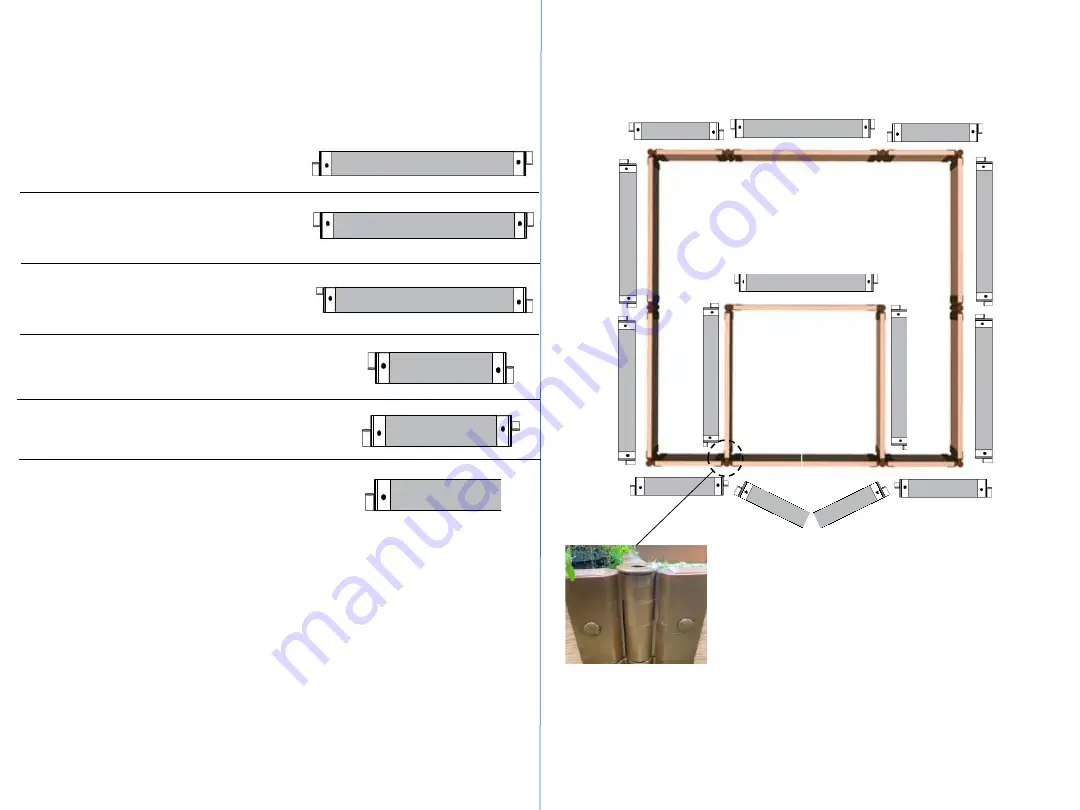
Connect the brackets and boards for the third level in the following pattern:
1.
Connect
4
x 4ft Boards with Stacking Brackets on
both ends in alternating orientation.
2.
Connect
2
x 4ft Boards with stacking brackets
on both sides, facing the same orientation.
3.
Connect
2
x 4ft Boards with a stacking Bracket on
one end and a top 4-way bracket on the other end
in alternating orientation.
4.
Connect
2
x 2ft Boards with Stacking Brackets on
both ends in alternating orientation.
5.
Connect
2
x 2ft Boards with a stacking bracket on one
end and a mid-section 4-way bracket on the other end
in alternating orientation.
6.
Connect
2
x Gate Boards with a stacking bracket on
the board end with predrilled holes.
ASSEMBLY INSTRUCTIONS
–
Level 3
1
3
6
Step 9
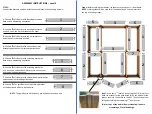
: Stack the Boards for level 3 according the board numbers assigned in Step 7,
referencing the diagram below.
Step 11
: For a 4-level design, repeat steps
5, 6,
&
7.
2
Step 10.
Start your 3rd level by connecting the 3/5/6 joint
first. Have the bracket for the gate board (6) on the bottom
of the joint as shown in the picture to the left. Then
continue from this point stacking the remaining 2
nd
level
boards.
1
4
5
1
1
1
2
2
4
4
3
3
5
5
6
6


