background image


Poêle à combustible liquide 

3. Operating instructions 


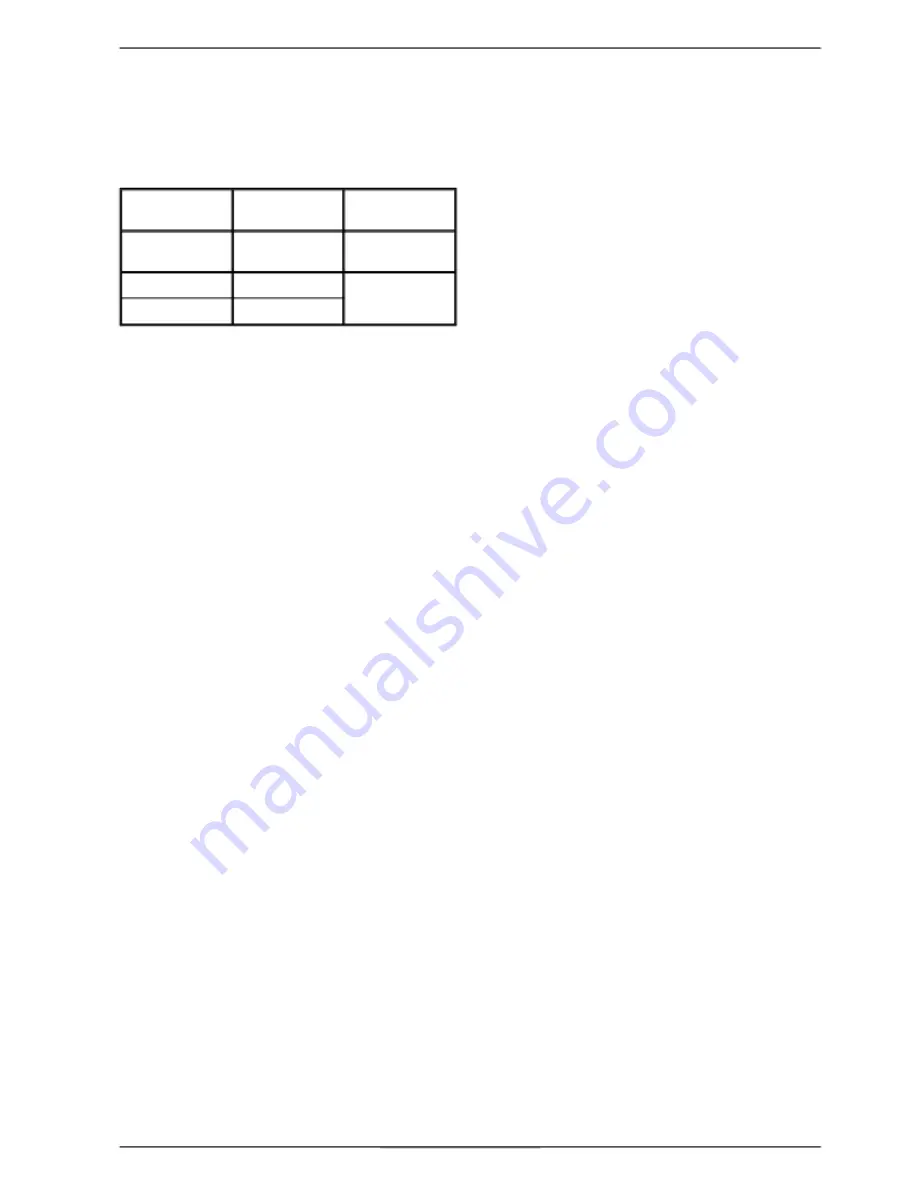
3.1. Fuel 
 

Warning

  :  Your  stove  is  fitted  with  a  specific  carburator  

for a specific oil. The fuel  oil must be free from  any dirt  
and water which could disturb the stove in operation 

1740602  

1740728 

1740716  

1741028 

Diesel oil 35  

Kerosene 28 

GB 

sec.  

sec. 

Canada  

Fuel oil # 2 

USA  

or fuel # 1 


3.2. Lighting procedure 
 

Be sure the control knob is to "0". 

- Turn on oil supply, 

- Push down gently on the safety lever (# 4 of fig. n° 8). 
This will allow the oil to flow into the regulator.  
-  Open the front door, and remove the catalyser from 
burner. Make sure the inside of the pot is clean thoroughly, 
and there is no oil accumulation. 

- Place  2  tablespoons  of methylated spirit  or  gelled  alcohol 
in the  bottom of  the  pot.  Light the  starter  gel or methylated 
spirit  with  a  fireplace  match  or  long  butane  lighter.  Place 
the catalyser back into the burner, being sure it is centered in 
the burner. Shut the main door. 

-  Allow  the  catalyser  to  heat  approximately  30  to  45  sec.. 
Turn dail to "1" position. 

-  Allow 10 to 15 minutes for oil fire and draught to 
stabilize.  The  catalyser  should  glow  red before  adjusting 
the control knob to a higher setting, 

3.3. Operating procedure 
 

• Allow  10  to  15  minutes  after lighting  to  adjust  the  control  
knob  to  a  higher  setting,  usually  between  a  "2"  and  "4"  
setting. 

When  adjusting  the  heat  output,  move  the  control  knob 
only 1 number in either direction, allowing  5  minutes 
between moves for the flame to re-adjust to new setting. 

•  If  the  burner  stops  during  operating,  immediatly  turn  
off  the  control  knob  (position "0") and wait until the  
burner  is  completely  cool  before  repeating  the  lighting  
procedure. 

3.4. Shutting down 
 

- Set dail to the "0" position, 
- Raise the safety lever of the regulator. 
- Allow the flame to  burn out completely  before opening 
the door. 

3.5. Recommendation 
 

• The adjustment of your unit has been done by your 
installer. Don’t  touch it.  Any  change of  operation must 
be reported at once to him. 

Normandie 

•  This  room  heater  is  a  hight  heat  producing  appliance 
and may  cause severe burns if  touched on  the glass 
front door, or on top directly over the burner  - keep 
children away - Do not use for drying wet clothing. 

CAUTION

 : Never light the burner if there is any amount 

of oil in pot. Clean out oil before lighting. 

Racing

  :  An  audible  fluttering  sound  is  an  indication  that 

there  is  too  much oil  in  the  pot burner  and/or a lack 
adequate draught. 

-  turn  off  oil   supply and  set the  control knob in  closed  
position -0-, until fire has decreased to proper burn rate. 

  Do not  overfire

  : If the stove  or chimney connector 

starts to glow, you are overfiring. 

3.6. Maintenance of the stove 

Every week

 : operate the de scaling lever (ill. 10, # 5)) : - 

Pull  the  rod,  then  push  the  rod  in  rotating  360  degrees 
two or three times (CAUTION : The rod is HOT). 

Every 3 or 4 months

 : Clean the burner completely. 

- Remove all the parts of the catalyser (# 1, 2, 3 of fig. 9). 

- Using a soft bristle brush (a small clean paint brush), 
carefully  brush  off  the  catalyser.  Loosen  any  carbon 
soot from the bottom of the burner with a putty knife, and 
vacuum  clean.  Ensure  that  the  small  air  holes  in  burner 
are free of carbon. 

 At least once a year / End of heating season

 : Clean 

or replace all the oil filters in the oil supply line. To clean 
the filter of the regulator : 
- set the regulation knob in position "0", 
- turn off the tankvalve or the valve of the oil supply line, - 
raise the safety lever of the float regulator,  
-  place a small container  (or a small rag) under the 
regulator  filter  opening  in  order  to  collect  the  oil 
contained in the regulator, 
-  remove the filter  cover  plate  located  under  the 
regulator (ill. 10, # 4) with a screwdriver, 
-  remove  the  tubular  filter  from  the  regulator. Clean,  if 
necessary,  with  oil  using  a  soft  brush ,  never  a 
wire-brush, 
- replace the filter in the regulator, install the cover plate 
and secure with the screw. 

• Clean all the enamelled  panels  of the stove  with a dry or 
slighly damp soft cloth. 

• Use a soft clean cloth to wipe the front glass when the  
unit is running at a low burning rate. When the main door  
is  opened for  cleaning, the flame will be disturb, and  
turn  to  a  yellow  flame.  Clean  quickly,  but  gently.  Close  
the  door, the flame will  return  to  a  normal  burning  
position. 

Note  :  The  appearance  of  cracks  when  burning  the  
enamelled  units  is  quite  usual  and  tends to disappear  
when the appliance is  cooling down.  It should  not  be  
considered as a defect but rather as a patina of the  
enamel which does not affect its quality nor its service  
ability.  


Notice de référence 

Document n° 741-5  ~ 30/01/1998 

15 

Summary of Contents for 174 06 02

Page 1: ...ument n 741 5 30 01 1998 Notice de référence à conserver par l utilisateur pour consultation ultérieure Technical manual to be save by the user for future reference Gebrauchsanleitung bitte sorgfältig aufbewahren Les Fonderies Franco Belges F 59660 MERVILLE Téléphone 03 28 43 43 43 Fax 03 28 43 43 99 RC Hazebrouck 445750565B Matériel sujet à modifications sans préavis Document non contractuel ...

Page 2: ... 3 in 770 mm 30 1 3 in 390 mm 15 3 8 in 600 mm 23 5 8 in Ø 120 125 5 in 2 Fig n 2 Fig n 3 3 7 1 4 2 6 Fig 4 Figure 1 5 1 1 Poêle à combustible liquide 7 2 6 3 Fig 5 Figure 6 2 Document n 741 5 30 01 1998 Notice de référence ...

Page 3: ...n Installationnebengelaß Bild 2 Schrauben und Schutzkappen 1 Schrauben und Schutzkappen 2 Halterung USA CAN Bild 3 Waagerechte Aufstellung Bild 4 und 5 1 Max 2 5m 2 Min 0 25 m 3 Tank 4 Filter 5 Absaugpumpe mit Reservetank 6 Rohr 6x8 7 Min 0 15 m Fig 6 Montage des Griffes Fig 7 Schließdruck der Tür 1 Madenschraube zur Sicherung 2 Excenterschraube English Fig 1 Dimensions in mm and minimum clearance...

Page 4: ...reglers 2 Einstellschraube für Max Durchflußmenge 3 Einstellschraube für Min Durchflußmenge Bild 9 1 Brennerring 2 Glühhut 3 Glühzylinder Bild 10 1 Sichtfenster AUF ZU 2 Bedienungshebel zur Einstellung der Durchflußmenge 3 Reglereinschalthebel Sicherheitshebel 4 Zugang zum Reglerfilter 5 Reinigungshebel English Illustration 8 1 Adjustment of the draught regulator 2 Adjustment screw for maxi settin...

Page 5: ...e Maintenance of the Chimney Operating instructions Fuel Lighting procedure Operating procedure Shutting down Recommendation Maintenance of the stove Spare parts 1 Description of the unit 1 1 Specifications Model 174 06 02 Nominal Heat Output NF D 35 385 kW 5 5 Btu hr 18 770 Oil consumption at maximum speed litre h 0 70 Imp gal hr 0 154 US gal hr 0 184 minimum speed litre h 0 17 Imp gal hr 0 037 U...

Page 6: ...e door closes correctly that the glasses are not damaged Normandie Model 174 10 28 Nominal Heat Output NF D 35 385 kW 8 7 Btu hr 30000 Oil consumption at maximum speed litre h 1 2 Imp gal hr 0 264 US gal hr 0 317 minimum speed litre h 0 25 Imp gal hr 0 055 US gal hr 0 066 Chimney draft required at maximum speed Pa 19 in w g 0 076 minimum speed Pa 9 in w g 0 036 Weight kg 90 lbs 199 Flue outlet dia...

Page 7: ...ible liquide increase the flame by turning the setting screw 3 clock wise If the flame is too high reduce the flame by turning the setting screw 3 counter clock wise High setting Refer to fig 8 n 2 Set the regulating knob on 6 and let the burner run for a few minutes The flame must be shaped like a cone and reach the upper part of the window If the flame is too low increase the flame by turning th...

Page 8: ...t clothing CAUTION Never light the burner if there is any amount of oil in pot Clean out oil before lighting Racing An audible fluttering sound is an indication that there is too much oil in the pot burner and or a lack adequate draught turn off oil supply and set the control knob in closed position 0 until fire has decreased to proper burn rate Do not overfire If the stove or chimney connector st...

Page 9: ... B C 01 11 119208 Décrasseur Reinigungsnadel Descaler D 01 12 122204 Écrou à ailettes Flügelmutter Winged nut diam 8 A B C D 02 13 110318 Fermoir Verschluß Snap A 01 14 109868 Chape Hülse Fork A 01 15 109720 Chaînette Kette Chain A 01 16 202801 Support Halterung Support A B C 01 17 445902 Patte de fixation Festmachenplatte Fixing plate C 01 18 408300 Couvercle Deckel Cover A 01 19 109552 Capuchon ...

Page 10: ... Safety door A B C D 01 91 315904 Suppl de tampon Abnehmbarer Klappe Supplementary plate K L A B C 01 92 322103 Bride Halterung Clamp A B C D 01 93 322306 Garniture Verziehrung Coat of arms A B C D 01 94 323509 Garniture Verziehrung Coat of arms A B C D 01 95 323606 Garniture Verziehrung Coat of arms A B C D 01 96 326901 Habillage R Frontblende R H S front panel A B C D 01 97 327001 Habillage Fron...

Page 11: ...Normandie Poêle à combustible liquide Fig 11 18 Document n 741 5 30 01 1998 Notice de référence ...

Page 12: ...nst any defect flaw or im perfection During this time all parts judged defective by our Warranty con trol department may be replaced in our workshops Incidental costs of trans portation and packing payable by the buyer Some parts or components have a lon ger warranty period Cast iron or steel shell of boiler 3 years Removable or independent stainless steel hot water cylinder 5 years Independent en...

Page 13: ... 10 28 Model of the appliance Modellbezeichnung Couleur color Farbe q J q K q L q Y Numéro de série Serial number Serien Nr Ce certificat est à compléter et à conserver soigneusement par l utilisateur En cas de réclamation faire une copie dûment remplie et l adresser à This certificate has to be completed and kept carefully In case of claims send a copy of this to Diese Garantie Karte ist zu vervo...

Reviews: