3
3
4
5
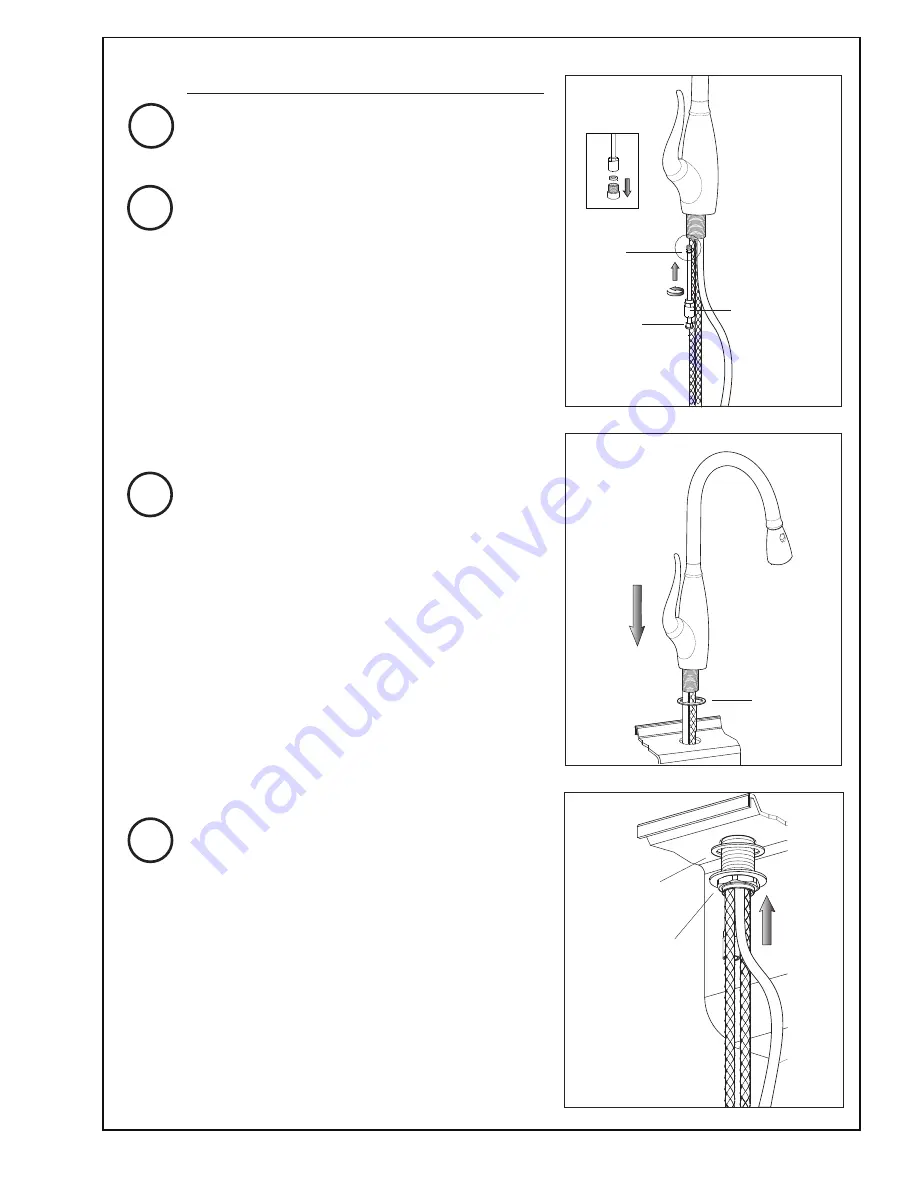
Before inserting the mixer in the hole in the sink
or counter top, make sure that the rubber washer
is properly positioned in its seat. Place the mixer
in the hole, orienting the spout toward the sink
bowl.
Note: Hole should be 35mm (1-3/8”) minimum
diameter
Installation
Rubber
Washer
2
Flush the water supply to be sure it is free of
debris and then shut off the water supply.
Install fastening set as shown: rubber washer
and threaded washer/nut. Tighten the
washer/nut with wrench.
DO NOT ROTATE MIXER BODY
to tighten the threaded nut.
Only tighten with wrench from the underside
of sink.
Ensure O-ring is in place as shown to create
proper seal. If O-ring is missing, the faucet will
leak. Remove the check valve from the riser
swivel nut so the nut can be moved out of the
way. Install hose riser into mixer body. Use
wrench to tighten. Reinstall the check valve and
sealing washer onto the swivel nut, hand tight.
Rubber
Washer
Washer/Nut
Position
wrench
on hose
riser flats
O-ring
Remove
check valve
Swivel nut


