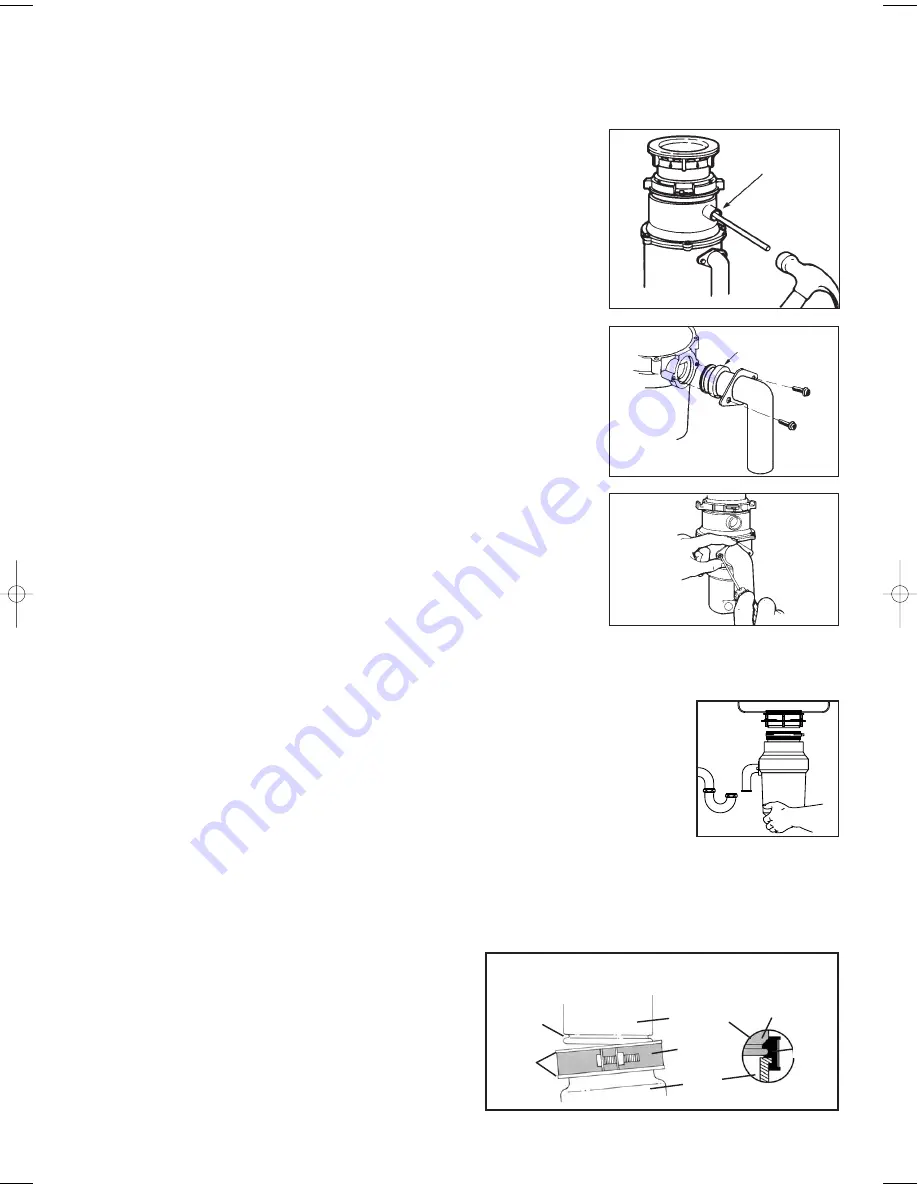
3. Overflow/Appliance Connections
4B
For overflow or dishwasher connection complete the following procedure.
Alternatively go to step 4.
A. Using a blunt instrument (steel punch or wooden dowel), knock out entire
plug (see 3A). Do not use a screwdriver or sharp instrument. When
knockout plug falls into disposer, you may remove it or simply grind it up
when the disposer is used. This will not damage the disposer in any way,
but may take some time to grind, over the course of several uses.
B. Connect overflow or hose using hose clamp. If hose size is different, you
will need a stepped rubber adaptor.
KNOCK
OUT
PLUG
3A
4. Attaching discharge elbow
RUBBER GASKET
4A
A.
Connect waste elbow to disposer (see 4A), proceed to step 5 and then
connect bottom of elbow by tightening slip nut.
B.
Make sure all plumbing connections are tight (see 4B).
5. Connecting disposer to mount assembly
3-BOLT MOUNT (See section 3 for your mount type.)
A.
Press firmly around the Hush Cushion® to ensure
it is engaged with the neck of the disposer.
B.
Lubricate the top inside lip of the rubber Hush
Cushion® with a liquid soap.
C.
Line up discharge elbow of disposer with trap
under mounting assembly. Guide disposer up and
engage the groove of the Hush Cushion® around
the ridge at the bottom of the sink flange (see 5A
& refer back to 1B). While still supporting the
disposer, tighten the screw-clamp around Hush
Cushion®. The disposer will now hang by itself.
D.
If you need to turn the disposer make sure the
sink flange does not turn. It will break the seal
created when installed. Go back to steps 5A and 5B.
IMPORTANT – PLEASE READ
Do not remove clamp from
Hush Cushion® or Hush
Cushion® from hopper. Both
parts are factory installed and
installation ready.
Lubricate top angled surface of rubber Hush Cushion®
with liquid soap prior to engaging disposer to sink flange.
Fit Hush Cushion® lip into sink flange groove using a slight
rocking motion. Tighten clamp (see 5B).
5B
SINK FLANGE
CLAMP
HUSH CUSHION®
TOP ANGLED
SURFACE
HUSH
CUSHION
®
SINK
FLANGE
GROOVE
CLAMP
HOPPER
5A
FR020627 OWNERS GUIDE 16/5/06 4:38 pm Page 5


