background image

Residual heat indicator (Fig 9)                               

As long as the temperature of the burner remains high enough to cause injury, the display corresponding to 
the burner shows the “

H

” symbol (residual heat)


alternatively with “0” symbol

. This indication only disappears 

when there is no longer any danger (at 60°C). 
To save energy, turn off the burner in advance, in order to exploit the residual heat. 
The residual heat indicator “

H

” is lost in the event of a mains power cut lasting more than 3 seconds.  


Turning off the cook top (Fig 10)                               

The cook top can be turned off at any time by means of the on/off key (1). 

The display shows a “

H

” as long as the temperature remains above 60°C.


4. Dual-circuit burners (Fig 11)


Some burners can be equipped with a second circuit: for instance, the burner is composed of a central disk 
and an outer ring. You can turn on the central disk alone (fig. A) or both elements (fig. B). This enables you 
to adapt the heated area to the size of the saucepan you are using.  
 

Turning on a dual-circuit burner (Fig 12)                               

1.Select the required power setting (from 1 to 9) with the keys “

+

” e “

-

“ (5/4). 

2.Turn on the second circuit by means of the dual circuit key. (8). 
The pilot light (9) relating to the burner concerned comes on; the second circuit comes on together with the 
first. 
 

Turning off the burner’s second circuit  

1.The dual-circuit burner must be on.  
2.Touch the dual-circuit key (8). 
The pilot light (9) goes off and the second circuit on burner also goes off. 
 

5. Triple-circuit burners (Fig 13)


Some burners can be equipped with a third circuit: for instance, the burner is composed of a central disk, an 
inner and an outer ring. You can turn on the central disk alone (fig. A), two elements (fig. B), or all the 
elements. This enables you to adapt the heated area to the size of the saucepan you are using.  
 

Turning on a triple-circuit burner (Fig 14)                               

1.Select the required power setting (from 1 to 9) with the keys “

+

” e “

-

“ (5/4). 

2.The dual-circuit burner must be on (10) 
3.Turn on the triple circuit by means of the triple circuit key. (14). 
The pilot light (15) relating to the burner concerned comes on; the third circuit comes on together with the 
others. 
 

Turning off the burner’s triple circuit  

1.The triple-circuit burner must be on.  
2.Touch the triple-circuit key (14). 
The pilot light (15) goes off and the third circuit on burner also goes off. 

 
6. Safety cut-out 

If one or more burners are accidentally left on, the control automatically turns them off after a certain time 
has elapsed. The table below indicates the time interval, which depends on the power level setting. 
 

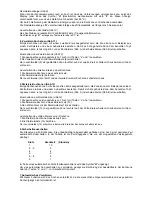
Level   

Time limit (hours)          

  1                             10 
  2  -3   

        5 

  4 


        4 

               5                             3 
               6 – 8   

        2 

               9 


        1 


If the safety cut-out has tripped, the symbol “

H

” is displayed. 

To avoid the automatic cut-out being tripped, simply touch the burner selection key or the “

+

” or “

-

“  keys 

before the time runs out.  
 

7.Automatic preheating 

This automatic device facilitates the cooking process because you do not need to supervise the whole 
cooking cycle. 


Summary of Contents for TP-431

Page 1: ...ERAS ENCASTRABLES OPERATING AND MAINTENANCE INSTRUCTION FOR HOBS ELECTRIC HOBS INSTRUCTIONS POUR L USAGE E LA MAINTENANCE DES PLAQUES ELECTRIQUE PLAQUES BEDIENUNGS WARTUNGSANLAITUNGEN F R KOCHERDE ELE...

Page 2: ...ontrole la eficiencia de la instalaci n de toma a tierra obligatoria por Ley El Fabricante no se asume ninguna responsabilidad por posibles lesiones a personas o da os a cosas causados por la inobserv...

Page 3: ...activa Antes de de la puesta en marcha dicha funci n permanece activa y consecuentemente deber ser desbloqueada Mientras la funci n de bloqueo est activa los botones no funcionan 3 Encendido y apagad...

Page 4: ...el circuito auxiliar de la zona de cocci n 5 Zonas de cocci n de triple circuito Fig 13 Algunas zonas de cocci n pueden estar dotadas de un tercer circuito por ejemplo la zona est compuesta de un disc...

Page 5: ...el bot n 5 3 Regule el tiempo desde 1 a 99 minutos con los botones y 10 11 Si el reloj programador se selecciona mediante el bot n Menos 11 el tiempo inicial es el 99 nivel m ximo 4 Regule el tiempo...

Page 6: ...r f cilmente con una rasqueta para vidrio El mango de la rasqueta no debe ser de pl stico porque se podr a pegar a las superficies calientes Tenga mucho cuidado durante su uso peligro de heridas El az...

Page 7: ...n on the nameplate situated on the underside of the cook top then make sure that the rated mains voltage and power available are suitable for its operation Before making the electric connections check...

Page 8: ...as a child safety device A pilot light 3 indicates that the safety lock function has been enabled It will still be enabled when the cook top is turned on again As long as the safety lock function is e...

Page 9: ...it key 8 The pilot light 9 goes off and the second circuit on burner also goes off 5 Triple circuit burners Fig 13 Some burners can be equipped with a third circuit for instance the burner is composed...

Page 10: ...the keys e 10 11 If the timer is selected by the minus key 11 the starting time would be 99 maximum value 4 Select the required power setting from 1 to 9 with the keys e 5 4 The pilot light 13 relatin...

Page 11: ...d damaging the seal Any tenacious dirt can easily be removed with the aid of a glass scraper The scraper handle must not be made of plastic because it could become stuck to the hot surfaces Pay attent...

Page 12: ...teur et la puissance disponibles sont adapt es son fonctionnement Avant d effectuer le branchement v rifier l efficacit de l installation de mise la terre La mise la terre de l appareil est rendue obl...

Page 13: ...galement de s curit pour les enfants Un voyant 3 signale que la fonction est active A l allumage successif elle sera encore activ e Tant que la fonction de blocage est active l action sur les touches...

Page 14: ...ble circuit 8 Le voyant 9 s teint tout comme le deuxi me circuit de la zone de cuisson 5 Zones de cuisson triple circuit Fig 13 Certains zones de cuisson peuvent tre munies d un troisi me circuit par...

Page 15: ...0 11 Si la zone cuisson est s lectionn e avec la touche MOINS 11 le niveau initial est le 99 niveau maximum 4 R gler le niveau de 1 9 l aide des touches et 5 4 Le voyant 13 relatif la zone s lectionn...

Page 16: ...aire Si l un de ces produits entre en contact avec l encadrement il faut le nettoyer imm diatement avec un chiffon humide pour viter tout dommage Les incrustations peuvent tre limin es facilement avec...

Page 17: ...e Daten kontrollieren die auf dem Schild am Boden des Kochfelds angegeben sind dann sicher stellen dass zur Verf gung stehende Netz Nennspannung und Leistung f r den Betrieb des Kochfelds geeignet sin...

Page 18: ...m n chsten Einschalten immer noch aktiviert sein Die Ber hrung der Tasten ist wirkungslos solange die Blockierfunktion aktiviert ist 3 Ein und Ausschalten Abb 7 1 Die Taste EIN 1 ber hren Die Steuerun...

Page 19: ...Kreis der Kochzone schaltet sich aus 5 Dreikreis Kochzonen Abb 13 Einige Kochzonen k nnen mit einem dritten Kreis ausgestattet sein die Zone kann zum Beispiel aus einem Zentralkreis einkreis und einem...

Page 20: ...nd 10 11 Wird nach der Selektion der Timer mittels der MINUS Taste 11 eingeschaltet so startet die Kochstelle mit der maximalen 99 4 Die gew nschte Leistungsstufe von 1 bis 9 mit Tasten und ausw hlen...

Page 21: ...s dieses unverz glich mit einem nassen Tuch entfernt werden da es die Umrahmung besch digen kann Verkrustungen k nnen mit einem Glasschaber leicht entfernt werden Der Schabergriff darf nicht aus Plast...

Page 22: ...TP 431 230V 12A hi light 2700 1950 1050W 1 W 2 7 Kw 3 1 5 mm2 1 1 1000 C 25 40 mm 150 mm 55 mm 25 mm 2 C 3 2 3 mm 10 mm H05RR F E 89 109 108 25 01 92 CE 89 336 EEC 93 68 EEC 73 23 EEC 20002 96EC WEEE...

Page 23: ...5 1 5 1 OFF 2 3 4 5 6 7 8 ON OFF 9 10 11 12 13 ON OFF 14 15 2 6 2 3 3 7 1 ON OFF 1 3 0 10 8 ON OFF 1 10 5 4 1 9 5 4 4 9 0 9 1 2 0 4 3 3 0 1 2 5 4...

Page 24: ...3 0 9 0 600 C 3 10 ON OFF 1 600 C 4 11 12 1 1 9 5 4 2 8 9 1 2 8 9 5 13 13 1 1 9 5 4 2 10 3 14 14 1 2 13 14 6 1 10 2 3 5 4 4 5 3 6 8 2 9 1...

Page 25: ...7 15 9 9 7 6 9 6 1 11 1 1 11 6 1 1 11 2 2 44 3 4 47 4 5 28 5 6 29 6 1 11 7 2 44 8 2 44 9 1 7 2 1 7 2 4 8 16 1 11 2 10 5 3 1 99 10 11 11 99 4 1 9 5 4 14 Pyrex...

Page 26: ...500 C 2002 96 EC WEEE...

Page 27: ...ng on the bottom of the cook top fixing bracket screw F Fixation au meuble plaquettes introduire sur le fond de la table de cuisson encastrement patte de fixation vis D Befestigung am M bel Stift der...

Page 28: ...n of the controls F Description des commandes D Beschreibung der Schaltvorrichtungen GR Fig 6 Abb 6 6 ES Bloqueo de las funciones de la encimera GB Locking the cook top functions F Blocage des fonctio...

Page 29: ...or residual GB Residual heat indicator F Indicateur de chaleur r siduelle D Restw rmeanzeige GR Fig 10 Abb 10 10 ES Apagado de la encimera GB Turning off the cook top F Extinction de la table de cuiss...

Page 30: ...lten einer Zweikreiszone GR Fig 13 Abb 13 13 ES Zonas de cocci n de triplo circuito GB triple circuit burners F Zones de cuisson triple circuit D Dreikreis Kochzonen GR Fig 14 Abb 14 14 ES Encendido d...

Page 31: ...om tico GB Enabling automatic preheating F Activation du pr chauffage automatique D Aktivierung des automatischen Vorw rmens GR Fig 16 Abb 16 16 ES Activaci n del reloj programador GB Enabling timer F...

Page 32: ...FRANKE ESPA A SAU Poligono Can_Magarola C Mol de Can Bassa n 2 10 08100 MOLLET DEL VALLES Barcelona ESPA A...

Reviews: