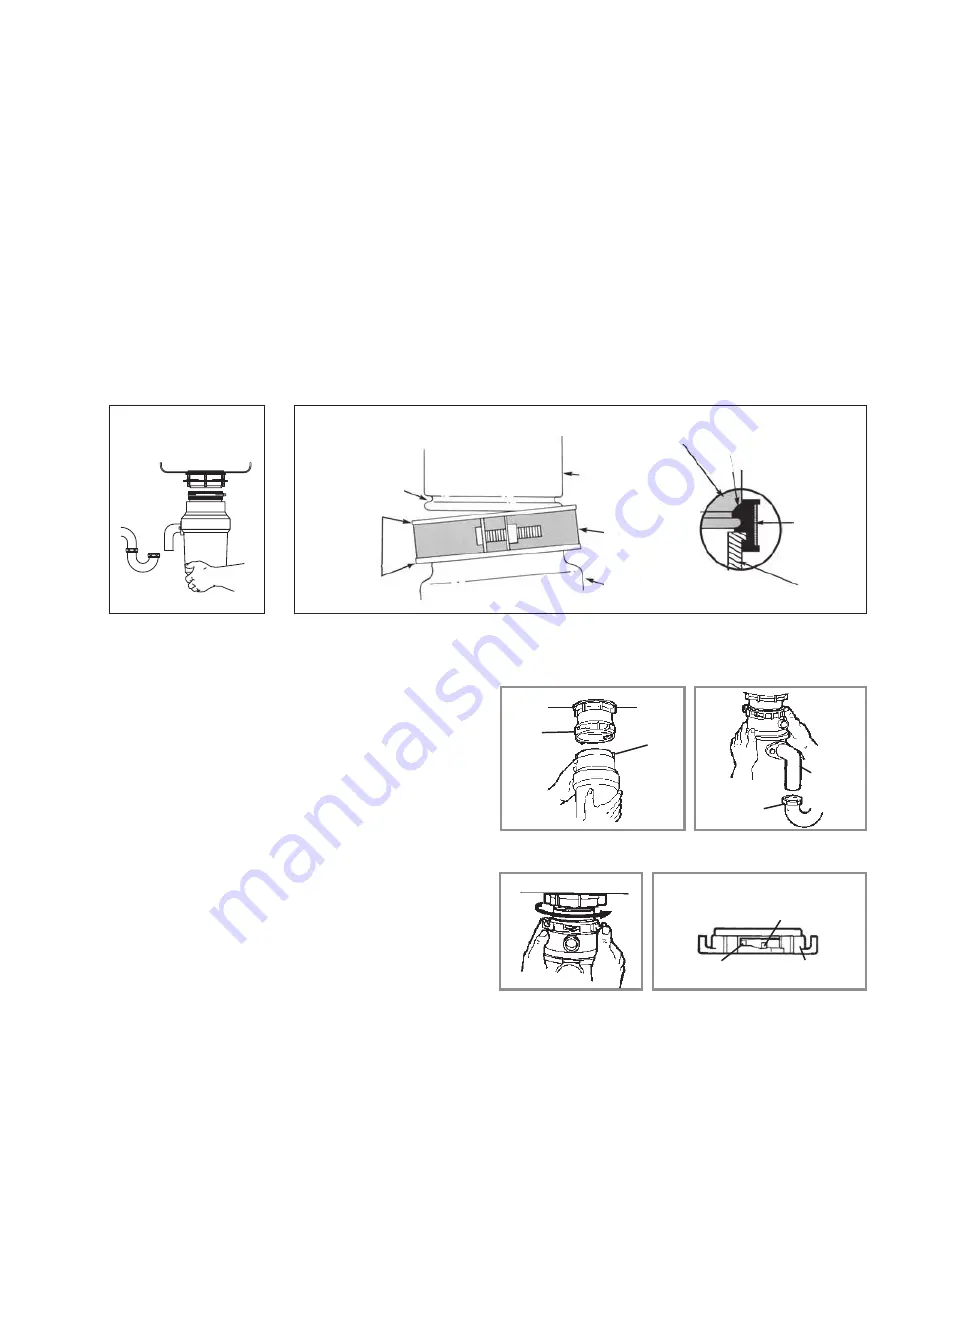
A
Press firmly around the cushion ring to ensure it is engaged
with the neck of the disposer.
B
lubricate the top inside lip of the rubber cushion ring with a
liquid soap.
C
line up discharge elbow of disposer with trap under mounting
assembly (see 5A). Guide disposer up and engage the GROOVE
A
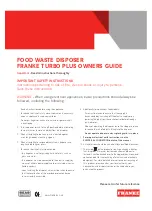
line up disposer under mounting assembly. Guide hopper
projections into mount ring slots. Turn mount ring about 1/4”
to right so that disposer is temporarily supported (see 6A).
B
Turn mount ring and disposer until disposer elbow lines up
with trap (see 6B).
C
Turn mount ring to the right (counter-clockwise)until it locks up
tight. Tap the mount ring ears with a hammer until the lock
position is achieved. Hopper projections must be to extreme
left of mounting slots (see 6C & 6D).
D
If mount ring is hard to turn, you may add a small amount of
petroleum jelly or liquid soap to hopper projections. Run water
and check for leaks.
of the cushion ring around the RIDGE at the bottom of the
sink flange (see 5A & refer back to 2B). While still supporting
the disposer, tighten the screw-clamp around cushion ring.
The disposer will now hang by itself.
D
If you need to turn the disposer make sure the sink flange does
not turn. It will break the seal created when installed.
5a. 3 BOLT mOuNT ASSEmBLy
For TP-50, TP-75 and TP-125 models.
5b. EZ mOuNT ASSEmBLy
For TP-125B models.
6B
SINK FLANGE
GROOVE
SINK FLANGE
CLAMP
HOPPER
SINK FLANGE
CUSHION
RING
CUSHION RING
TOP ANGLED SURFACE
HOPPER
CLAMP
6A
ImPORTANT PLEASE READ -
DO NOT REMOVE ClAMP FROM CUSHION RING OR CUSHION RING FROM HOPPER.
BOTH PARTS ARE FACTORY INSTAllED AND INSTAllATION READY
5A
5B
6B
ELBOW
TRAP
SLOT
PROJECTION
6A
6C
LOCKING DETAIL
HOPPER PROJECTION IN
“SUPPORTED” POSITION
HOPPER PROJECTION IN
“LOCK” POSITION
MOUNT
RING
6D


