background image

 Quick guide to digital oscilloskope 400150 

 400150-Simple_Setup_AC

    p.

 4/4 


Group 

F

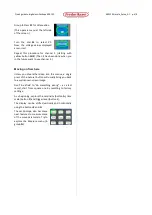
: Press 

F1

 for 

Attenuation


(This opens a menu at the left side 
of the screen.) 


Turn  the  dial 

M

  to  select 

X1

.  

Now,  the  voltage  values  displayed 
are correct 

Repeat  this  procedure  for  channel  2  (starting  with 
yellow button 

CH2

). (Then it has been done when you 

in the future want to use channel 2.) 


Moving on from here 

Unless  you  dive  rather  deep  into  the  menus,  a  single 
press of the 

Autoset

 button will usually bring you back 

to a well-known screen image. 

Don’t  be  afraid  to  “do  something  wrong”  –  as  a  last 
resort,  start  from  square  one  by  resetting  to  factory 
settings. 

As a beginning, explore the sensitivity (button 

A

), time 

scale (button 

C

) and trigger level (button 

L

). 

The  display  can  be  shifted  vertically  and  horizontally 
using the buttons 

E

 and 

G

The  oscilloscope  also  has  some 
neat features to measure some 
of the curve parameters. Try to 
explore  the 

Measure

  menu  (in 

group 

N

).  


Summary of Contents for 400150

Page 1: ...nulpunkt i forhold til de indkommende pulser Triggerniveauet fastlægges af knappen L Knapperne F og H bruges til valg af punkter i menuer som vises på skærmen M er en drejeknap som lige ledes anvendes til at vælge mellem muligheder som vises på skærmen Knapperne i gruppen N er hovedfunktioner disse leder oftest til menuer som betjenes via F og H Knappen K fjerner eventuelle menuer fra skærmen Opsæ...

Page 2: ...muligheder for at at måle forskellige parametre på kurven Prøv at se hvad menuen Measure i gruppe N byder på Reklamationsret Der er to års reklamationsret regnet fra fakturadato Reklamationsretten dækker materiale og produktionsfejl Reklamationsretten dækker ikke udstyr der er blevet mishandlet dårligt vedligeholdt eller fejlmonteret ligesom udstyr der ikke er repareret på vort værksted ikke dække...

Page 3: ...e zero point of the axis relative to the incoming pulses The trigger level is set by button L Buttons F and H are used for selections within menus that appear on the screen M is a dial also used for selecting options shown on screen The buttons in group N control major functions often leading to menus controlled by the F and H buttons Button K removes possible menus from the screen Setting up step...

Page 4: ...ing on from here Unless you dive rather deep into the menus a single press of the Autoset button will usually bring you back to a well known screen image Don t be afraid to do something wrong as a last resort start from square one by resetting to factory settings As a beginning explore the sensitivity button A time scale button C and trigger level button L The display can be shifted vertically and...

Reviews: