6
1
ASSEMBLY
• Assembly requires two persons.
• Place all parts in a cleared area and remove the
packing materials. Do not dispose of the packing
materials until you finish all assembly steps.
• If a part is not in the hardware kit, check to see if
it has been preassembled.
• Left parts are marked “L” or “Left” and right parts
are marked “R” or “Right.”
• To identify small parts, see page 5.
• The following tools (not included) are required for
assembly:
one adjustable wrench
one Phillips screwdriver
a set of metric hex keys
Assembly may be easier if you have a set of
wrenches. To avoid damaging parts, do not use
power tools.
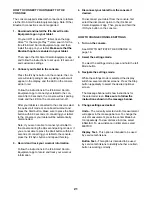
1. Attach the Rear Stabilizer (128) to the Frame (1)
with two M8 x 25mm Screws (79), two M8 Split
Washers (87), and two M8 x 16mm x 1.5mm
Washers (110).
87
87
110
110
79
79
128
1
2
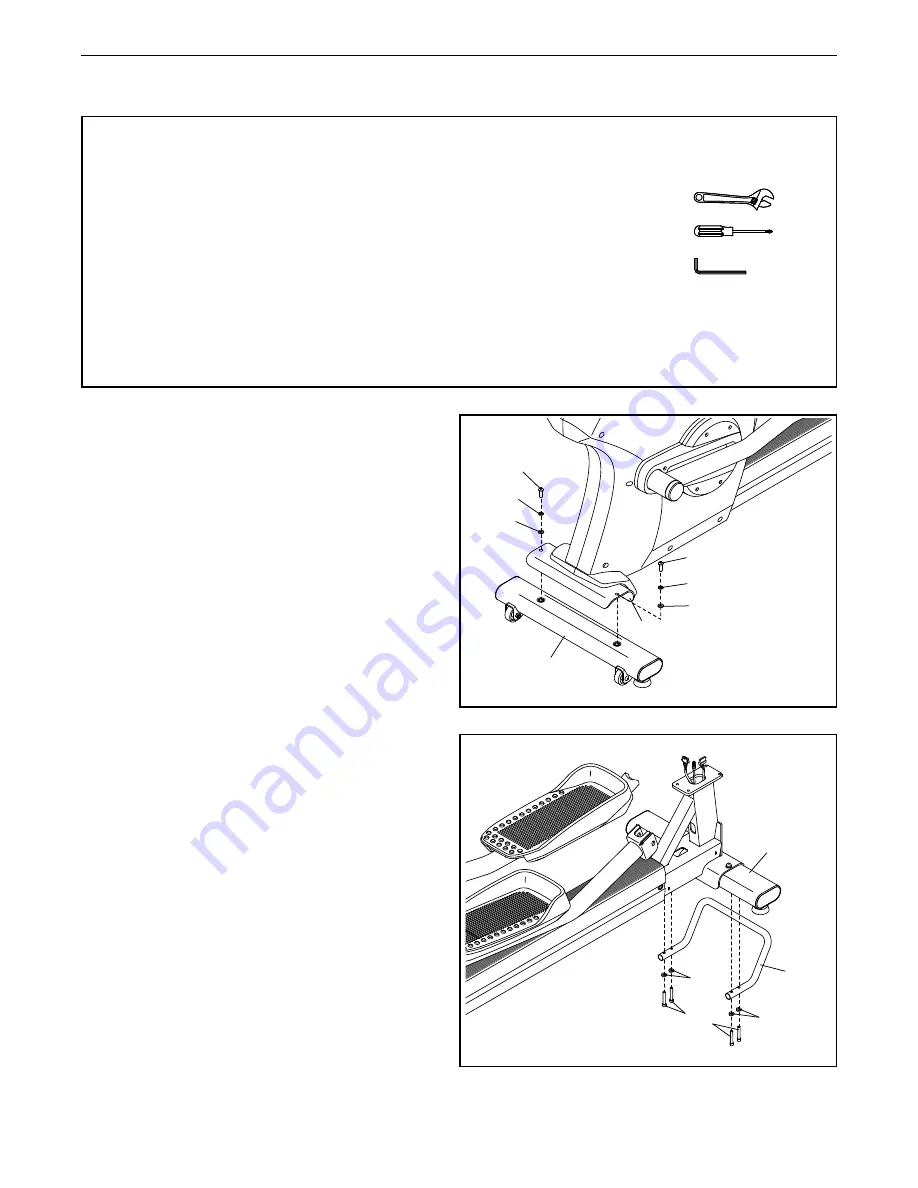
2. Attach the Transport Handle (142) to the
underside of the Front Stabilizer (114) with four
M6 x 30mm Screws (144) and four M6 Curved
Washers (143); start all the Screws, and then
tighten them.
144
143
143
142
114
Summary of Contents for e8.9b
Page 26: ...26 NOTES ...


