10
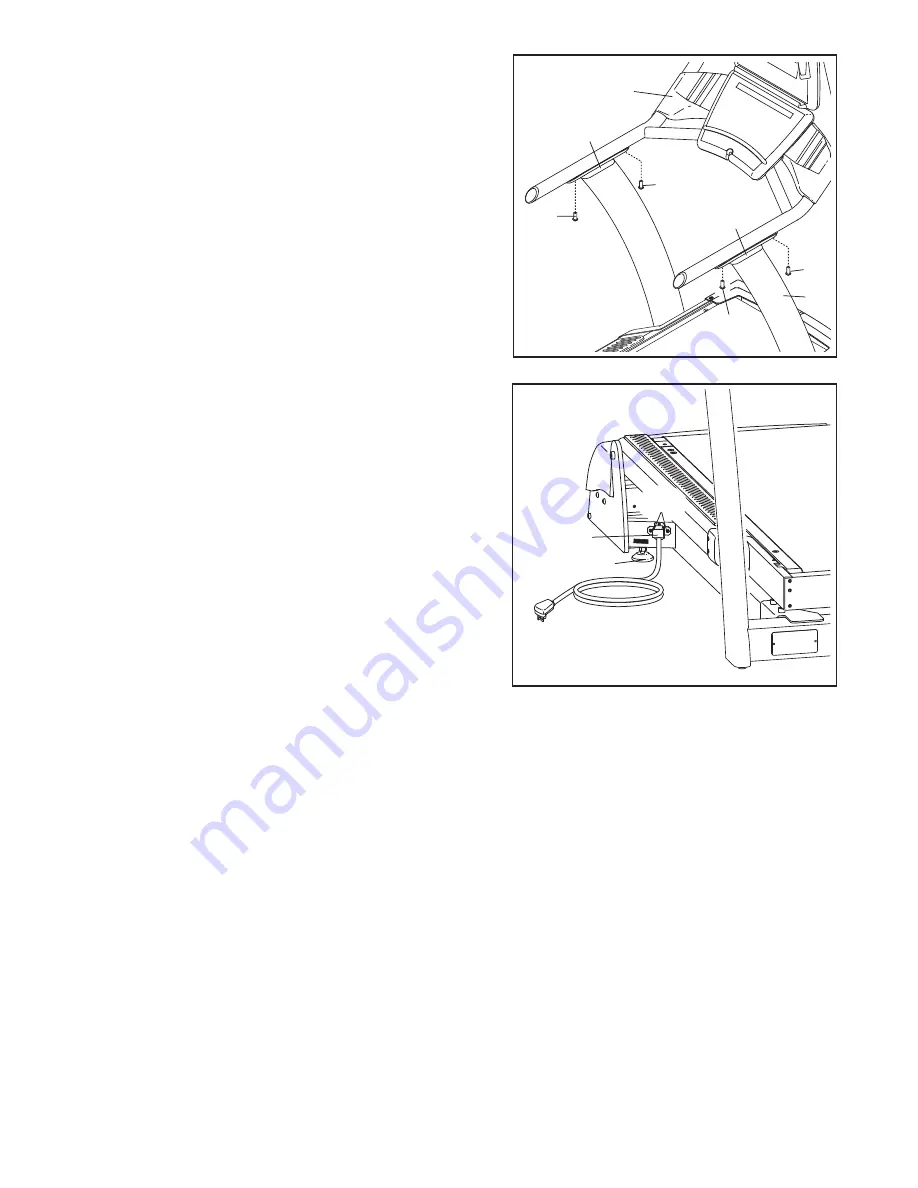
9. After the incline trainer is placed in the location where it
will be used (see HOW TO MOVE THE INCLINE
TRAINER on page 30), make sure that both Rear
Leveling Feet (38) and the Base Pads (not shown) rest
firmly on the floor. If the incline trainer rocks even
slightly, turn one of the Rear Leveling Feet clockwise or
counterclockwise until the rocking motion is eliminated.
Remove the #10 x 1/2" Screws (34) and the Power Cord
Bracket (64). Plug the power cord into the incline trainer
and reattach the Power Cord Bracket.
Note: The Power
Cord Bracket must be attached at all times.
To pur-
chase a power cord, see page 11.
38
64
9
34
10.
Make sure that all parts are properly tightened before you use the incline trainer.
To protect the floor or
carpet, place a mat beneath the incline trainer.
8. Attach the handrail assembly to the Handrail Brackets
(92) with four 3/8" x 1" Bolts (51);
start all four Bolts,
and then tighten each of them.
Handrail
Assembly
51
51
92
51
51
93
92
8


