FreeNAS Certified Storage Server
Basic Setup & Deployment
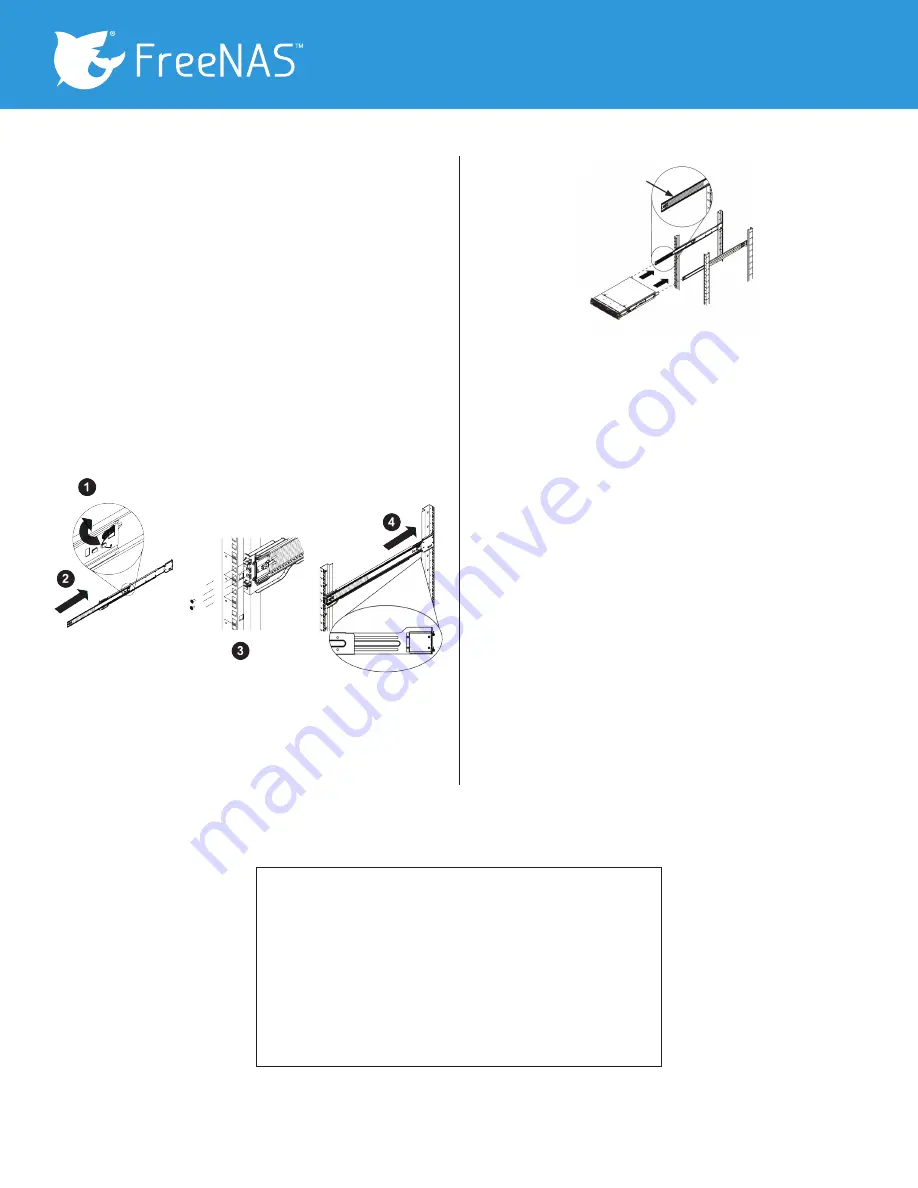
Installing the Outer Rails onto the Rack.
1. Press upward on the locking tab at the rear end of the middle rail.
2. Push the middle rail back into the outer rail.
3. Hang the hooks on the front of the outer rail onto the square
holes on the front of the rack. If desired, use screws to secure the
outer rails to the rack.
4. Pull out the rear of the outer rail, adjusting the length until it just
fits within the posts of the rack.
5. Hang the hooks of the rear section of the outer rail onto the
square holes on the rear of the rack. Take care that the proper holes
are used so the rails are level. If desired, use screws to secure the
rear of the outer rail to the rear of the rack.
Figure 6
. Extending and Mounting the Outer Rails
Figure 7
. Installing into a Rack
Installing the System into a Rack.
1. Extend the outer rails as illustrated in Figure 7.
2. Align the inner rails of the chassis with the outer rails on the rack.
3. Slide the inner rails into the outer rails, keeping the pressure even
on both sides. When the chassis has been pushed completely into
the rack, it should click into the locked position.
4. Optional screws may be used to hold the front of the chassis to
the rack.
For complete FreeNAS documentation visit:
http://doc.freenas.org/ and select your version of FreeNAS
If you require assistance, contact your iXsystems Support Representative
1 (855) 473-7449 option 2 (US Only Toll-Free); +1 (408) 943-4100 option 2
Email:
support@iXsystems.com
Copyright © 2017 iXsystems. FreeNAS is a registered trademark of iXsystems, Inc. All rights reserved.
Ball-Bearing
Shuttle


