background image

- 6 -


INSTALLING YOUR EVOLUTION ROOF TOP TENT 

ON YOUR ROOF RACK: 


IMPORTANT NOTE:  

We recommend that the Evolution be installed on a separate roof rack on top 

of your vehicle, one that can handle over 175lbs of dynamic load. We do offer 
some roof racks on our website or you can purchase them from several 

companies including Rhino Rack, Yakima, Thule, Dee-Zee, etc. If you have any 
questions on which roof rack will work for your specific vehicle, please reach 

out to the roof rack company directly.  

The distance between the Evolution Roof Top Tent and the roof rack should 

not exceed more than 1.5”.  


INSTALLATION STEPS: 

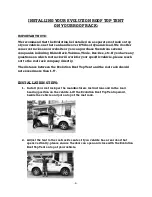
1.


Install your roof rack per the manufacturers instructions and in the load 

bearing position on the vehicle. Lift the Evolution Roof Top Tent upward, 

beside the vehicle and put on top of the roof rack. 


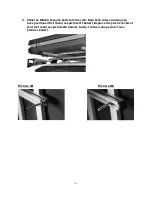
2.


Adjust the tent to the roof rack’s center. If you vehicle has a rear door that 

opens vertically, please ensure the door can open and close with the Evolution 

Roof Top Tent on top of your vehicle. 


Summary of Contents for Evolution 49"

Page 1: ...1 EVOLUTION 49 55 INSTRUCTION MANUAL...

Page 2: ...ave asked us to be innovative to provide the best quality to provide great customer service and to keep creating products that Elevate Your Adventure so stay in touch with us Follow us on social media...

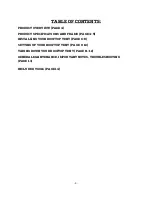
Page 3: ...PRODUCT SPECIFICATIONS AND FRAME PAGE 4 5 INSTALLING YOUR ROOFTOP TENT PAGE 6 8 SETTING UP YOUR ROOFTOP TENT PAGE 9 10 TAKING DOWN YOUR ROOFTOP TENT PAGE 11 12 GENERAL MAINTENANCE IMPORTANT NOTES TRO...

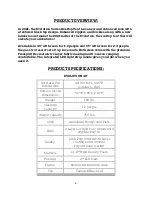
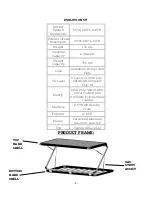
Page 4: ...spirit Recreation tri layer fabric making multi season camping comfortable The integrated LED light strip inside gives you light when you need it PRODUCT SPECIFICATIONS EVOLUTION 49 49 Hard Top Dimens...

Page 5: ...ght 172 lbs Sleeping Capacity 2 3 people Weight Capacity 750 lbs Shell Aluminum Honeycomb Plate Tri Layer 3 Layers of 150D Poly Oxford with 90g M2 Poly fil Rainfly 210D Poly Oxford with Silver Coating...

Page 6: ...will work for your specific vehicle please reach out to the roof rack company directly The distance between the Evolution Roof Top Tent and the roof rack should not exceed more than 1 5 INSTALLATION S...

Page 7: ...bolts into the rails from both sides ensuring you have positioned 8 of them see picture 1 below Replace the plastic covers of your roof rack see picture 2 below Lastly fix the u shape stator see pictu...

Page 8: ...8 Rack Rail U Shape Stator U Shape Stator Plastic Nut 8 Total M8x50 Bolts 8 total M8 Flat Washer M8 Arc Washer Plastic End Caps for Rail...

Page 9: ...R EVOLUTION ROOFTOP TENT 1 Release the stainless steel buckles 2 From the rear side push up the tent 3 Tent will automatically open with the gas strut assist 4 From the front side of the tent push up...

Page 10: ...on the top of the ladder in the center Insert the point into the hole of the frame 6 Attach the ladder to the frame and then open the telescoping ladder to your desired height Your Evolution Roof Top...

Page 11: ...own on the top hard shell 2 At the back of the tent pull down on tbe belt puller to collapse the tent down 3 When the top hard shell is closed tuck the fabric into the tent that is remaining outside L...

Page 12: ...12 4 The LED Light Strip will need a power source so please remember to take your preferred power source with you One is not included...

Page 13: ...and vehicle to make sure all points are locked 5 Please don t jump inside the tent because it can cause damage from uneven force 6 Always keep the tent in the closed position when driving your vehicl...

Page 14: ...can either be found in the shoe bag or sitting on the mattress when you open the tent Freespirit Denver 120 Capital Drive Golden CO 80410 Freespirit Bend 2453 NE 4th Street Suite 110 Bend OR 97701 WWW...

Reviews: