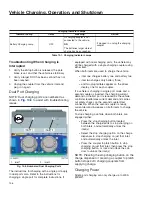
On a vehicle with dual port charging, the power
supplied by the charger connected to inlet one, or
the forward inlet, is double the amount of the power
supplied by the charger connected to inlet two, or the
rearward inlet. See
Inlet Maximum Current (Maximum Power)
Forward Inlet (#1)
Rearward Inlet (#2)
Single Inlet
Charging
400A
(180kW max)
400A
(180kW max)
Dual Inlet
Charging
400A
(180kW max)
200A
(90kW max)
Table 10.2, Inlet Maximum Current (Maximum Power)
Programming the Vehicle to Charge
NOTE: Keeping a high-voltage lithium battery
fully charged and deeply discharging a battery
shortens battery life.
In general, a battery lasts longest when kept
between a 15 percent and 85 percent SOC.
NOTE: The vehicle does not have to be connected to
a charger to set up charging limits or schedule
departure times.
1.
On the infotainment screen, select ’Settings’ or
the gear icon.
2.
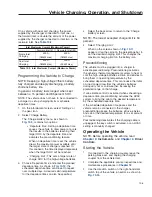
Select ’Charge Battery.’
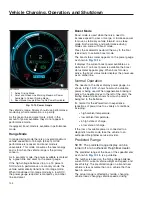
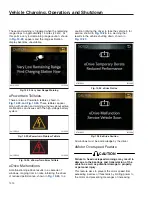
The ’Charge Battery’ menu, as shown in
contains two options:
•
’Departure time’: Setting a departure time
causes the vehicle to draw power at a rate
that results in the batteries reaching their
target SOC by the departure time and
activates the preconditioning feature.
When no departure time is set, the vehicle
draws the maximum power available until
the target state of charge is reached. In
this scenario, the time displayed represents
when the target SOC will be reached.
•
’Charging limit’: This sets a target state of
charge SOC for the high-voltage batteries.
3.
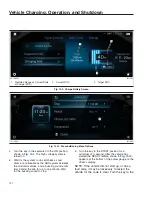
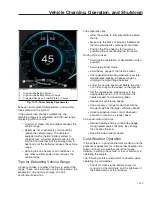
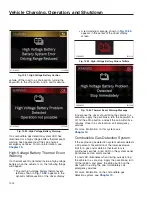
Choose ’Departure time’ and enter the planned
departure time. As shown in
the
scheduled departure time can be set to repeat
over multiple days. A desired cabin temperature
for the departure time can also be specified.
4.
Select the back arrow to return to the ’Charge
Battery’ screen.
NOTE: The lowest accepted charge limit is 50
percent.
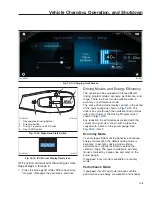
5.
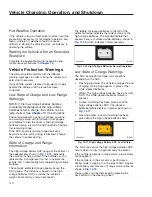
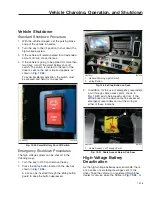
Select ’Charging Limit.’
When on the screen shown in
appears, drag the circle on the percentage bar to
set the desired charging limit. This changes the
maximum charging limit on the battery icon.
Preconditioning
The vehicle must be plugged into a charger to
activate preconditioning. Preconditioning activates
the vehicle’s thermal management system to heat or
cool the high-voltage batteries, eDrive, and eAxles to
bring them to operating temperature by the
scheduled departure time. This can reduce the initial
on-road power draw from the vehicle’s batteries
during very hot or cold weather, increasing the
predicted range on that charge.
If cab climate control is activated when scheduling a
departure time, preconditioning activates the HVAC
system to bring the cab to the desired temperature
by the scheduled departure time.
If the scheduled departure time passes and the
vehicle remains connected to the charger,
preconditioning keeps the batteries, eDrive, eAxles,
and cab at the desired temperature for a set amount
of time.
Preconditioning deactivates if the charging cable is
unplugged, the key switch is activated, or an HVAC
setting is manually changed.
Operating the Vehicle
NOTE: Before operating the vehicle, read
Instruments
, and
Driver
Controls
.
Starting the Vehicle
1.
If connected to the charging coupler, leave the
parking brake set, and unplug the charging
coupler from the vehicle inlet.
2.
Complete the applicable pre-trip inspections and
maintenance procedures in
3.
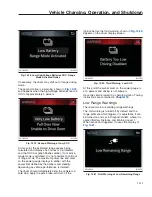
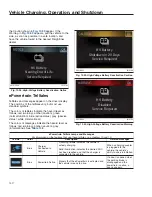
Use the direction switch on the right-hand stalk
switch to put the vehicle in neutral, as shown in
Vehicle Charging, Operation, and Shutdown
10.6
Summary of Contents for PX113064S T 2016
Page 4: ......
Page 10: ......
Page 18: ......
Page 58: ......
Page 86: ......
Page 112: ......
Page 122: ......
Page 142: ......
Page 154: ......
Page 155: ...12 Steering System Power Steering System 12 1...
Page 158: ......
Page 159: ...13 eAxle eAxle 2 Speed Transmission 13 1...
Page 176: ......
Page 190: ......
Page 202: ......
Page 222: ......
Page 223: ...20 Emissions Information Noise Emissions 20 1 Greenhouse Gas Emissions 20 1...
Page 229: ......
Page 236: ......

