Descriptions of LEFT and RIGHT are from the point of view of standing
behind the equipment facing the front
10
ASSEMBLY DIAGRAM 5
USE A PARTNER TO HELP WITH THIS STEP
REMEMBER: Only hand tighten all nuts and bolts until whole
&&Ͳ
X
ϰ
is assembled
1.
Insert a BUSHING (34) into each open end of the BUTTERFLY SUPPORT (21) posts.
(See the exploded diagram for more
detail, skip this step if pre-assembled)
2.
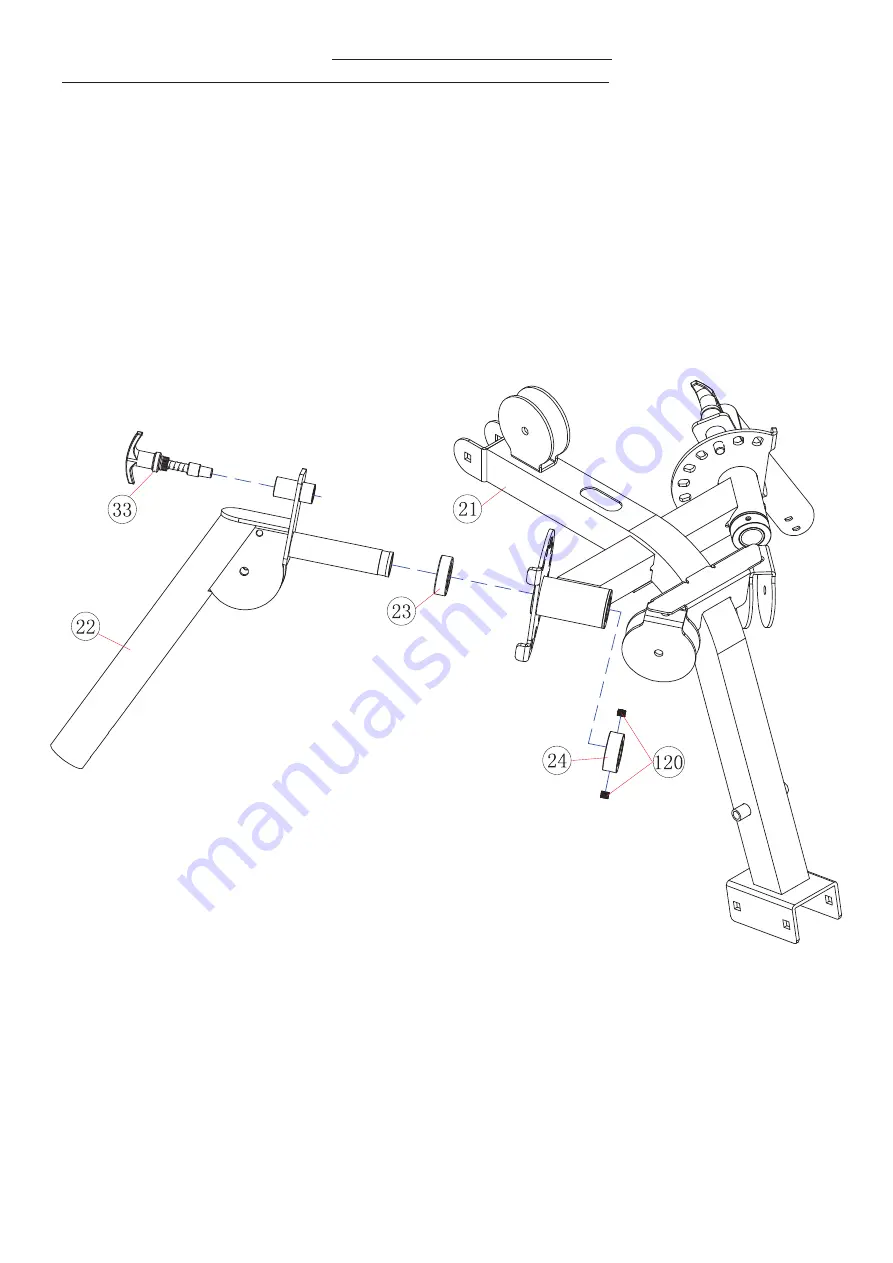
Attach a BUSHING (23) to the short end of both BUTTERFLY (22) and slot them into position on each side of the
BUTTERFLY SUPPORT (21)
3.
Connect the BUTTERFLY (22) to the BUTTERFLY SUPPORT (21) on both sides using a BUTTERFLY SLEEVE (24) and two
ALLEN BOLTS M8X8 (120) on each.
4.
Slot a LOCK KNOB (33) into position on the front of each BUTTERFLY (22) to angle the butterflies equally on each side.


