9
•
Check the area in which goods are placed for foreign objects. Remove goods
stored incorrectly immediately.
•
Do not set up or store the unit outdoors. To ensure good air circulation, maintain
minimum distances to surrounding walls and other units.
•
Do not attach stickers or films to glass surfaces.
•
Do not operate the multideck if there is any glass damage (cracks, breaks).
2.4.
Personal protective equipment
Use hand protection:
•
Protection from heavy equipment parts during transport, unpacking, installation,
and disposal.
•
Protection from sharp edges when unpacking and during setup and installation.
•
Protection from contact with liquid/leaking refrigerant in the event of leakage in
the refrigerant circuit.
•
Protection from low temperature during loading and cleaning.
•
For removing glass parts and glass splinters in the event of glass breakage.
Use eye protection:
•
Protection from contact with liquid/leaking refrigerant in the event of leakage in
the refrigerant circuit.
Wear protective clothing:
•
When loading the multideck with products, wear appropriate clothing (cold
protection).
2.5.
Electrical voltage
Only qualified staff may carry out work on the electrical system. In the event of fault
messages or damage to the multideck, contact the maintenance service.
Electrical safety guidelines:
•
Do not connect a damaged appliance or damaged parts (such as connecting
cables) to the power supply.
•
Check to ensure safety devices are complete and working.
•
Do not remove protective devices and covers attached to the unit.
•
Note the following before connecting to the power supply:
o
Applicable local electrical safety regulations.
o
Applicable standards and safety instructions.
o
The power supply voltage and frequency must match the specifications on
the technical data sticker.
•
Only trained operating personnel may disconnect the unit.
Summary of Contents for JUPITER H8
Page 1: ...OPERATION MANUAL MULTIDECK JUPITER ...
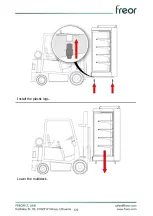
Page 14: ...14 Install the plastic legs Lower the multideck ...
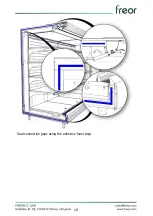
Page 19: ...19 Seal connection gaps using the adhesive foam tape ...
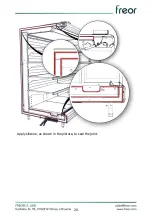
Page 20: ...20 Apply silicone as shown in the picture to seal the joint ...
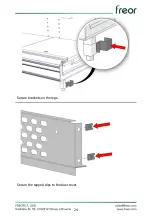
Page 24: ...24 Secure brackets on the legs Secure the tapped clips to the dust cover ...
Page 43: ...43 Date Work Name ...

