Page 92
Service Manual Deli Multisserie form 9123560 rev. 09/2017
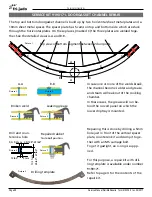
Due to limitations in the production proces of punching curved stainless steel, the mounting
holes in the new stainless steel gutter differ from the plastic ones.
Therefore an upgrade kit is available to be able to mount this gutter on the “old” curved pa-
nels. For contents, see last page of this chapter.
4x
1
2
5
6
7
8
9
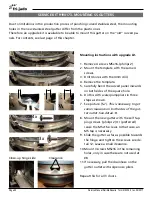
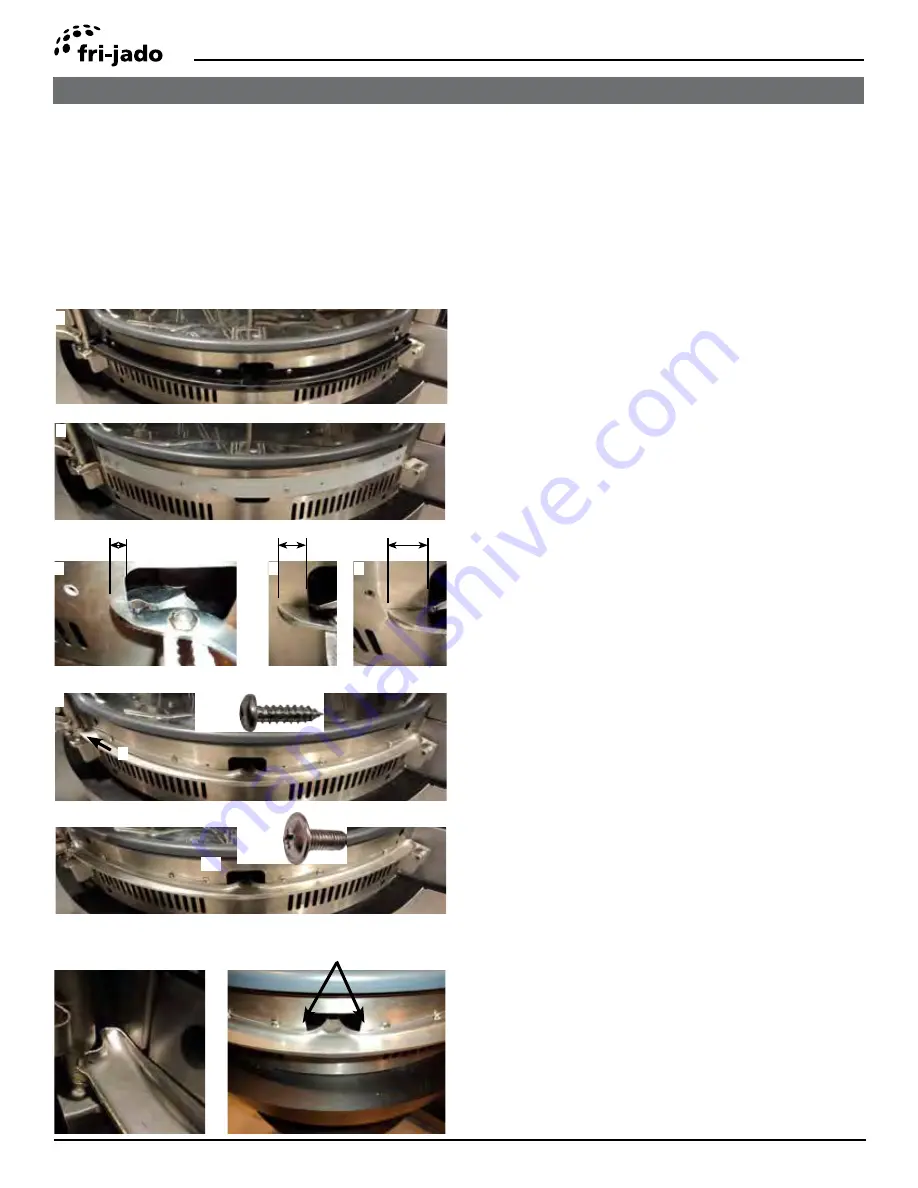
Mounting instructions with upgrade kit.
1. Remove 4 screws M5x16. (philips 2)
2. Mount the template with the same 4
screws.
3. Drill 4 holes with the 4mm drill.
4. Remove the template.
5. Carefully bend the curved panel inwards
on both sides of the square hole.
6. Do this with waterpumppliers in three
steps as shown.
7. See picture (5-7).
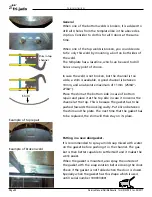
This is necessary to get
some clearance on both sides of the gut-
ter outlet. See detail 13.
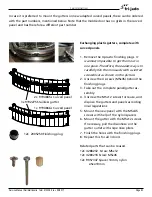
8. Mount the new gutter with the self tap-
ping screws. (philips 2) Or (preferred)
reuse the M5x15 screws. In that case, an
M5 tap is necessary.
9. Slide the gutter as far as possible towards
the hinge and tighten the screws. see de-
tail 12. Leave a small clearance.
10. Mount 3 screws M5x16 in the remaining
holes, only in case these are not used at
#8
11. If necessary, pull the drainhose on the
gutter outlet with snipe nose pliers.
Repeat this for all 3 doors.
10
3x
Clearance
SERVICE KIT 9190173, MOUNTING SS GUTTERS
Close-up hinge side

