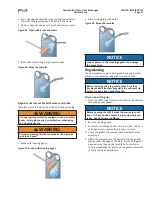
190.210-IOM (SEP 21)
Page 7
LazerWeld II Plate Heat Exchanger
Installation
Installation
Before installing
NOTICE
Before start-up, check that all tightening bolts are
firmly tightened and that you use the correct mea
-
surements of the plate pack. See LWZWII drawing
and
section.
• To avoid water hammer, do not use fast-closing valves.
• Install safety valves according to current pressure ves-
sel regulations.
• If the LZWII surface temperature is expected to be hot
or cold, insulate the heat exchanger.
• Use protective sheets to cover the plate pack.
• For each model, design pressures and temperatures are
marked on the identification plate. These must not be
exceeded.
• Full vacuum conditions apply at start up for refrig-
eration duties to avoid moisture and air in the heat
exchanger.
Requirements
Space
A minimum free space is needed for lifting cassettes in
and out. Refer to the delivered drawing.
Foundation
Install on a flat foundation giving enough support to the
frame.
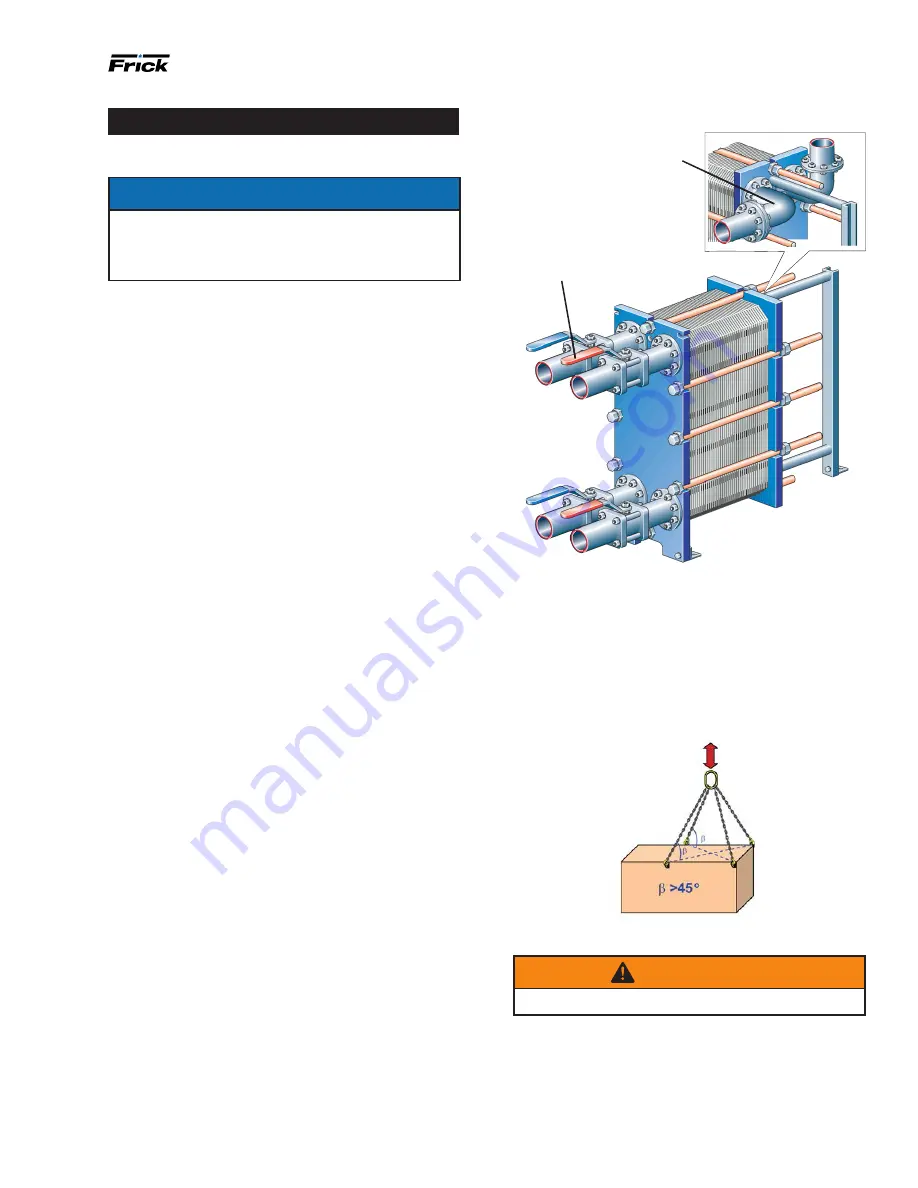
Elbow
To allow easier disconnection of the LZWII, connect an el-
bow to the pressure plate using a flange, directed upwards
or sideways, and with another flange located just outside
the contour of the heat exchanger.
Shut-off valve
In order to open the LZWII, install shut-off valves at all
connections.
Connections in the pressure plate
Ensure the plate pack is tightened to the correct dimen-
sion A before connecting the pipe system. Verify on the
nameplate.
Drip tray (optional)
Depending on the type of fluid in the LZWII and the type of
installation, a drip tray (drainage box) may be necessary to
avoid injury to personnel and damage to equipment.
Note:
Put the drip tray in place before positioning the LZWII
Figure 5: Shut-off valve and elbow location
Lifting
Use straps when lifting the LZWII. Attach the straps as
illustrated in
with a minimum angle of 45°.
Position straps as illustrated in
Figure 6: Lifting straps
WARNING
Never lift by the connectors or studs.
Shut-off valve
Elbow


