background image

20

Your appliance is covered by a one year limited warranty. For one year from your original date of
purchase, Electrolux will pay all costs for repairing or replacing any parts of this appliance that prove to be
defective in materials or workmanship when such appliance is installed, used and maintained in
accordance with the provided instructions.

This warranty does not cover the following:

1.

Products with original serial numbers that have been removed, altered or cannot be readily determined.

2.

Product that has been transferred from its original owner to another party or removed outside the USA or

Canada.

3.

Rust on the interior or exterior of the unit.

4.

Products purchased "as-is" are not covered by this warranty.

5.

Food loss due to any refrigerator or freezer failures.

6.

Products used in a commercial setting.

7.

Service calls which do not involve malfunction or defects in materials or workmanship, or for appliances

not in ordinary household use or used other than in accordance with the provided instructions.

8.

Service calls to correct the installation of your appliance or to instruct you how to use your appliance.

9.

Expenses for making the appliance accessible for servicing, such as removal of trim, cupboards,

shelves, etc., which are not a part of the appliance when it is shipped from the factory.

10. Service calls to repair or replace appliance light bulbs, air filters, water filters, other consumables, or
knobs, handles, or other cosmetic parts.

11. Surcharges including, but not limited to, any after hour, weekend, or holiday service calls, tolls, ferry trip
charges, or mileage expense for service calls to remote areas, including the state of Alaska.

12. Damages to the finish of appliance or home incurred during installation, including but not limited to
floors, cabinets, walls, etc.

13. Damages caused by: services performed by unauthorized service companies; use of parts other than
genuine Electrolux parts or parts obtained from persons other than authorized service companies; or
external causes such as abuse, misuse, inadequate power supply, accidents, fires, or acts of God.

DISCLAIMER OF IMPLIED WARRANTIES; LIMITATION OF REMEDIES

CUSTOMER’S SOLE AND EXCLUSIVE REMEDY UNDER THIS LIMITED WARRANTY SHALL BE PRODUCT
REPAIR OR REPLACEMENT AS PROVIDED HEREIN. CLAIMS BASED ON IMPLIED WARRANTIES,
INCLUDING WARRANTIES OF MERCHANTABILITY OR FITNESS FOR A PARTICULAR PURPOSE, ARE
LIMITED TO ONE YEAR OR THE SHORTEST PERIOD ALLOWED BY LAW, BUT NOT LESS THAN ONE
YEAR. ELECTROLUX SHALL NOT BE LIABLE FOR CONSEQUENTIAL OR INCIDENTAL DAMAGES SUCH
AS PROPERTY DAMAGE AND INCIDENTAL EXPENSES RESULTING FROM ANY BREACH OF THIS
WRITTEN LIMITED WARRANTY OR ANY IMPLIED WARRANTY. SOME STATES AND PROVINCES DO NOT
ALLOW THE EXCLUSION OR LIMITATION OF INCIDENTAL OR CONSEQUENTIAL DAMAGES, OR
LIMITATIONS ON THE DURATION OF IMPLIED WARRANTIES, SO THESE LIMITATIONS OR EXCLUSIONS
MAY NOT APPLY TO YOU. THIS WRITTEN WARRANTY GIVES YOU SPECIFIC LEGAL RIGHTS. YOU MAY
ALSO HAVE OTHER RIGHTS THAT VARY FROM STATE TO STATE.

Keep your receipt, delivery slip, or some other appropriate payment record to establish the warranty period
should service be required. If service is performed, it is in your best interest to obtain and keep all receipts.
Service under this warranty must be obtained by contacting Electrolux at the addresses or phone
numbers below.

Exclusions

If You Need
Service

This warranty only applies in the USA and Canada. In the USA, your appliance is warranted by Electrolux Major Appliances
North America, a division of Electrolux Home Products, Inc. In Canada, your appliance is warranted by Electrolux Canada Corp.
Electrolux authorizes no person to change or add to any obligations under this warranty. Obligations for service and parts under
this warranty must be performed by Electrolux or an authorized service company. Product features or specifications as
described or illustrated are subject to change without notice.

USA
1.800.944.9044

Electrolux Major Appliances
North America
P.O. Box 212378
Augusta, GA 30907

Major Appliance Warranty Information

Canada

1.800.668.4606

Electrolux Canada Corp.

5855 Terry Fox Way

Mississauga, Ontario, Canada

L5V 3E4

Summary of Contents for 318203857

Page 1: ...s R Gas R Gas R Gas Range ange ange ange ange Slide in Models Warranty Back Cover Before You Call 19 Adjusting Your Oven Temperature 18 Solutions to Common Problems Care Cleaning 14 18 Cooking Informations 12 13 Setting Oven Controls 10 SettingWarm ServeDrawerControls 11 Before Setting Oven Controls 10 Features at a Glance 7 Important Safety Instructions 3 6 Welcome 2 Setting Surface Controls 8 9 ...

Page 2: ...EAD AND SAVE THESE INSTRUCTIONS This Use Care Manual contains general operating instructions for your appliance and feature information for several models Your product may not have all the described features The graphics shown are representative The graphics on your appliance may not look exactly like those shown These instructions are not meant to cover every possible condition and situation that...

Page 3: ...ician in accordance with the National Fuel Gas Code ANSI Z223 1 latest edition and National Electrical Code ANSI NFPA No 70 latest edition and local code requirements Install only per installation instructions provided in the literature package for this range Ask your dealer to recommend a qualified technician and an authorized repair service Know how to disconnect the electrical power to the appl...

Page 4: ...ship of utensil to flame will also improve efficiency Do not use stove top grills on the burner grates of sealed gas burners If you use a stove top grill on asealedgasburner itwillcauseincompletecombustionand can result in exposure to carbon monoxide levels above allowable current standards This can be hazardous to your health Knowwhichknobcontrolseachsurfaceburner Place apanoffoodontheburnerbefor...

Page 5: ... socouldcausethebulbtobreak Disconnecttheappliance or turn off the power to the appliance before removing and replacing light bulb IMPORTANT INSTRUCTIONS FOR CLEANING YOUR RANGE Cleantherangeregularlytokeepallpartsfreeofgrease that could catch fire Exhaust fan ventilation hoods and grease filters should be kept clean Do not allow grease to accumulate on hood or filter Greasy deposits in the fan co...

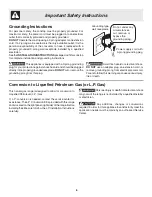
Page 6: ...cal outlet that is correctly polarized and properly grounded DONOTOperatethecooktopusinga2 prongadapteroranextension cord If a 2 prong wall receptacle is the only available outlet it is the personal responsibility of the consumer to have it replaced with a properly grounded 3 prong wall receptacle installed by a qualified electrician SeetheINSTALLATIONINSTRUCTIONSpackagedwiththiscooktop for comple...

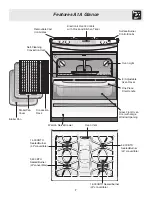
Page 7: ...ConvectionOven 3 Adjustable Oven Racks One Piece DoorHandle Glass Front Oven DoorwithLarge WindowOpening Warm Serve Drawer Broiler Pan Cover RemovableCast Iron Grates Oven Vent 14 000 BTU SealedBurner LPconvertible 9 500 BTU SealedBurner LPconvertible 16 000 BTU Sealed Burner LPconvertible 5 000 BTU SealedBurner LPconvertible Convection Rack ...

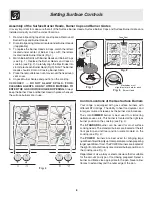
Page 8: ...rear somemodels burnerpositionson the cooktop see Fig 4 Regardless of size always select cookware that is suitable for the amount and type of food being prepared Select a burner and flame size appropriate to the pan Never allow flames to extend beyond the outer edge of the pan 1 Remove all packing tape from cooktop area Remove all Burner Caps and Burner Heads 2 Discardallpackingmateriallocatedunde...

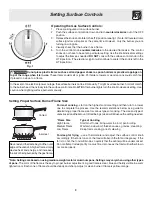
Page 9: ...ting surface burners manually Fig 1 Setting Proper Surface Burner Flame Size For most cooking start on the highest control setting and then turn to a lower one to complete the process Use the recommendations below as a guide for determining proper flame size for various types of cooking The size and type of utensilusedandtheamountoffoodbeingcookedwillinfluencethesettingneeded Flame Size Type of Co...

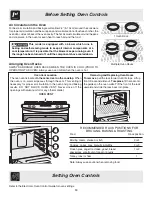
Page 10: ...ulation and baking results allow 2 4 5 10 cm around the cookware forproperaircirculationandbesurepansandcookwaredonottoucheachother the ovendoor sidesorbackoftheovencavity Thehotairmustcirculatearoundthepans and cookware in the oven for even heat to reach around the food This model is equipped with a blower which runs in baking and self cleaning mode to keep all internal components at a cool tempe...

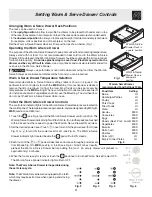
Page 11: ...Warm Serve DrawerTemperature Selection Recommended Warm Serve Drawer settings table is shown in Figure 2 If a particular food is not listed start with the MED setting If more crispness is desired remove the lid or aluminum foil from the food Most foods can be kept at serving temperatures on the MEDsetting Whenacombinationoffoodsaretobekeptwarm forinstance meatwith2vegetablesandrolls usetheHIsettin...

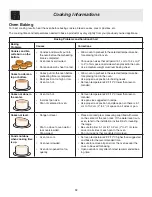
Page 12: ...fore placing food in oven Choose pan sizes that will permit 5 1 cm to 10 2 cm 2 to 4 of air space on all sides when placed in the oven Use a medium weight aluminum baking sheet Allow oven to preheat to the selected temperature be fore placing food in the oven Use proper rack position for baking needs Set oven temperature 25 F 12 C lower than recom mended Set oven temperature 25 F 12 C lower than r...

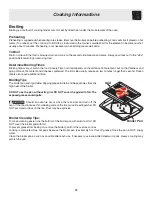
Page 13: ...The first side usually requires a few minutes longer than second Frozen meats also require additional time BroilingTips The broiler pan and it grid allow dripping grease to drain and be kept away from the high heat of the broiler DO NOT use the pan without its grid DO NOT cover the grid with foil The exposed grease could ignite Should an oven fire occur close the oven door and turn off the oven If...

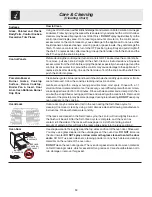
Page 14: ...inthedishwasheranddryuponremoval Ifsoils are not removed follow the cooktop cleaning instructions below Gentle scouring with a soapy scouring pad will remove most spots Rinse with a 1 1 solutionofclearwaterandammonia Ifnecessary coverdifficultspotswithanammonia soaked paper towel for 30 to 40 minutes Rinse with clean water and a damp cloth then scrub with a soap filled scouring pad Rinse and wipe ...

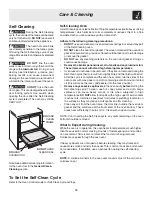
Page 15: ...dull After the cycle is complete and the oven has cooled rub the sides of the oven racks with wax paper or a cloth containing a small amount of salad oil this will make the racks glide easier into the rack position Remove any excessive spillovers in the oven cavity before starting the Self Cleaning cycle To clean use hot soapy water and a cloth Large spillovers can cause heavy smoke or fire when s...

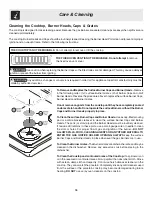
Page 16: ...e gas Burners are in use ToCleantheBurnerGrates TheBurnerGratesaredishwashersafeandmaybe cleaned in the dishwasher Remove any excessive soils before placing in the dishwasher ToCleantheCooktopandcontouredareasoftheCooktop Ifaspilloccurson or in the recessed or contoured areas blot up spill with an absorbent cloth Rinse with a clean damp cloth and wipe dry Do not use harsh abrasive cleaners on the ...

Page 17: ...lly over the hooks 3 Grab the door by the sides pull the bottom of the door up and toward you to disen gage the hinge supports Keep pulling the bottom of the door toward you while rotating the top of the door toward the range to completely disengage the hinge levers Figure 2 4 To clean oven door follow the instructions provided in the General Care Cleaning table To Replace Oven Door 1 Grab the doo...

Page 18: ...oven control guide Care Cleaning Electrical Shock Hazard can occur and result in serious injuryordeath Disconnectappliancefromelectricpowerbeforecleaning and servicing the warm Serve drawer Removing and Replacing Warm Serve Drawer To Remove Warm Serve Drawer 1 Turn power off before removing the warm Serve drawer 2 Open the drawer to the fully opened position 3 Locate glide lever on each side of dr...

Page 19: ...f you feel the oven is too hot or cool see Recalibrating Your Oven Temperature section in the Electronic Oven Control Guide 1 A cooling fan may automatically turn on and off to cool internal parts It is normal and the fan may continue to run even after oven is turned off 1 Excessive spillovers in oven Set self clean cycle for a longer cleaning time 2 Excessive spillovers in oven This is normal esp...

Page 20: ...ice companies or external causes such as abuse misuse inadequate power supply accidents fires or acts of God DISCLAIMER OF IMPLIED WARRANTIES LIMITATION OF REMEDIES CUSTOMER S SOLE AND EXCLUSIVE REMEDY UNDER THIS LIMITED WARRANTY SHALL BE PRODUCT REPAIR OR REPLACEMENT AS PROVIDED HEREIN CLAIMS BASED ON IMPLIED WARRANTIES INCLUDING WARRANTIES OF MERCHANTABILITY OR FITNESS FOR A PARTICULAR PURPOSE A...

Reviews: