background image

26

SETTING OVEN CONTROLS

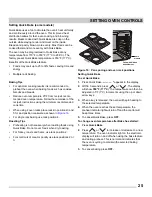
Setting Bake Time

The 

Bake Time

 key sets the amount of time needed for 

baking. The oven will turn on immediately and stop auto-
matically after the set bake time ends.

To program the oven to begin baking immediately and 
to shut off automatically (timed bake):

1.

Be sure the clock is set to the correct time of day.

2.

Place the food in the oven.

3.

Press 

Bake

— — — °

 appears in the display.

4.

Within 5 seconds, press 

 or 

. The display 

will show 

350°F 

(

177°C

). The temperature can then be 

adjusted in 5°F (1°C) increments,

5.

Press 

Bake Time

.

0

:

00

 will appear in the display.

6.

Press 

 or 

 until the desired baking time 

appears in the display.

7.

The oven will turn on and begin heating. 

When the set bake time runs out:

1. End

 will appear in the display, and the oven will shut off 

automatically.

2.

The control will beep three times every 60 seconds as a 
reminder until 

OFF 

is pressed.


Setting Start Time (delayed start)

Use the 

Start Time

 key to delay the starting time (delayed 

timed bake). The oven will turn on at a later time and stop 
automatically after the set bake time ends.

To program oven for a delayed start time and to shut-off 
automatically:

1.

Be sure that the clock displays the correct time of day.

2.

Place food in the oven.

3.

Press 

Bake. — — — °

 appears in the display. Within 5 

seconds, press 

 or 

. The display will show 

350°F

 (

177°C

). The temperature can then be adjusted 

in 5°F (1°C) increments.

4.

Press 

Bake Time

0:00

 will appear in the display.

5.

Press 

 or 

until desired baking time appears.

6.

Press 

Start Time

. The time of day will appear in the 

display.

7.

Press 

 or 

 until the desired start time 

appears in the display.

8.

Once the controls are set, the control calculates the 
time when baking will stop. The oven will turn on at the 
delayed start time and begin heating.

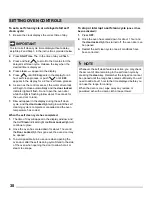
To change the oven temperature (or bake time) after 
baking has started:

1.

Press the function you want to change.

2.

 Press 

 or 

 to adjust the setting.


Bake Time will not operate when using the broil feature.

Once the controls are set, the oven will come on and 
begin heating to the selected baking temperature. The 
oven temperature (or time of day) will show in the display.

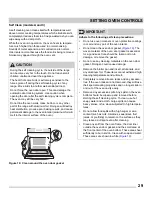
NOTE

Food Poisoning Hazard. Do not let food sit for more than 
one hour before or after cooking. Doing so can result in 
food poisoning or sickness. 

During a delayed timed bake, the preheat indicator light 
will not function until the set time to start cooking is 
reached.

CAUTION

NOTE

Summary of Contents for CFEF3054US

Page 1: ...ecord and Registration 2 Important Safety Instructions 3 Cooking Recommendations 9 Before Setting Surface Controls 12 Setting Surface Controls 15 Before Setting Oven Controls 19 Setting Oven Controls 20 Care and Cleaning 33 Before You Call 39 Warranty 44 ...

Page 2: ...ation Serial plate location open lower oven drawer some models or storage drawer some models PRODUCT RECORD AND REGISTRATION Thank you for choosing Frigidaire Important This Use and Care Guide is part of our commit ment to customer satisfaction and product quality throughout the service life of your new appliance We view your purchase as the beginning of a relationship To ensure our ability to con...

Page 3: ...r serious injury Indicates a potentially hazardous situation which if not avoided may result in minor or moderate injury Indicates installation operation maintenance or valuable information that is not hazard related Indicates a short informal reference something written down to assist the memory or for future reference WARNING CAUTION IMPORTANT NOTE WARNING Tip Over Hazard A child or adult can ti...

Page 4: ...ance with the National Fuel Gas Code ANSI Z223 1 NPFA No 54 latest edition and National Electrical Code NFPA No 70 latest edition and local electrical code requirements In Canada install in accordance with CAN CGA B149 1 and CAN CGA B149 2 and CSA Standard C22 1 Canadian Electrical code Part 1 latest editions and local electrical code requirements Install only per installation instructions provide...

Page 5: ...he appliance 240V grounded wall receptacle Power supply cord with 4 prong grounding plug WARNING Do not leave children alone Children should not be left alone or unattended in the area where appliance is in use They should never be allowed to sit or stand on any part of the appliance including the storage drawer lower broiler drawer warmer drawer or lower double oven Do not store items of interest...

Page 6: ...earing grill is not designed for use on the cooktop Doing so may result in a fire When you are flaming foods under a ventilating hood turn on the fan When heating fat or grease watch it closely Grease may catch fire if it becomes too hot Do not use water or flour on grease fires Smother fire or flame or use dry chemical or foam type extinguisher Cover the fire with a pan lid or use baking soda Use...

Page 7: ... is on may cause severe burns Do not place plastic or heat sensitive items on or near the oven vent These items can melt or ignite Placement of oven racks Always place oven racks in desired location while oven is cool If rack must be moved while oven is hot do not let potholder contact hot burner or element in oven Use potholders and grasp the rack with both hands to reposition Remove all cookware...

Page 8: ...he manuals All other servicing should be done only by a qualified technician This reduces the risk of personal injury and damage to the appliance Always contact your dealer distributor service agent or manufacturer about problems or condi tions you do not understand Ask your dealer to recommend a qualified techni cian and an authorized repair service Know how to disconnect the power to the applian...

Page 9: ...ware Dark bakeware cooks hotter than shiny bakeware Reduce the cooking temperature by 25 F 13 14 C when using dark bakeware Glass bakeware Glass bakeware cooks hotter than shiny bakeware Glass is convenient as the same piece of bakeware can be used for cooking serving and storing food Reduce the cooking temperature by 25 F 13 14 C when using glass bakeware Insulated bakeware Insulated bakeware coo...

Page 10: ...vaporation Increase bake time or oven temperature Reduce amount of baking soda or baking powder in recipe Reduce rising time or punch down dough and allow it to rise twice Cooking Results Small adjustments may fix a problem with food not being as done as you like or more done than you like Result Recommendation Food too light Use the middle to maximum cook time recommended on packaging or recipe F...

Page 11: ...rature for convection broil is not recommended Broiling is direct heat cooking and will produce some smoke If smoke is excessive move the food farther from the broiler element Convection roast Convection roast is best for meats and does not require preheating for most meats and poultry Reducing the cooking temperature for convection roast is not recommended Carefully follow your recipe s temperatu...

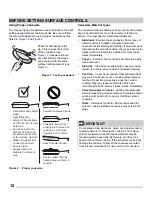
Page 12: ... will vary depending on base material Porcelain enamel coating must be smooth to avoid scratching ceramic cooktops Glass Slow heat conductor Not recommended for ceramic cooktop surfaces because it may scratch the glass Check for flatness by rotat ing a ruler across the bottom of the cookware see Figure 1 Cookware should have flat bottoms that make good contact with the entire surface heating eleme...

Page 13: ... directly on the smoothtop surface without a cooking utensil is not recommended as difficult cleaning will result and foods may smoke and cause potential fire hazard Always lift cookware before moving on the ceramic glass cooktop Any cookware that has a rough or dirty bottom can scratch the ceramic cooktop Always start with clean cookware White glass cooktops only Due to the high intensity of heat...

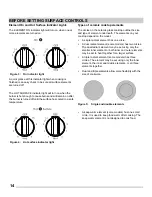
Page 14: ...underneath The elements on your cooktop depend on the model A single radiant element has one circle A dual radiant element some models has two circles The dual radiant element may be set using only the smaller inner element or both inner and outer elements may be set to heat together for a larger surface A triple radiant element some models has three circles The element may be set using only the i...

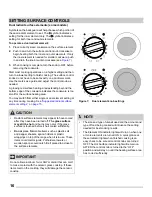
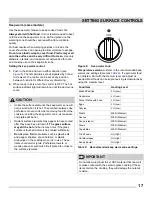
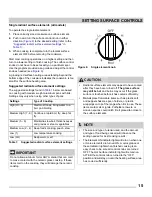
Page 15: ...r steam vegetables Medium Low 2 4 Keep foods cooking poach stew Low 1 Low temperature cooking Low LO Keep warm melt Table 1 Suggested radiant surface element settings Do not allow aluminum foil or ANY material that can melt to make contact with the ceramic glass cooktop If these items melt on the cooktop they will damage the ceramic cooktop IMPORTANT Figure 6 Single element knob Radiant surface el...

Page 16: ...ng at any time during cooking See Suggested radiant surface element settings on page 15 Radiant surface elements may appear to have cooled after they have been turned off The glass surface may still be hot and burns may occur if the glass surface is touched before it has cooled sufficiently Do not place flammable items such as plastic salt and pepper shakers spoon holders or plastic wrappings on t...

Page 17: ...st foods can be kept at serving temperatures by using the medium level Unlike the surface elements the keep warm zone will not glow red when it is hot To avoid burns always use potholders or oven mitts when removing food from the cooktop including the keep warm zone as cookware and plates will be hot Radiant surface elements may appear to have cooled after they have been turned off The glass surfa...

Page 18: ...eter of the canner does not exceed 1 inch beyond the surface element markings or burner It is recommended to use smaller diameter canners on electric coil and ceramic glass cooktops and to center canners on the burner grates Start with hot tap water to bring water to boil more quickly Use the highest heat seating when first bringing the water to a boil Once boiling is achieved reduce heat to lowes...

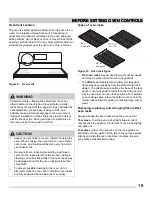
Page 19: ...y and slide out To replace Place the oven rack on the rack guides on both sides of oven walls Tilt the front of oven rack upward slightly and slide the oven rack back into place Be sure oven racks are level before using Figure 9 Oven vent Protective Liners Do not use aluminum foil or any other material or liners to line the oven bottom walls racks or any other part of the range Doing so will alter...

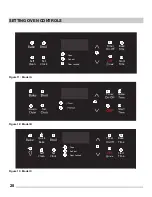
Page 20: ...ck Start Time Timer Oven Preheat Door Locked Self Clean OFF Hold 6 1 2 3 4 5 6 7 8 9 10 11 12 1 2 4 5 6 8 9 10 11 12 15 Bake Time Set Clock Bake Broil Self Clean Start Time Quick Bake Timer On Off Oven Preheat Door Locked OFF Hold 6 1 2 3 4 5 6 7 8 9 10 11 12 13 14 SETTING OVEN CONTROLS ...

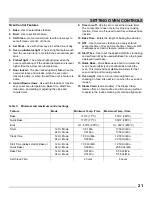
Page 21: ...e to clear any feature previously entered except the time of day and minute timer Also use OFF to activate oven lockout feature some models 12 Start Time Use to set the desired start time for baking and self clean May be used with Bake Time to program a delayed timed bake 13 Quick Bake Quick Bake uses a fan to circulate the oven s heat uniformly and continuously around the oven This improved heat ...

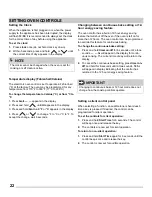
Page 22: ... the oven is left on for more than 12 hours The oven control can be programmed to override this feature for continuous baking To change the continuous bake setting 1 Press and hold timer on off for 6 seconds until a tone sounds hr will appear in the display for contin uous cooking The current time of day will return to the display 2 To cancel the continuous bake setting press timer on off and hold...

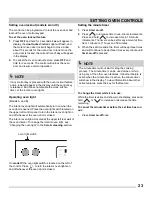
Page 23: ...ed on the left of the control Press to turn the interior oven lights on and off whenever the oven door is closed Setting the minute timer 1 Press timer on off 2 Press to increase time in one minute increments Press and hold to increase time in 10 minute increments The timer can be set for any amount of time from 1 minute to 11 hours and 59 minutes 3 When the set time ends the timer will beep three...

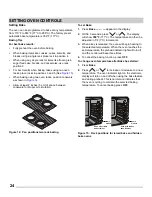
Page 24: ...rs in the display 2 Within 5 seconds press or The display will show 350 F 177 C The temperature can then be adjusted in 5 F 1 C increments 3 When a key is released the oven will begin heating to the selected temperature When the oven reaches the set temperature the preheat indicator light will turn off and the control will beep three times 4 To cancel the baking function press OFF To change oven t...

Page 25: ...r and position cookware as shown in Figure 16 For single rack baking use rack position 4 Roasting Tips Preheating is not necessary when roasting foods using Quick Bake Do not cover foods when dry roasting For Turkey roasts and hams use rack position 2 For small cuts of meat or poultry use rack positions 2 or 3 Setting Quick Bake To set Quick Bake 1 Press Quick Bake appears in the display 2 Within ...

Page 26: ...yed start time and to shut off automatically 1 Be sure that the clock displays the correct time of day 2 Place food in the oven 3 Press Bake appears in the display Within 5 seconds press or The display will show 350 F 177 C The temperature can then be adjusted in 5 F 1 C increments 4 Press Bake Time 0 00 will appear in the display 5 Press or until desired baking time appears 6 Press Start Time The...

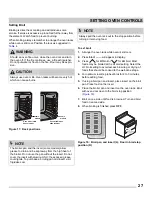
Page 27: ...ack Broil with oven door open to the broil stop position Figure 18 7 Broil on one side until food is browned Turn and broil food on second side 8 When broiling is finished press OFF Should an oven fire occur close the oven door and turn the oven off If the fire continues use a fire extinguisher Do not put water or flour on the fire Flour may be explo sive Always use oven mitts Oven racks will beco...

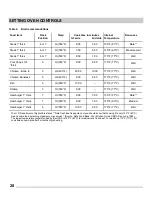
Page 28: ... 8 00 6 00 170 F 77ºC Well Fish 6 HI 550 F 13 00 170 F 77ºC Well Shrimp 5 HI 550 F 5 00 170 F 77ºC Well Hamburger 1 thick 7 HI 550 F 6 00 5 00 135 F 57 C Rare Hamburger 1 thick 7 HI 550 F 9 00 7 00 145ºF 63ºC Medium Hamburger 1 thick 6 HI 550 F 10 00 8 00 170 F 77ºC Well The U S Department of Agriculture states Rare fresh beef is popular but you should know that cooking it to only 140 F 60 C means...

Page 29: ...lean around the oven door gasket CAUTION Adhere to the following self clean precautions Do not use oven cleaners or oven protective coatings in or around any part of the oven interior Do not clean the oven door gasket Figure 19 The woven material of the oven door gasket is essential for a good seal Care should be taken not to rub damage or remove the gasket Do not use any cleaning materials on the...

Page 30: ...ar in the display window and the Self Clean indicator light and Door Locked light will continue to glow 2 Once the oven has cooled down for about 1 hour and the Door Locked light has gone out the oven door may be opened 3 To avoid possible burns use care when opening the oven door after the self cleaning cycle Stand to the side of the oven when opening the door to allow hot air or steam to escape ...

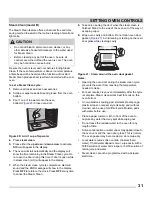
Page 31: ... oven cavity and bottom Do not clean oven door gasket Figure 21 Avoid leaning or resting on the oven door glass while cleaning cavity Notes Opening the oven door during the steam clean cycle prevents the water from reaching the temperature needed to clean For best results clean oven immediately after the cycle is complete Steam clean works best for soils on the oven bottom A non abrasive scouring ...

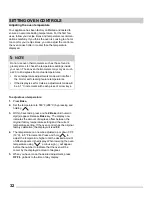
Page 32: ...ing If the oven control has the original factory calibration the display will read 00 4 The temperature can now be adjusted up or down 35 F 19 C in 5 F increments Press and hold to adjust the temperature higher until the desired amount of offset appears in the display When lowering the oven temperature using a minus sign will appear before the number to indicate that the oven will be cooler by the...

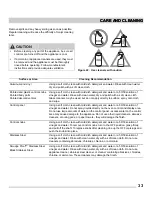
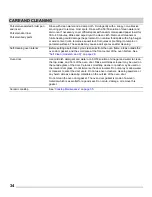
Page 33: ...tergent and water or a 50 50 solution of vinegar and water Do not spray liquids directly on the oven control and display area Do not use large amounts of water on the control panel excess water on the control area may cause damage to the appliance Do not use other liquid cleaners abrasive cleaners scouring pads or paper towels they will damage the finish Control knobs Using a soft cloth clean with...

Page 34: ...fore setting a self clean cycle clean soils from the oven frame areas outside the oven door gasket and the small area at the front center of the oven bottom See Self Clean models A and C on page 29 Oven door Use mild dish detergent and water or a 50 50 solution of vinegar and water to clean the top sides and front of the oven door Rinse well Glass cleaner may be used on the outside glass of the do...

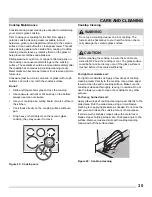
Page 35: ...top surface without a pan Drop heavy or hard objects on the ceramic glass cooktop they may cause it to crack Cooktop Cleaning For light to moderate soil For light to moderate soil Apply a few drops of cooktop cleaning cream directly to the cooktop Use a clean paper towel to clean the entire cooktop surface Make sure the cooktop is cleaned thoroughly leaving no residue Do not use the towel you use ...

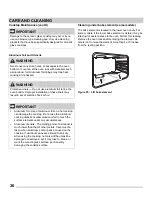
Page 36: ...oven rack with materials such as aluminum foil Aluminum foil linings may trap heat causing a fire hazard Protective Liners Do not use aluminum foil to line the oven bottom Improper installation of these liners may result in risk of electric shock or fire Aluminum foil Use of aluminum foil on a hot cooktop can damage the cooktop Do not use thin aluminum cooking utensils or allow aluminum foil to to...

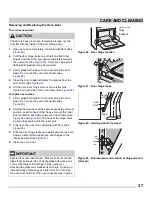
Page 37: ...roller pins located on each side of the oven door frame See Figure 28 and Figure 29 The hook of the hinge arms must be fully seated onto the roller pins 3 Fully open the oven door horizontal with floor See Figure 26 4 Push the door hinge locks up towards and into the oven frame on both left and right oven door hinges to the locked position See Figure 27 5 Close the oven door The door is heavy For ...

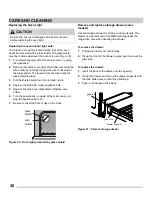
Page 38: ...r back on again at the main source or plug the appliance back in 7 Be sure to reset the time of day on the clock Remove and replace storage drawer some models Use the storage drawer for storing cooking utensils The drawer can be removed to facilitate cleaning under the range Use care when handling the drawer To remove the drawer 1 Pull empty drawer out until it stops 2 Tilt up the front of the dra...

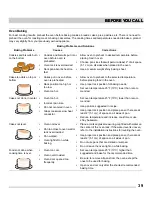
Page 39: ...13 C lower than recom mended Cakes not done in center Oven too hot Incorrect pan size Pan not centered in oven Glass cookware slow heat conductor Set oven temperature 25 F 13 C lower than recom mended Use pan size suggested in recipe Use proper rack position and place pan so there are at least 2 5 1 cm of space on all sides of pan Reduce temperature and increase cook time or use shiny bakeware Cak...

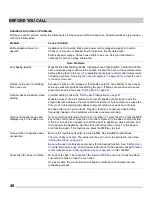
Page 40: ...ition the broil pan to provide proper clearance between the meat and broil element or burner Remove excess fat from meat Cut remaining fatty edges to prevent curling but do not cut into lean Grease build up on oven surfaces Regular cleaning is necessary when broiling frequently Grease or food splatters will cause excessive smoking Oven control panel beeps and displays any F or E code error Oven co...

Page 41: ...n the cooktop Sliding or scraping of metal utensils on cooktop surface Do not slide metal utensils on the cooktop surface Apply cooktop cleaning creme to the ceramic surface Buff with a non abrasive cloth or sponge For more information see Cooktop Mainte nance on page 35 Brown streaks or specks on cooktop surface Boil overs are cooked onto the surface When cooktop is cool use a razor blade scraper...

Page 42: ...ge appear not level Be sure cabinets are square and have sufficient room for appliance clearance Cannot move appliance easily Appliance must be accessible for service Cabinets not square or are built in too tightly Contact the builder or installer to make the appliance accessible Carpet interferes with appliance Provide sufficient space so the appliance can be lifted over carpet Installation over ...

Page 43: ...43 BEFORE YOU CALL ...
Page 44: ...ersons other than authorized service companies or external causes such as abuse misuse inadequate power supply accidents fires or acts of God CUSTOMER S SOLE AND EXCLUSIVE REMEDY UNDER THIS LIMITED WARRANTY SHALL BE PRODUCT REPAIR OR REPLACEMENT AS PROVIDED HEREIN CLAIMS BASED ON IMPLIED WARRANTIES INCLUDING WARRANTIES OF MERCHANTABILITY OR FITNESS FOR A PARTICULAR PURPOSE ARE LIMITED TO ONE YEAR ...

Reviews: