background image

Summary of Contents for CFEF311GSA

Page 1: ...800 668 4606 Canada Oven Controls 6 7 Genera_ Care C_eaning 8 10 Before You Call Solutions to Common Problems 11 Warranty Back Page Visit the Frigidaire Web Site at http flwww frigidaire com u READ AND SAVE THESE INSTRUCTIONS pin 316460400 0602 ...

Page 2: ...CaUse bodily injury or properiy damage Circuit Protection As a protection against surcharge a 15 amp 120 volt breaker is provided for the electric outlet The electrical outlet is located on top of the control panel Models with no electric outlet have no breaker Remove all tape and packaging before using the range Destroy the carton and plastic bags after unpacking the range Never allow children to...

Page 3: ...ng soda a dry chemical or foamotype extinguisher When heating fat or grease watch it closely Fat or grease may catch fire if allowed to become too hot Use Only Dry Potholders hioist or damp potholders on hot surfaces may result in burns from steam Do not let potholders touch hot heating elements Do not use a towel or other bulky cloth instead of a potholdeR Do Not Heat Unopened Food Containers Bui...

Page 4: ...ean Ventilating Hoods Frequently Grease should not be allowed to accumulate on the hood or filter Fol ow manufacturer s instructions for cleaning CO_L COOK TOP MODELS Make Sure Reflector Pans or Drip Bowls Are in Pmace Absence of these pans or bowls during cooking may subject wiring or components underneath to damage Protective Liners Do not use aluminum foil to line surface unit drip bowls or ref...

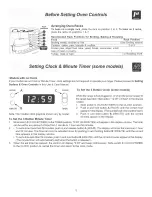
Page 5: ...rupted 12 00 will flash in the display window 1 Slide switch C CLOCK TIMER to the CLOCK position 2 Push in and hold button A HOUR until the correct hour appears inthe display The numbers will only count fop yard 3 Push in and hold button B MINUTE until the correct minutes appear in the display Slide switch C CLOCK TIMER to the TIMER position 0 59 59 MINUTES will appear in the display window The ti...

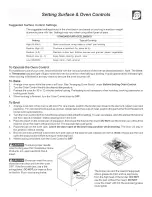
Page 6: ...he clock operation To Operate the Surface Elements 1 Place cooking utensil on the surface element 2 Push in and turn the surface control knob in either direction See Fig 1 to the desired setting Start most cooking operations on a higher setting and then turn to a lower setting to finish cooking The control knobs do not have to be set exactly on a particular setting Use the settings as a guide and ...

Page 7: ... rare meats position the broiler pan closer to the element upper oven rack positions For well done foods such as chicken lobster tails or thick cuts of meat position the pan further from the element ower oven rack positions 2 Turn the Oven Contro to Broil Most foods can be broi ed at the Broil setting To sear rare steaks a ow the element to become red hot about 2 minutes before p acing food in the...

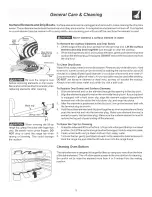
Page 8: ...e all cleaners or the porcelain may become damaged during future heating DO NOT use spray oven cleaners on the range top Oven Racks Oven Door Stainless Steel some models Remove oven racks See Removing Replacing Oven Racks under Before Setting Oven Controls Use a mild abrasive cleaner following the cleaner s recommendations Rinse with clean water let dry After cleaning the racks rub the sides of th...

Page 9: ...soft cloth To Replace Drip Bowls and Surface Elements 1 Slide the terminal end on the element through the opening in the drip bowl 2 Align the element support to rest on the rim inside the drip bowl Ifyour drip bowl is equipped with a hold down clip align the element support opposite the terminal end with the slot in the hold down clip and snap into place 3 After the element is positioned in the d...

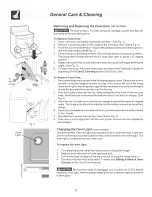
Page 10: ...s or chip the porcelain finish on the oven front frame 2 Hold door at the sides near the top while resting the lower front of door on your knee Insert the door channels at the bottom of door over the door hinges See Fig 3 3 Allow the door to slide down into the door hinges evenly at the same 45 degree angle The hinge arms should be inserted into the bottom corners as far as they can go 4 Open door...

Page 11: ...rate in this checklist Oven light does not work some models o Replace or tighten bulb See Changing Oven Light section in this Use Care Manual Oven smokes excessively durin_ o 1 Contro s not set properly Follow Broil instructions under Setting Oven Controms 2 Make sure oven door is opened to broil stop position 3 Meat too close to the broil element Reposition the broil rack to provide proper cleara...

Page 12: ...s other than authorized service companies or external causes such as abuse misuse inadequate power supply accidents fires or acts of God DISCLAIMER OF IMPLIED WARRANTIES LIMITATION OF REMEDIES CUSTOMER S SOLEAND EXCLUSIVE REMEDY UNDER THIS LIMITED WARRANTY SHALL BE PRODUCT REPAIR OR REPLACEMENTAS PROVIDED HEREIN CLAIMS BASED ON IMPLIED WARRANTIES INCLUDING WARRANTIES OF MERCHANTABILITY OR FITNESS ...

Reviews: