background image

8

30" ELECTRIC SLIDE-IN RANGE INSTALLATION INSTRUCTIONS

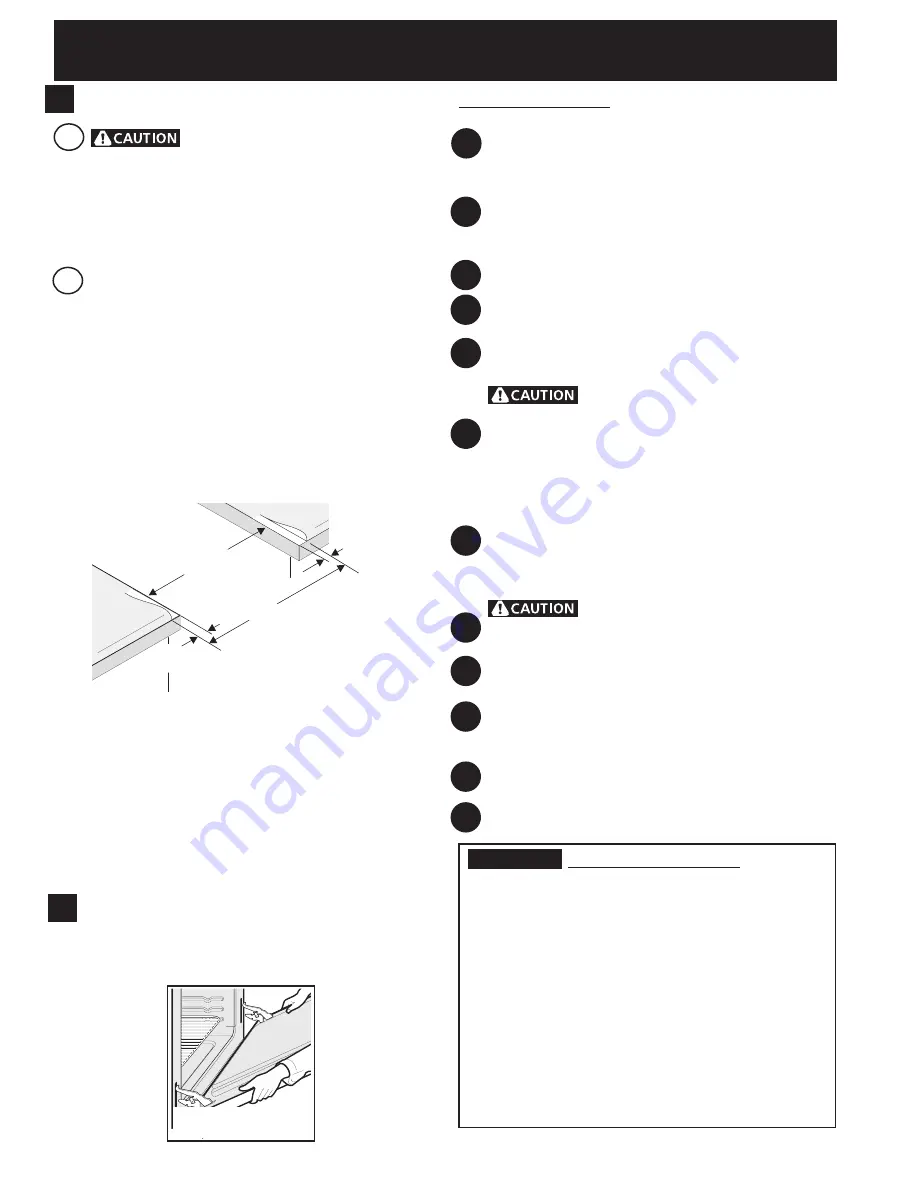
¾”

(1.9 cm)

¾”

(1.9 cm)

31½”

(81 cm)

Min. 

Cutout 

Width

Formed or tile countertop 

trimmed ¾" (1.9 cm) back at 

front corners of countertop 

opening.

Figure 7


 To eliminate the risk of burns or 

fire by reaching over heated surface units, do not 
have cabinet storage space above the range.  If there 
is cabinet storage space above range, reduce risk by 
installing a range hood that projects horizontally a 
minimum of 5" (12.7 cm) beyond the bottom of the 
cabinet.

       Countertop Preparation

• The cooktop sides of the range fit over the cutout 

edge of your countertop.

• If you have a 

square finish (flat) countertop

, no 

countertop preparation is required. Cooktop sides lay 
directly on edge of countertop.

• Formed front-edged countertops 

must have molded 

edge shaved flat 3/4" (1.9 cm) from each front corner 
of opening (Figure 7).

• Tile countertops

 may need trim cut back 3/4"(1.9 

cm) from each front corner and/or rounded edge 
flattened (Figure 7).

• Countertop must be level.

 Place a level on the 

countertop, first side to side, then front to back. If 
the countertop is not level, the range will not be level. 
The oven must be level for satisfactory baking results. 
Cooktop sides of range fit over edges of countertop 
opening

4.1

4.

 Cabinet Construction

4.2

• If the existing cutout width is greater than 
  3 0   1 / 1 6 "   ( 7 6 , 4   c m ) ,

  re d u c e   t h e   ¾ "   ( 1 . 9   c m ) 

dimension.

Standard Installation

The range cooktop overlaps the countertop at the 
sides and the range rests on the floor. The cooktop is 
31½" (80 cm) wide.
Install base cabinets 30" (76.2 cm) apart. Make sure 
they are plumb and level before attaching cooktop. 
Shave raised countertop edge to clear 31½" (80 cm) 
wide range top rim.
Install cabinet doors 31" (78.7 cm) min. apart so as 
not to interfere with range door opening.
Cutout countertop exactly as shown on page 1.
Make sure the four leveling legs (front and rear) are 
setup higher than the height of the cabinet (shown 
on page 3).


Install  the  anti-tip  bracket  at 

this point before placing the range at its final 
position. 

Follow the installation instructions at the 

last page or on the anti-tip bracket template supplied 
with the range.
To provide an optimum installation, the top surface 
of the countertop must be level and flat (lie on the 
same plane) around the 3 sides that are adjacent to 
range cooktop. Proper adjustments to make the top 
flat should be made or gaps between the countertop 
and the range cooktop may occur. 

 To reduce the risk of damaging your 

appliance, do not handle or manipulate it by the 
cooktop. Manipulate with care.
Position range in front of the cabinet opening.
Make sure that the underside of the cooktop clears 
the countertop. If necessary, raise the unit by lowering 
the leveling legs.

Level the range 

(see section 6). The floor where 

the range is to be installed must be level. Follow the 
instructions under "Leveling the Range".
Slide the range into the cutout opening.

IMPORTANT


If Accessories Needed :

Installation With Backguard

The cutout depth of (21 3/4" (55.2 cm)Min., 22 1/8" 
(56.2cm) Max.) needs to be increased to 24" (61 cm) 
when installing a backguard.

Installation With End Panel

A End Panel kit can be ordered through a Service 
Center. 

Installation With Side Panels

A Side Panels kit can be ordered through a Service 
Center. Note: Install cabinet doors 32" (81.3 cm) min. 
apart so as not to interfere with range door opening.

5.

 Range Installation

Important Note: 

Door removal is not a requirement for 

installation of the range, but is an added convenience. 
Refer to the Use and Care Guide for oven door removal 
instructions.

1

2

3

4

5

6

7

8

9

10

11

12

Summary of Contents for CPES3085KF

Page 1: ...aces should be flat leveled hatched area Do not install the unit in the cabinet before reading next two pages INSTALLATION AND SERVICE MUST BE PERFORMED BY A QUALIFIED INSTALLER IMPORTANT SAVE FOR LOCAL ELECTRICAL INSPECTOR S USE READ AND SAVE THESE INSTRUCTIONS FOR FUTURE REFERENCE FOR YOUR SAFETY Do not store or use gasoline or other flammable vapors and liquids in the vicinity of this or any ot...

Page 2: ...hing into it Raise leveling legs at a higher position than the cabinet height see page 3 insert the appliance in the counter and then level Make sure the unit is supported by the leveling legs and NOT by the cooktop itself flame retardant millboard covered with not less than No 28 MSG sheet metal 0 015 0 4 mm stainless steel 0 024 0 6 mm aluminum or 0 020 0 5 mm copper 30 76 2 cm minimum clearance...

Page 3: ... of the counter H1 H2 H3 H4 Illustration 1 Shave Raised Edge to Clear Space for a 31 81 cm Wide Cooktop 1 Max 3 8 cm Max Remove the protective channels on each side of the glass cook top if provided Slide the unit into the cabinet Make sure the center of the unit is aligned with the center of the cabinet cut out Illustration 2 To successfully install the range the initial level height from floor t...

Page 4: ...om temperature without shrinking warping or discoloring Do not install the range over carpeting unless you place an insulating pad or sheet of 0 64 cm thick plywood between the range and carpeting Never leave children alone or unattended in the area where an appliance is in use As children grow teach them the proper safe use of all appliances Never leave the oven door open when the range is unatte...

Page 5: ... or loss of electrical connection may occur 3 Access to Terminal Block Grounding Strap U S A Electrical Shock Hazard Electrical ground is required on this appliance Do not connect to the electrical supply until appliance is permanently grounded Disconnect power to the circuit breaker or fuse box before making the electrical connection This appliance must be connected to a grounded metallic permane...

Page 6: ...re Copper Wire To 240 V Receptacle A User Supplied Strain relief Must Be Installed at This Location Black Wire 1 1 8 2 9cm Dia Direct Connection Hole Punch Out Knockout for 1 3 8 3 5cm Dia Cord Kit Hole NOTE Be sure to remove the supplied grounding strap Figure 4 4 Electrical Connection to the Range U S A Three Conductor Wire Connection to Range If local codes permit connection of the frame ground...

Page 7: ...es together Figure 5 3 Wire Grounded Neutral Electrical System Example Junction Box Cable from Residence Junction Box White Wire U L listed Conduit Connector or CSA listed Cable from Appliance Green or Bare Copper Wire Red Wires Neutral white Wire Black Wires NOTE Be sure to remove the supplied grounding strap Where local codes DO NOT permit connecting the appliance grounding conductor to the neut...

Page 8: ...et doors 31 78 7 cm min apart so as not to interfere with range door opening Cutout countertop exactly as shown on page 1 Make sure the four leveling legs front and rear are setup higher than the height of the cabinet shown on page 3 Install the anti tip bracket at this point before placing the range at its final position Follow the installation instructions at the last page or on the anti tip bra...

Page 9: ... and the convection fan will turn The convection fan will stop turning when the oven door is opened during convection baking or roasting Warmer Drawer some models Set the control knob to HI and check to see the drawer is heating When All Hookups are Complete Make sure all controls are left in the OFF position Model and Serial Number Location The serial plate is located on the oven front frame behi...

Page 10: ... You may also grasp the top rear edge of the range and carefully attempt to tilt it forward to make sure range is properly anchored Figure 10 Figure 9 Back Edge of Range or Rear Wall Anti Tip Bracket Anti Tip Bracket Slide Back Leveling Leg Raise Lower 8 Important Safety Warning To reduce the risk of tipping of the range the range must be secured to the floor by properly installed anti tip bracket...

Reviews: