background image

6

E

IMPORTANT SAfETY INSTRUCTIONS

aBoUT FoodS

• 

Do not pop popcorn in your microwave oven unless in a special 

microwave popcorn accessory or unless you use popcorn labeled 
for use in microwave ovens.

• 

Some products such as whole eggs and sealed containers—for 

example, closed jars—will explode and should not be heated in 
this microwave oven. Such use of the microwave oven could result 
in injury.

• 

Do not boil eggs in a microwave oven. Pressure will build up inside 

egg yolk and will cause it to burst, possibly resulting in injury.

• 

Operating the microwave with no food inside for more than a 

minute or two may cause damage to the microwave oven and 
could start a fire. It increases the heat around the magnetron and 
can shorten the life of the microwave oven.

• 

Foods with unbroken outer “skin” such as potatoes, hot dogs, 

sausages, tomatoes, apples, chicken livers and other giblets, 
and egg yolks should be pierced to allow steam to escape during 
cooking.

• 

Avoid heating baby food in glass jars, even with the lid off. Make 

sure all infant food is thoroughly cooked. Stir food to distribute the 
heat evenly. Be careful to prevent scalding when warming formula 
or breast milk. The container may feel cooler than the milk really 
is. Always test the milk before feeding the baby.

• 

Spontaneous boiling—Under certain special circumstances, liquids 

may start to boil during or shortly after removal from the microwave 
oven. To prevent burns from splashing liquid, we recommend the 
following: before removing the container from the microwave oven, 
allow the container to stand in the microwave oven for 30 to 40 
seconds after the microwave oven has shut off. Do not boil liquids 
in narrownecked containers such as soft drink bottles, wine flasks 
and especially narrow necked coffee cups. Even if the container 
is opened, excessive steam can build up and cause it to burst or 
overflow.

• 

Do not defrost frozen beverages in narrow-necked bottles 

(especially carbonated beverages). Even if the container is 
opened, pressure can build up. This can cause the container to 
burst, possibly resulting in injury.

• 

Hot foods and steam can cause burns. Be careful when opening 

any containers of hot food, including popcorn bags, cooking 
pouches and boxes. To prevent possible injury, direct steam away 
from hands and face.

• 

Do not overcook potatoes. They could dehydrate and catch fire, 

causing damage to your microwave oven.

• 

Cook meat and poultry thoroughly—meat to at least an INTERNAL 

temperature of 160˚F and poultry to at least an INTERNAL 
temperature of 180˚F. Cooking to these temperatures usually 
protects against foodborne illness.

aBoUT YoUR MICRoWaVE oVEN

This Use and Care Manual is valuable: read it carefully and always 
save it for reference.
A good microwave cookbook is a valuable asset. Check it for 
microwave cooking principles, techniques, hints and recipes. 

NEVER

 use the microwave oven without the turntable and support 

nor turn the turntable over so that a large dish could be placed in 
the microwave oven. The turntable will turn both clockwise and 
counterclockwise.

alWaYS

 have food in the microwave oven when it is on to absorb 

the microwave energy.
When using the microwave oven at power levels below 100%, 
you may hear the magnetron cycling on and off. It is normal for 
the exterior of the microwave oven to be warm to the touch when 
cooking or reheating.
Condensation is a normal part of microwave cooking. Room 
humidity and the moisture in food will influence the amount of 
moisture that condenses in the microwave oven. Generally, covered 
foods will not cause as much condensation as uncovered ones. 
Ventilation openings must not be blocked.
The microwave oven is for food preparation only. It should not be 
used to dry clothes or newspapers.
All microwave ovens are rated by using the IEC Test Procedure as 
1200 watts, except for the CPLMZ209 which is 1100 watts. In using 
recipes or package directions, check food a minute or two before 
the minimum time and add time accordingly.

aBoUT MICRoWaVE CookING

• Arrange food carefully. Place thickest areas towards outside of dish.
• Watch cooking time. Cook for the shortest amount of time 

indicated and add more as needed. Food severely overcooked 
can smoke or ignite.

• Cover foods while cooking. Check recipe or cookbook for 

suggestions: paper towels, wax paper, microwave plastic wrap or 
a lid. Covers prevent spattering and help foods to cook evenly.

• Shield with small flat pieces of aluminum foil any thin areas of 

meat or poultry to prevent overcooking before dense, thick areas 
are cooked thoroughly.

• Stir foods from outside to center of dish once or twice during 

cooking, if possible.

• Turn foods over once during microwaving to speed cooking of 

such foods as chicken and hamburgers. Large items like roasts 
must be turned over at least once.

• Rearrange foods such as meatballs halfway through cooking both 

from top to bottom and from the center of the dish to the outside.

• Add standing time. Remove food from microwave oven and stir, 

if possible. Cover for standing time which allows the food to finish 
cooking without overcooking.

• Check for doneness. Look for signs indicating that cooking 

temperatures have been reached. 

  doneness signs include:

- Food steams throughout, not just at edge.
- Center bottom of dish is very hot to the touch.
- Poultry thigh joints move easily.
- Meat and poultry show no pinkness.
- Fish is opaque and flakes easily with a fork.

Summary of Contents for CPLMZ209

Page 1: ...0 TINSEB477MRR0 E Welcome Congratulations 2 Important Safety Instructions 2 7 Part Names 8 Before Operating 9 Manual Operation 9 Operating Instructions 10 14 Cleaning and Care 15 Service Call Check 15 Specifications 16 Warranty 17 Visit the Frigidaire Web Site at http www frigidaire com ...

Page 2: ...dition and situation that may occur Common sense and caution must be practiced when installing operating and maintaining any appliance Please record your model and serial numbers below for future reference Model Number ___________________________________________________________________ Serial Number ___________________________________________________________________ Purchase Date _ _______________...

Page 3: ...r surface cleaning instructions on page 15 To reduce the risk of fire in the microwave oven cavity Do not overcook food Carefully attend appliance when paper plastic or other combustible materials are placed inside the microwave oven to facilitate cooking Remove wire twist ties from paper or plastic bags before placing bag in microwave oven If materials inside the microwave oven should ignite keep...

Page 4: ...eals and sealing surfaces broken or loose door hinges and latches and dents inside the cavity or on the door If there is any damage do not operate the microwave oven and contact your dealer or ELECTROLUX AUTHORIZED SERVICER Choosing a Location for Your Microwave oven on the counter You will use the microwave oven frequently so plan its location for ease of use It s wise if possible to have counter...

Page 5: ...t is properly installed and grounded DO NOT UNDER ANY CIRCUMSTANCES CUT OR REMOVE THE GROUNDING PIN FROM THE PLUG Extension Cord If it is necessary to use an extension cord use only a 3 wire extension cord that has a 3 blade grounding plug and a 3 slot receptacle that will accept the plug on the microwave oven The marked rating of the extension cord should be AC 115 120 volt 15 amp or more Be care...

Page 6: ...borne illness About Your Microwave oven This Use and Care Manual is valuable read it carefully and always save it for reference A good microwave cookbook is a valuable asset Check it for microwave cooking principles techniques hints and recipes NEVER use the microwave oven without the turntable and support nor turn the turntable over so that a large dish could be placed in the microwave oven The t...

Page 7: ...okbooks or other items Select store and handle food carefully to preserve its high quality and minimize the spread of foodborne bacteria Keep waveguide cover clean Food residue can cause arcing and or fires Use care when removing items from the microwave oven so that the utensil your clothes or accessories do not touch the safety door latches About Utensils and Coverings It is not necessary to buy...

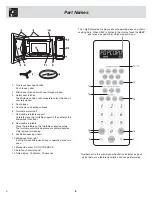
Page 8: ...owave Oven will not operate unless the door is securely closed 4 Door hinges 5 Door seals and sealing surfaces 6 Turntable motor shaft 7 Removable turntable support Carefully place the turntable support in the center of the Microwave Oven floor 8 Removable turntable Place the turntable on the turntable support securely The turntable will rotate clockwise or counterclockwise Only remove for cleanin...

Page 9: ...ET POWER LEVEL There are eleven preset power levels Using lower power levels increases the cooking time which is recommended for foods such as cheese milk and long slow cooking of meats Consult cookbook or recipes for specific recommendations TOUCH POWER LEVEL PAD NUMBER OF TIMES FOR DESIRED POWER Power Level x 1 100 High POWER LEVEL x 2 90 POWER LEVEL x 3 80 POWER LEVEL x 4 70 Medium High POWER L...

Page 10: ...a cooking hint Touch Help pad when the HELP indicator is lighted in the display Covering Foods Some foods work best when covered Use the cover recommended in the Sensor Cooking chart for these foods 1 Casserole lid 2 Plastic wrap Use plastic wrap recommended for microwave cooking Cover dish loosely allow approximately 1 2 inch to remain uncovered to allow steam to escape Plastic wrap should not to...

Page 11: ...r Cover with lid or plastic wrap After cooking stir and let stand covered for 3 minutes Cover with vented plastic wrap Touch Chicken Breast pad When microwave oven stops turn over Shield with small flat pieces of aluminum foil any areas that are cooking too rapidly Re cover and touch Start After cooking let stand covered 3 5 minutes Chicken should be 160 F Place rice into a deep casserole and add ...

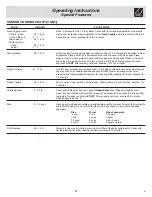
Page 12: ... CHART Fresh Rolls Beverage Frozen Rolls 1 10 pieces 5 2 0 cups 1 10 pieces FOOD AMOUNT one touch cooking ONE TOUCH COOKING allows you to cook or reheat many of your favorite foods by touching just one pad Suppose you want to heat 2 fresh rolls or muffins Touch Fresh Rolls pad 2 times The microwave oven starts automatically NOTE 1 To increase quantity touch chosen pad until number in display is sa...

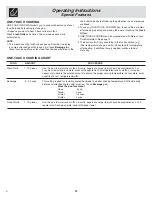
Page 13: ...Ex touch Steaks Chops then 3 and 0 for a weight of three pounds or touch Steaks Chops then 2 and 2 for a weight of 2 2 lb 5 To use any Defrost pad touch within 3 minutes after cooking opening and closing the door or touching the Clear Off pad Remove any thawed pieces after each stage Let stand covered for 5 to 10 minutes After each stage rearrange and if there are warm or thawed portions shield wi...

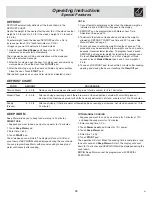
Page 14: ...imes for French KG HELP In display Whenever HELP is lighted in the Interactive Display touch Help to read cooking and operating hints MULTIPLE SEQUENCE COOKING Your microwave oven can be programmed for up to 4 automatic cooking sequences switching from one power level setting to another automatically Sometimes cooking directions tell you to start on one power level and then change to a different p...

Page 15: ...e waveguide cover is located on the ceiling in the microwave oven cavity It is made from mica so requires special care Keep the waveguide cover clean to assure good microwave oven performance Carefully wipe with a damp cloth any food spatters from the surface of the cover immediately after they occur Built up splashes may overheat and cause smoke or possibly catch fire Do not remove the waveguide ...

Page 16: ...on the nameplate means the product is listed by Underwriters Laboratories Inc This symbol on the nameplate means the product is listed by Underwriters Laboratories Inc for use in USA or Canada This microwave oven is listed by the Canadian Standard Association as certified CPLMZ209 AC Line Voltage UL Rating Single phase 120V 60Hz AC only CUL Rating Single phase 120V 60Hz AC only AC Power Required U...

Page 17: ...rom persons other than authorized service companies or external causes such as abuse misuse inadequate power supply accidents fires or acts of God DISCLAIMER OF IMPLIED WARRANTIES LIMITATION OF REMEDIES CUSTOMER S SOLE AND EXCLUSIVE REMEDY UNDER THIS LIMITED WARRANTY SHALL BE PRODUCT REPAIR OR REPLACEMENT AS PROVIDED HEREIN CLAIMS BASED ON IMPLIED WARRANTIES INCLUDING WARRANTIES OF MERCHANTABILITY...

Page 18: ......

Page 19: ...n http www frigidaire com Introducción 2 Instrucciones importantes sobre seguridad 2 7 Nombres de las piezas 8 Antes de la puesta en funcionamiento 9 Funcionamiento manual 9 Instrucciones de funcionamiento 10 14 Limpieza y cuidado 15 Especificaciones 16 Verificación de llamada de servicio 16 Garantía 17 Manual de uso y cuidado ...

Page 20: ...mente como indicado en este manual No se pretende que estas instrucciones cubran todas las situaciones y condiciones posibles que pueden ocurrir Se debe aplicar sentido común y precaución al momento de instalar operar y dar mantenimiento a cualquier electrodoméstico Por favor registre su modelo y números de serie más abajo para referencia futura Numero de modelo ___________________________________...

Page 21: ...ior del horno microondas para facilitar la cocción Retirar los alambres de amarre de las bolsas plásticas o papel antes de colocar la bolsa en el horno microondas Si los materiales en el interior del horno microondas se encienden mantener cerrada la puerta del horno microondas apagar el horno microondas y desconectar el cable de suministro de energía o cortar la energía desde el panel de fusibles ...

Page 22: ...bolladuras dentro de la cavidad o en la puerta De existir cualquier daño no operar el horno microondas y comunicarse con su distribuidor o PROVEEDOR DE SERVICIO AUTORIZADO DE ELECTROLUX CÓMO ESCOGER LA MEJOR UBICACIÓN PARA SU HORNO MICROONDAS SOBRE EL ESTANTE Usted usará su horno microondas frecuentemente es por esto que se recomienda planificar su ubicación para fácil acceso y uso Es recomendable...

Page 23: ...siempre guardar para referencia Un buen libro de recetas de cocina para hornos microondas es muy útil Consultar el mismo para obtener los principios técnicas consejos y recetas NUNCA utilizar el horno microondas sin la bandeja giratoria y soporte ni voltear la bandeja giratoria con el fin de colocar un plato grande en el horno microondas La bandeja giratoria girará tanto en sentido horario como en...

Page 24: ...0 a 40 segundos después que se haya apagado No hervir líquidos en recipientes con cuellos angostos tales como botellas de bebidas gaseosas frascos de vino y especialmente tazas de café con cuellos angostos Incluso si el recipiente está abierto se puede acumular vapor excesivo pudiendo ocasionar explosión o derrame No descongelar bebidas congeladas en botellas de cuello angosto especialmente bebida...

Page 25: ...cubiertas poner atención especial a paquetes que tuesten alimentos porque pueden estar extremadamente calientes No asumir que porque un niño ha dominado una habilidad de cocinar el ella puede cocinar cualquier alimento Los niños necesitan aprender que el horno de microondas no es un juguete Ver la página 14 para la característica de Bloqueo de seguridad INFORMACIÓN SOBRE SEGURIDAD Verificar los al...

Page 26: ...da 4 Bisagras de la puerta 5 Sellos de puerta y superficies de sellado 6 Eje motor para la bandeja giratoria 7 Soporte base para bandeja giratoria desmontable Colocar cuidadosamente el apoyo de la bandeja giratoria en el centro del piso del horno microondas 8 Bandeja giratoria desmontable Colocar la bandeja giratoria en el soporte de la misma de manera segura La bandeja giratoria rotará en sentido...

Page 27: ...tiempo de cocción lo cual es recomendable para alimentos tales como queso leche y cocción lenta y larga de carnes Consultar el libro de cocina o recetas para obtener recomendaciones específicas Suponer que desea descongelar durante 5 minutos al 30 1 Ingresar el tiempo de descongelación 5 0 0 2 Pulsar el botón Power Level 8 veces o manter presionado hasta que el nivel de potencia deseado aparezca e...

Page 28: ...haber iniciado la cocción al abrir o cerrar la puerta o al pulsar el botón Clear Off 10 Hay un consejo propio para cada alimento Pulsar el botón HELP cuando se ilumine el indicador HELP en la pantalla Cómo cubrir los alimentos Algunos alimentos presentan mejores resultados si se les cubre Usar la cubierta recomendada en la Tabla de la función SENSOR COOKING 1 Tapa de cacerola 2 Envoltura plástica ...

Page 29: ...r y dejar reposar cubierto por 3 minutos Cubrir con una envoltura de plástico ventilada Pulsar el botón Chicken Breast Pechuga de pollo Cuando el horno microondas se detenga voltear Cubrir con pedazos pequeños de papel de aluminio las áreas que se están cocinando muy rápido Volver a cubrir y pulsar el botón START Después de la cocción dejar reposar cubierto por 3 a 5 minutos El pollo estará a una ...

Page 30: ...s 1 10 piezas 5 2 0 tazas 1 10 piezas ALIMENTO CANTIDAD one touch cooking MODO DE COCCIÓN ONE TOUCH ONE TOUCH COOKING le permite cocinar o recalentar muchos de sus alimentos favoritos tan sólo con pulsar un solo botón Suponer que quiere recalentar dos panecillos o panecillos dulces frescos Pulsar el botón Fresh Rolls 2 veces El horno microondas iniciará automáticamente NOTA 1 Para aumentar la cant...

Page 31: ...e tres libras o pulsar Steaks Chops luego el 2 y 2 para un peso de 2 2 lb 5 Para usar cualquier botón DEFROST pulsar dentro de los 3 minutos de haber iniciado la cocción abriendo y cerrando la puerta o pulsando el botón Clear Off Después de cada paso retirar las piezas que se hayan descongelado Dejar reposar cubiertas de 5 a 10 minutos Después de cada paso volver a arreglar las piezas o retirar la...

Page 32: ...tes pulsar el botón Help y el número 4 Seguir pulsando el número 4 hasta que se seleccione su opción según la tabla indicada más abajo Luego pulsar START Pulsar el número 4 una vez para la opción Inglés LB Pulsar el número 4 dos veces para la opción Inglés KG Pulsar el número 4 tres veces para la opción Español LB Pulsar el número 4 cuatro veces para la opción Español KG Pulsar el número 4 cinco v...

Page 33: ...ecial ya que está hecha de mica Mantener limpia la cubierta de la guía de ondas para asegurar el buen funcionamiento del horno microondas Limpiar con mucho cuidado usando un paño húmedo para quitar salpicaduras de comida inmediatamente después de que ocurran en la superficie de la cubierta Las salpicaduras que dejen acumularse pueden calentarse hasta producir humo y posiblemente encender fuego NO ...

Page 34: ...Clasificación CSA Monofásico 120 V 60Hz AC Corriente Alterna únicamente Potencia CA Requerida Clasificación UL 1700W 14 3 A Clasificación CSA 1500W 13 0 A Potencia de Salida UL GLMB209 PLMBZ209 1200 W CSA CPLMZ209 1100 W Frecuencia 2450 MHz Dimensiones exteriores 24 Ancho x 13 3 8 Alt x 19 1 8 Prof Dimensiones de la cavidad 7 3 8 Ancho x 10 1 2 Alt x 18 5 8 Prof Capacidad del horno microondas 2 0 ...

Page 35: ...idas de personas que no pertenezcan a compañías de servicio autorizado o causas externas como abuso mal uso suministro eléctrico inadecuado accidentes incendios hechos fortuitos or desastres naturales RENUNCIA DE RESPONSABILIDAD DE GARANTÍAS IMPLÍCITAS LIMITACIÓN DE ACCIONES LEGALES LA ÚNICA Y EXCLUSIVA OPCIÓN DEL CLIENTE BAJO ESTA GARANTÍA LIMITADA ES LA REPARACIÓN O REEMPLAZO DEL PRODUCTO SEGÚN ...

Page 36: ......

Page 37: ...S INSTRUCTIONS F Visitez le site Web de Frigidaire à http www frigidaire com Bienvenue et félicitation 2 Importantes consignes de sécurité 2 7 Nomenclature 8 Avant l usage 9 Fonctionnement manuel 9 Consignes d utilisation 10 15 Nettoyage et entretien 15 Fiche technique 16 Appel de service 16 Garantie 17 ...

Page 38: ...vendu le four à micro ondes Épargnez du temps et de l argent Consulter la section intitulée Avant d appeler le dépanneur Cette section vous aide à résoudre des problèmes courants Si vous avez besoin de service vous pouvez relaxer en sachant que vous pouvez obtenir de l aide par téléphone Une liste de numéros sans frais du service à la clientèle se trouve au verso de ce manuel OU communiquez avec l...

Page 39: ...stible pour faciliter la cuisson Retirer les attaches de métal des sacs de papier ou de plastique avant de mettre les sacs au four Si les matériaux à l intérieur du four prennent feu garder la porte du four fermée arrêter le four et débrancher la fiche ou couper l électricité au panneau d entrée Ne pas utiliser la cavité comme espace de rangement Ne laisser ni papier ni ustensiles ni aliments dans...

Page 40: ... et les portées de ces joints ne sont pas endommagés que les charnières et les verrous ne sont pas brisés ou desserrés et que la porte ou l intérieur de la cavité ne portent aucune trace de coups Si on constate quelque dommage que ce soit ne pas mettre le four en service et communiquer avec le détaillant ou un SERVICE D ENTRETIEN AGRÉÉ PAR ELECTROLUX Choix d un emplacement pour le four Un four éta...

Page 41: ...AIS se servir du four sans le plateau tournant et le support Ne pas installer le plateau tournant à l envers pour faire entrer dans le four un plat de grandes dimensions Le plateau tourne dans les deux sens Voir la page 18 pour des instructions complètes Veiller à ce qu il y ait TOUJOURS des aliments dans le four lorsqu il est allumé de sorte qu ils absorbent l énergie produite Quand on utilise le...

Page 42: ...s de vin et spécialement les tasses à café à col étroit Même si le contenant est ouvert une vapeur excessive peut se former et entraîner des éclaboussures ou des débordements Ne dégelez pas de boissons congelées dans des bouteilles à goulot étroit en particulier des boissons gazeuses Même si le contenant est ouvert une pression peut se former Cela peut entraîner l explosion du contenant et possibl...

Page 43: ...i ne résiste pas à la chaleur des plastiques qui ne conviennent pas aux micro ondes contenants de margarine des produits en papier recyclé des sacs en papier des sacs pour la conservation des aliments des attaches métalliques Pour vérifier si un plat va au four à micro ondes le placer dans le four et mettre le four en marche à la puissance maximale pendant 30 secondes Si le plat devient très chaud...

Page 44: ...ur ne peut pas fonctionner si la porte n est pas parfaitement fermée 4 Charnières de la porte 5 Joints d étanchéité et portées de ces joints 6 Arbre d entraînement du plateau tournant 7 Support amovible du plateau tournant Placer soigneusement le support du plateau tournant au centre du four 8 Plateau tournant Le placer sur le support et l arbre d entraînement Il peut tourner dans le sens des aigu...

Page 45: ...ou les viandes qui exigent une cuisson lente Consulter un livre de cuisine ou de recettes pour chaque cas particulier Supposons que l on veuille décongeler des aliments pendant 5 minutes à 30 1 Préciser la durée de décongélation 5 0 0 2 Appuyer huit fois sur la touche Power Level ou la maintenir enfoncée jusqu à ce le niveau de puissance désiré s affiche 3 Appuyer sur la touche START Une fois la p...

Page 46: ...s la cuisson en fermant la porte en appuyant sur la touche Clear Off ou après la cuisson 10 Il y a un conseil de cuisson pour chaque aliment Appuyer sur la touche Help lorsque l indicateur HELP est affiché Manières de couvrir les aliments Certains aliments cuisent mieux lorsqu ils sont couverts Procéder selon les instructions fournies dans le tableau pour ces aliments 1 Couvercle 2 Pellicule plast...

Page 47: ...à 3 minutes Ne pas ajouter d eau Couvrir avec le couvercle ou utiliser une pellicule plastique Après la cuisson remuer et si possible laisser reposer à couvert pendant 3 minutes Couvrir d une pellicule plastique tout en laissant une ouverture Appuyer sur la touche Chicken Breast Lorsque le four s arrête retourner les aliments À l aide de petits morceaux de papier aluminium protéger les parties qui...

Page 48: ... Frozen Rolls Petits pains congelés 1 à 10 pièces 0 5 à 2 tasses 1 à 10 pièces aliment QUANTITÉ one touch cooking CUISSON À UNE TOUCHE ONE TOUCH COOKING vous permet de cuire ou de réchauffer beaucoup de vos plats favoris en appuyant seulement sur une touche Supposons que vous vouliez chauffer 2 petits pains frais ou 2 muffins Appuyer deux fois sur la touche Fresh Rolls Le four se met automatiqueme...

Page 49: ...ivres ou appuyer sur la touche Steaks Chops puis sur 2 et 2 pour un poids de 2 2 lb 5 Pour utiliser toute touche Defrost appuyer sur la touche en deçà de trois minutes après la cuisson aprés avoir ouvert et fermé la porte ou après avoir appuyé sur la touche Clear Off Après chaque étape retirer toute partie réchauffée Couvrir et laisser reposer 5 à 10 minutes Après chaque étape du cycle de décongél...

Page 50: ...re fois sur 4 pour espagnol kg Appuyer cinq fois sur 4 pour français lb Appuyer six fois sur 4 pour français lb cuisson À SÉQUENCES MULTIPLES Le four peut être programmé pour 4 séquences automatiques de cuisson passant d un niveau de puissance à un autre automatiquement Parfois les conseils de cuisson suggèrent de commencer à un certain niveau de puissance et de poursuivre à un autre niveau Votre ...

Page 51: ...du bicarbonate de sodium ou un savon doux Bien rincer à l eau chaude NE JAMAIS VAPORISER DE PRODUIT À NETTOYER LES FOURS DIRECTEMENT SUR L UNE OU L AUTRE PARTIE DE VOTRE FOUR Couvercle du guide d ondes Le couvercle du guide d ondes est en mica et nécessite donc une attention spéciale Maintenir le couvercle du guide d ondes propre pour assurer un bon fonctionnement du four Essuyer immédiatement et ...

Page 52: ...A Classification CSA 1 500 W 13 0 A Puissance de sortie UL GLMB209 PLMBZ209 1 200 W CSA CPLMZ209 1 100 W Fréquence 2 450 MHz Dimensions extérieures 24 po L x 13 3 8 po H x 19 1 8 po P 610 mm x 340 mm x 486 mm Dimensions de la cavité 17 3 8 po L x 10 1 2 po H x 18 5 8 po P 441 mm x 257 mm x 473 mm Capacité de four à micro ondes 2 0 pi3 56 6 l Uniformité de cuisson Plateau tournant ventilateur Poids...

Page 53: ...e qui n ont pas été obtenues par l entremise d un réparateur autorisé ou les causes étrangères comme l abus l alimentation électrique inadéquate ou les cas de force majeure AVIS DE NON RESPONSABILITÉ SUR LES GARANTIES IMPLICITES LIMITATIONS DES RECOURS L UNIQUE RECOURS DU CLIENT EN VERTU DE CETTE GARANTIE LIMITÉE EST LA RÉPARATION OU LE REMPLACEMENT DU PRODUIT COMME DÉCRIT PRÉCÉDEMMENT LES DEMANDE...

Page 54: ......

Page 55: ......

Page 56: ......

Reviews: