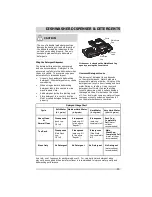
background image

16

BEFORE YOU CALL

Dishware Stained or Discolored

• 

Tea and coffee can stain cups.  
Remove the stains by hand washing in 
a solution of 1/2 cup (120 ml) bleach 
and one quart (1L) of warm water.  
Rinse thoroughly.

• 

Iron deposits in water can cause a 
yellow or brown ! lm.  A special ! lter 
installed in the water supply line will 
correct this problem. (See Removing 
Spots and Film).

• 

Aluminum utensils can leave gray/
black marks when they rub against 
other items.  Load Properly.

• 

Certain high acid foods can cause 
discoloration of stainless steel and 
plastics if allowed to sit for a long 
period.  Use the Rinse Only cycle 
or rinse by hand if not operating 
dishwasher at once.

• 

Mixing stainless steel and silver 
utensils in silverware basket can cause 
pitting of the stainless steel blades.  
Avoid mixing stainless steel and silver.

Etching

• 

Using too much detergent especially 
in soft or softened water causes 
damage that looks like a ! lm but 
cannot be removed.

• 

Adjust the amount of detergent 
based on the water hardness. (Check 
Detergent Chart).

• 

Lower the water temperature 
by selecting one of the lower 
temperature options.

Detergent Left in Cups

• 

Detergent may be old.  Discard and 
use fresh detergent.

• 

Be sure the dish load doesn’t block 
spray from entering the detergent 
cup.

• 

Check to see if cycle has been 
completed.

• 

Make sure items do not prevent the 
detergent dispenser from opening.

Dishwasher Leaks

• 

Check that the door gasket is pressed 
into its mounting channel, reaches to 
the bottom of the tub and does not 
extend beyond the end rib so as to 
interfere with door closure.

• 

Spilled rinse aide can cause foam and 
lead to over" owing.  Wipe up any 
spills with a damp cloth.

• 

Check to see that the dishwasher is 
level.  (See Installation Instructions).

• 

Avoid oversudsing by using the 
correct amount of detergent designed 
for automatic dishwashers.

• 

Check to see that dishwasher is level. 
(See Installation Instructions).

Water in Bottom of Tub

• 

Water left in the tub bottom after 
the cycle is complete is not normal.  
If water remains in the bottom of 
the tub, the dishwasher may not be 
draining properly. (See Dishwasher 
Does not Drain Properly).

Cycle Takes a Long Time

• 

The cycle may have been automatically 
lengthened to reach key temperatures 
due to some factor such as a cool water 
supply or a large load of dishes.

• 

Delay Start option may have been 
selected.

• 

Choose lower temperature options to 
shorten the cycle.

• 

Cycles that are soil-sensing adjust 
automatically to assure a good wash 
- heavier soils will elicit a longer cycle 
response.

Vapor at Vent

• 

Spilled rinse aid can cause foam and 
lead to over" owing.  Wipe up any spills 
with a damp cloth.

Normal Sounds You Will Hear

• 

Normal sounds include water ! ll, 
water spray, draining and motor 
sounds.

• 

There is a noticeable change in 
sound when the wash action switches 
between the lower and middle spray 
arm.  This is normal since each spray 
arm has its own sound.

• 

It is normal for the dishwasher to 
pause (no sound) when the wash 
action is switching between the lower 
and middle spray arms.

Summary of Contents for DGCD2444SA

Page 1: ...ortant Safety Instructions 2 Product Registration 3 Features at a Glance 4 Operating Instructions 4 6 Preparing and Loading Dishes 7 10 P N A05272501RevA Artwork A05272501Rev001 July 2016 Dishwasher Dispenser and Detergents 11 Factors Affecting Performance 12 Care and Cleaning 13 14 Before you Call 15 17 Notes 18 Major Appliance Warranty 19 ...

Page 2: ...nt and rinse agents out fo the reach of children Do not wash plastic items unless marked Dishwasher Safe or equivalent Check with manufacturer for recommendations if not marked Items that are not marked dishwasher safe may melt and create a potential re hazard Disconnect electrical power to dishwasher before servicing If the dishwasher drains into a food disposer make sure disposer is completely e...

Page 3: ...mal to hear some of what is going on inside The wash cycles include several instances of water entering the unit splashing the wash pump running to spray water on the dishware motor splashing and the drain pump running to discharge the dirty water and soils Variations in the pumping spraying sounds are normal During a cycle the pump switches on and off many times and operation switches back and fo...

Page 4: ...k the incoming water temperature and if it is not hot enough the cycle will be lengthend for automatic water heating in the main wash and nal rinse of all cycles This happens even when HI TEMP WASH option has not be selected When HI TEMP WASH is selected an even higher temperature will be reached to handle heavier soil loads Operating Instructions Getting Started 1 Load Dishwasher See Preparing an...

Page 5: ...ancel a Cycle Option Selections Hi Temp Wash Option When HI TEMP WASH option is selected the dishwasher heats water in the main wash to approximately 140o F 60o C This increase in water temperature helps the dishwasher detergent remove food grease and soil from dishes more effectively and aids in drying HI TEMP WASH option can be used with HEAVY and NORMAL CLEAN only HI TEMP WASH is automatically ...

Page 6: ...ption 2 4 6 Cycle and intended use Water per Cycle Heavy Clean Recommended for pots pans casseroles and dinnerware having light to heavily soiled loads 5 5 8 9 gal 21 34 L 1 3 4 2 1 4 Hours Duration approx Normal Clean Recommended for lightly to heavily soiled loads Quick Clean Recommended for lightly soiled loads only Top Rack Recommended for small loads in the upper rack only that are light to h...

Page 7: ...asher Loading the Top Rack Features and appearance of racks and silverware basket may vary from your model The upper rack is designed for exibility in loading a wide variety of items including cups glasses stemware small plates bowls etc Load glasses in top rack only Damage may occur if placed in bottom rack Load plastic items in top rack only Melting may occur if placed in bottom rack Load items ...

Page 8: ...ack available on select models To raise the upper rack refer to the gure below Press the lever toward the center of the rack and pull straight up on the rack Lever To lower the upper rack press the lever and push down on the rack Bowl Tines available on select models The bowl times offer the ultimate in exibility When closed load with saucers or small dishes Open halfway and it is perfect for smal...

Page 9: ...ems do not block spray arm rotation Be sure pan handles do not protrude through the bottom of the rack and block the spray arm rotation Loading the Bottom Rack 10 place settings standard loading pattern 12 place settings standard loading pattern on select models Fixed Tines 12 place settings standard loading pattern on select models Fold down tines Fold down Tines available on select models The fo...

Page 10: ...s in place Use suggested loading patterns as shown to increase washability of the silverware Be sure nothing protrudes through bottom of basket or rack to block the spray arm Do not mix silver and stainless to avoid damaging the silver nish When covers are up mix items in each section of the basket with some pointing up and some down to avoid nesting Water spray cannot reach nested items To add or...

Page 11: ...gent water softener recommended 5 teaspoons each cup ll to line above Regular 5 teaspoons each cup ll to line above Regular 8 teaspoons each cup completely full 8 teaspoons Main Wash cup completely full Each Cup Completely Full water softener recommended Main Wash Cup Completely Full water softener recommended 11 DISHWASHER DISPENSER DETERGENTS The detergent dispenser has one covered and one uncov...

Page 12: ...to 140 washes depending on setting Water Pressure The hot water line to dishwasher must provide water pressure between 20 and 120 psi Low Water pressure may occur when laundry or showers are in operation If you experience poor wash performance you may need to wait until water use is reduced before starting dishwasher Water Temperature Hot water is needed for best dishwashing and drying results Wat...

Page 13: ...ath ë To empty the glass trap 1 Grasp the glass trap s handle and rotate it 900 clockwise while pressing down on the center of the wash arm 2 Grab the spray arm in the center and lift the spray arm and glass trap assembly up and out from the dishwasher 3 Tip the assembly over an appropriate container and tap it to empty the glass trap OR separate the glass trap pull the glass trap handle toward yo...

Page 14: ...connecting and restoring service to your dishwasher ë Winterizing A dishwasher left in an unheated place should be protected from freezing Have a quali ed person do the following To Disconnect Service 1 Turn off electrical power to the dishwasher at the supply source by removing fuses or tripping circuit breaker 2 Shut off water supply 3 Place a pan under the inlet valve Disconnect water line from...

Page 15: ...ify that the glass trap is maintained and installed properly See Care and Cleaning Dishes not Dry Select heat dry option Make sure the rinse aid dispenser is lled Increase the discharge setting of rinse aid See Rinse Aid Check the incoming water temperature Be sure it is at least 120o F 49o C Check for proper loading avoid nesting items ë Glassware Flatware Spotted or Cloudy Check water hardness F...

Page 16: ...r gasket is pressed into its mounting channel reaches to the bottom of the tub and does not extend beyond the end rib so as to interfere with door closure Spilled rinse aide can cause foam and lead to over owing Wipe up any spills with a damp cloth Check to see that the dishwasher is level See Installation Instructions Avoid oversudsing by using the correct amount of detergent designed for automat...

Page 17: ...Drain Properly Removing Spots and Film Hard water can cause lime deposit buildup on the interior of the dishwasher Dishes and glasses may also get spots and lm for a number of reasons See Glassware Flatware Spotted or Cloudy section To remove buildup and lm clean using the following instructions 1 Load clean dishes and glasses in normal manner Do not load any metal utensils or silverware 2 Do not ...

Page 18: ...18 NOTES ...

Page 19: ...rolux parts or parts obtained from persons other than authorized service companies or external causes such as abuse misuse inadequate power supply accidents res or acts of God DISCLAIMER OF IMPLIED WARRANTIES LIMITATION OF REMEDIES CUSTOMER S SOLE AND EXCLUSIVE REMEDY UNDER THIS LIMITED WARRANTY SHALL BE PRODUCT REPAIR OR REPLACEMENT AS PROVIDED HEREIN CLAIMS BASED ON IMPLIED WARRANTIES INCLUDING ...

Page 20: ...20 ...

Reviews: