background image

OPERATION


Allow unit to reach room temperature before operating. 
 
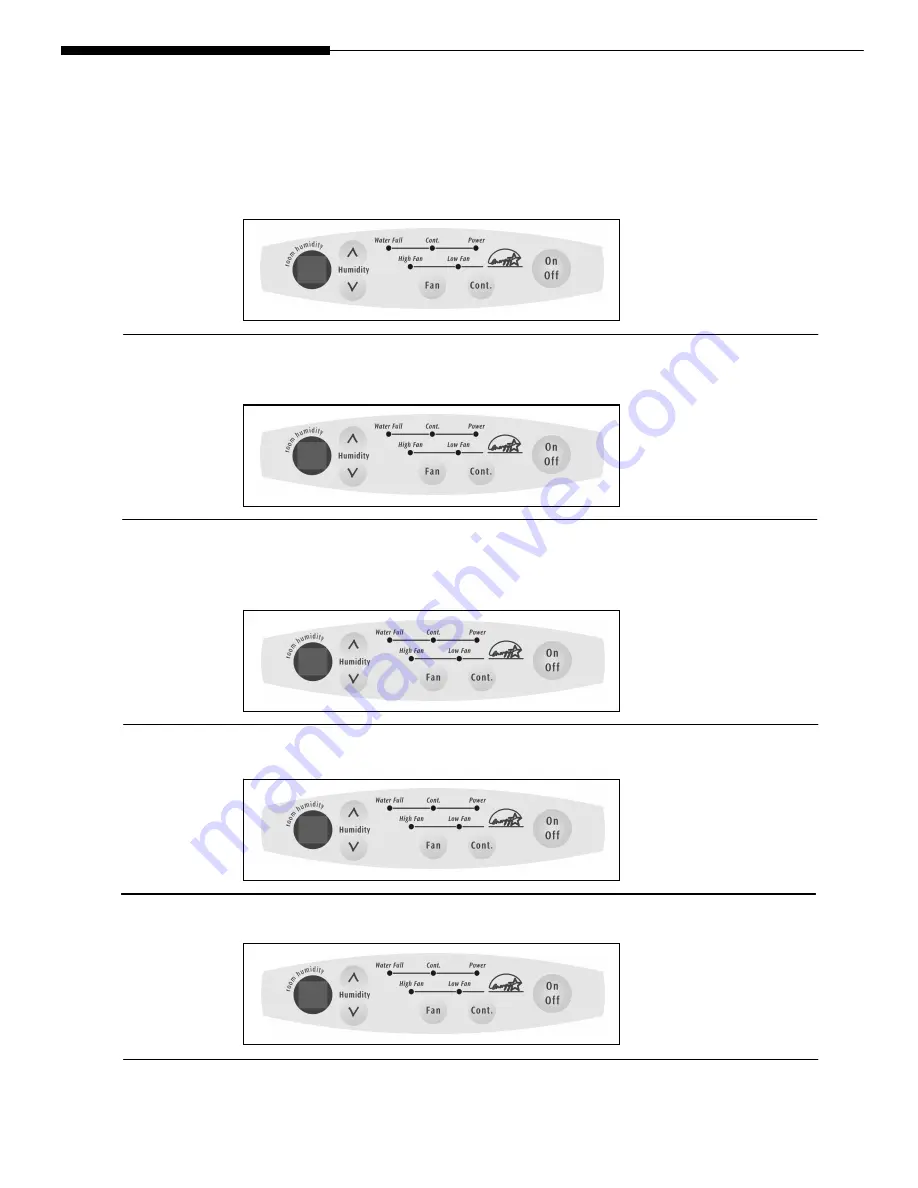
To begin operating the dehumidifier, follow these steps: 
 

1.  Plug the power cord into a properly grounded 110/120 volt AC outlet. Note the POWER indicator will flash 

slowly. 


2.  To turn the unit on press the ON/OFF button. The digital readout will indicate the room’s relative humidity. 

The factory setting is 60%. If the room is below this the unit will not operate. Press the CONT button to 
place the unit in continuous dehumidifying mode. 


3.  Pressing the CONT button, the unit will continuously dehumidify at the unit’s lowest Relative Humidity 

(25%). In this mode the 

c

 & 

d

 buttons will be disabled. The CONT indicator will light in this mode. Use this 

feature when first using the unit for three or four days. When the sweating and dampness odors have 
stopped, press the CONT button again and use the HUMIDITY buttons to provide a “dryness” to suit your 
comfort.  


4. The 

HUMIDITY 

c

 button raises the humidity setting. The maximum setting is 80%. 

5. The 

HUMIDITY 

d

 button lowers the humidity setting. The minimum setting is 35%. 


6.  Press the FAN button to change the fan speed to either HIGH or LOW. The indicator lights will show the 

setting you have selected. The High Fan should be selected for faster moisture removal.  


7.  Pressing the ON/OFF button at any time will shut down the unit, and the power indicator will go out. 


5

5

60 

Ñ

Ñ

Ñ

60 

6

5


52 

Ñ

Ñ

5

5

4

Summary of Contents for FDL60P12

Page 1: ...med it is in your best interest to obtain and keep all receipts Register Your Product The self addressed PRODUCT REGISTRATION CARD should be filled in completely signed and returned to the Frigidaire Company Contents 2 Warranty 3 Important Safety Instructions 3 Location 3 How It Works 4 Operation Features 5 Removing Collected W ater 5 Care and Cleaning 6 Avoid Service Checklist Operate dehumidifie...

Page 2: ...ion to a grounded power supply of sufficient voltage replacement of blown fuses repair of loose connections or defects in house wiring 4 Expenses for making the appliance accessible for servicing such as removal of trim cupboards shelves etc which are not a part of the appliance when it was shipped from the factory 5 Damages to finish after installation 6 Replacement of light bulbs and or fluoresc...

Page 3: ...o oo or rs s w w i in nd do ow w s s a an nd d o ot th he er r o ou ut ts si id de e o op pe en ni in ng gs s t to o t th he e r ro oo om m T Th he e e ef ff fe ec ct ti iv ve en ne es ss s o of f t th he e d de eh hu um mi id di if fi ie er r d de ep pe en nd ds s o on n t th he e r ra at te e a at t w w h hi ic ch h n ne ew w m mo oi is st tu ur re e l la ad de en n a ai ir r e en nt the the e e...

Page 4: ...idity 25 In this mode the c d buttons will be disabled The CONT indicator will light in this mode Use this feature when first using the unit for three or four days When the sweating and dampness odors have stopped press the CONT button again and use the HUMIDITY buttons to provide a dryness to suit your comfort 4 The HUMIDITY c button raises the humidity setting The maximum setting is 80 5 The HUM...

Page 5: ...d Re install the filter and replace the bucket 2 Cabinet a Dust cabinet with oil free cloth or clean using a damp cloth b Vacuum grill using brush attachment 3 Water Bucket a Clean bucket using warm water and detergent 5 Ñ a Remove the cap from the rear of the dehumidifier and insert into the collection tray inside the front of the unit above the bucket See photo b Screw the hose attachment suppli...

Page 6: ...t of vacuum cleaner to clean grill See Care and Cleaning Dehumidifier must be placed in a space that does not restrict air flowing into the rear coil or out of the front grill Dehumidifier has been installed or restarted recently The higher the moistuire in the room the longer the dehumidifier will operate Dehumidifier is in the CONT mode and will remain on in this mode Press the CONT bu tton so t...

Reviews: