background image

REMOVING COLLECTED WATER 


1.  Emptying the Bucket: 

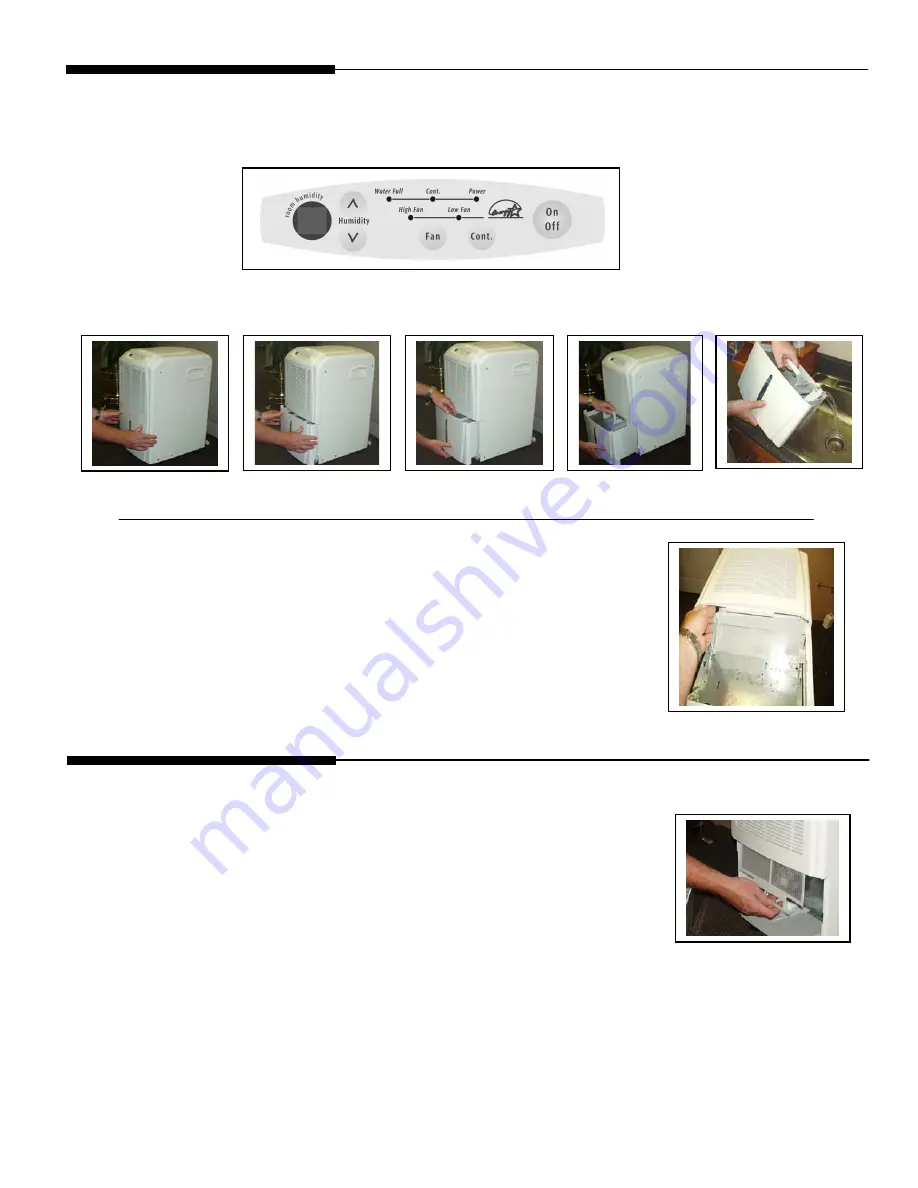
a.  When the bucket if full the unit will shut down and the “Water Full” indicator will illuminate. 


b.  Remove and empty the bucket as shown with the photographs below.  
c.  When replacing bucket, it must be located correctly for the unit to turn back on automatically. 


2. Continuous Drainage: 


CARE & CLEANING 

1. Filter 

a. Remove the filter every two weeks based on normal operating conditions.  
b.  To remove the filter first remove the bucket and reach under front to 

remove filter as shown. 

c.  Wash the filter with clean water then dry. 
d.  Re-install the filter and replace the bucket. 


2. Cabinet: 

a.  Dust cabinet with oil-free cloth, or clean using a damp cloth.  
b.  Vacuum grill using brush attachment. 


3. Water 

Bucket: 

a.  Clean bucket using warm water and detergent.  


5

Ñ

a.    Remove the cap from the rear of the dehumidifier and insert into the

collection tray inside the front of the unit above the bucket. (See photo).

b.    Screw the hose attachment supplied into a suitable length garden hose

(not supplied).

c.    Press the 8" long plastic tube supplied, firmly onto the back of the hose 

adaptor.

d.    Locate the opposite end of the plastic tube onto the rear spigot of the

dehumidifier and press firmly into place.

e.    Position the open end of the garden hose into a suitable drain. Make

sure the hose is level and has no kinks in it.

Summary of Contents for FDL60P12

Page 1: ...med it is in your best interest to obtain and keep all receipts Register Your Product The self addressed PRODUCT REGISTRATION CARD should be filled in completely signed and returned to the Frigidaire Company Contents 2 Warranty 3 Important Safety Instructions 3 Location 3 How It Works 4 Operation Features 5 Removing Collected W ater 5 Care and Cleaning 6 Avoid Service Checklist Operate dehumidifie...

Page 2: ...ion to a grounded power supply of sufficient voltage replacement of blown fuses repair of loose connections or defects in house wiring 4 Expenses for making the appliance accessible for servicing such as removal of trim cupboards shelves etc which are not a part of the appliance when it was shipped from the factory 5 Damages to finish after installation 6 Replacement of light bulbs and or fluoresc...

Page 3: ...o oo or rs s w w i in nd do ow w s s a an nd d o ot th he er r o ou ut ts si id de e o op pe en ni in ng gs s t to o t th he e r ro oo om m T Th he e e ef ff fe ec ct ti iv ve en ne es ss s o of f t th he e d de eh hu um mi id di if fi ie er r d de ep pe en nd ds s o on n t th he e r ra at te e a at t w w h hi ic ch h n ne ew w m mo oi is st tu ur re e l la ad de en n a ai ir r e en nt the the e e...

Page 4: ...idity 25 In this mode the c d buttons will be disabled The CONT indicator will light in this mode Use this feature when first using the unit for three or four days When the sweating and dampness odors have stopped press the CONT button again and use the HUMIDITY buttons to provide a dryness to suit your comfort 4 The HUMIDITY c button raises the humidity setting The maximum setting is 80 5 The HUM...

Page 5: ...d Re install the filter and replace the bucket 2 Cabinet a Dust cabinet with oil free cloth or clean using a damp cloth b Vacuum grill using brush attachment 3 Water Bucket a Clean bucket using warm water and detergent 5 Ñ a Remove the cap from the rear of the dehumidifier and insert into the collection tray inside the front of the unit above the bucket See photo b Screw the hose attachment suppli...

Page 6: ...t of vacuum cleaner to clean grill See Care and Cleaning Dehumidifier must be placed in a space that does not restrict air flowing into the rear coil or out of the front grill Dehumidifier has been installed or restarted recently The higher the moistuire in the room the longer the dehumidifier will operate Dehumidifier is in the CONT mode and will remain on in this mode Press the CONT bu tton so t...

Reviews: