

9
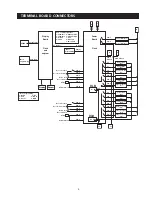
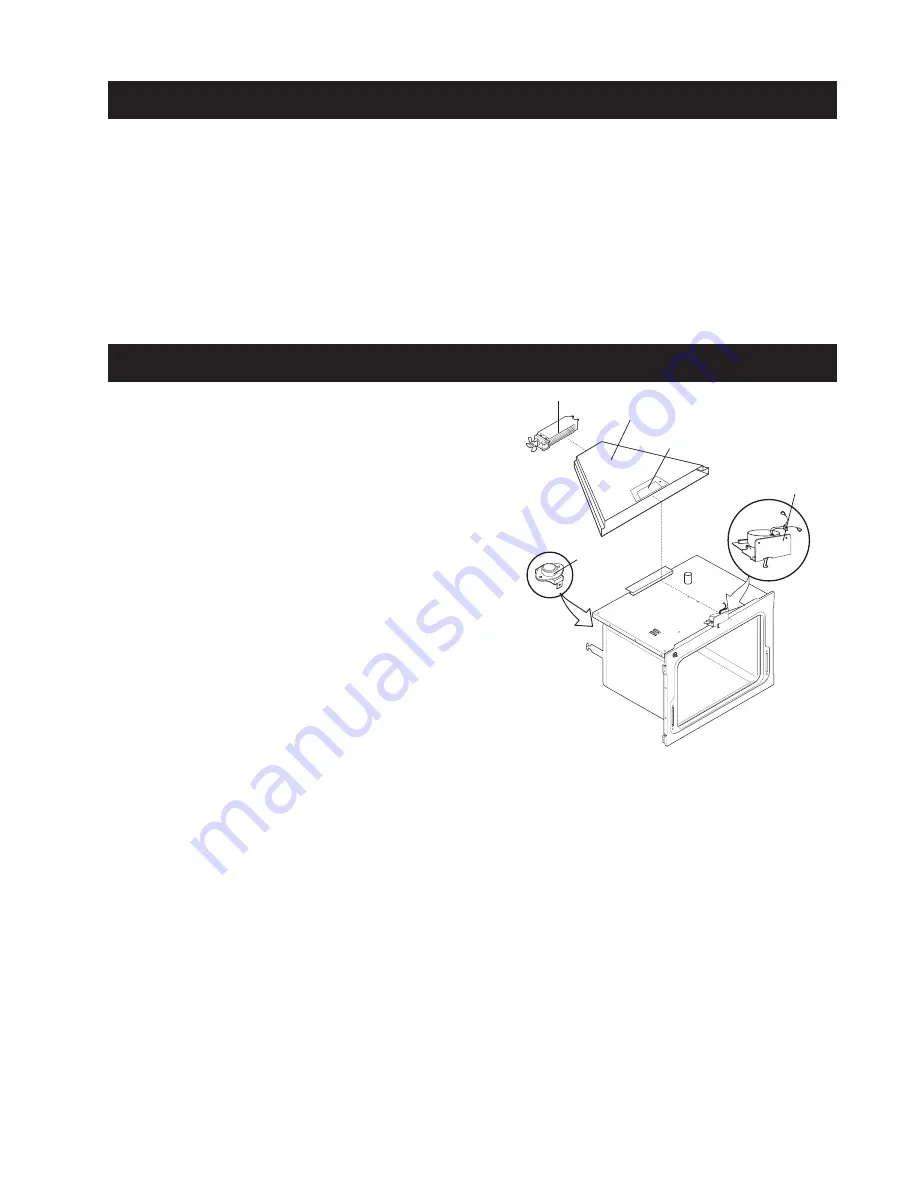
Motor Cooling Fan
Door Locking
Mechanism
Assembly
Safety
Thermostat
Upper Air Channel
Access Plate
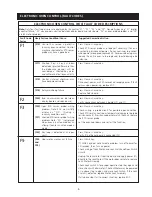
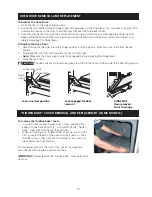
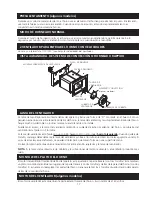
DOOR LOCK MECHANISM
The appliance is equipped with an electronic oven control and
has an auto locking door latch feature. When the self clean
cycle is programmed, the door is locked by a motor operated
latch system. The interior of oven doesn't need to heat up to
460°F/238°C before the door locks. However, until the
temperature inside oven reaches 460°F/238°C, the self-clean
program can be canceled and door will unlock immediately.
After oven reaches temperatures over 460°F/238°C, the door
will not unlock until temperature drops below 460°F/238°C.
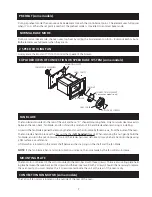
If a problem appears and the door stays locked it is possible for
the
servicer
to unlock the door without removing the appliance
from its place. Follow the steps below:
1. Trip the circuit breaker to
OFF
position.
2. Remove the 2 screws, which are fixing the oven door latch,
located between the control panel and the oven door.
3. When the screws are removed it is possible to unlock the
latch with a flat screwdriver, or one of the tools supplied with
the wall oven which are used to take off the oven from the
cabinet. Insert the tool tip through the slot on top of the oven
door. During this step it's important to take care to not damage the appliance.
4. As soon as the latch is in the unlock position, you can open the door.
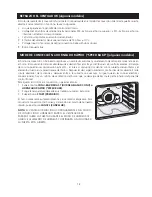
5. Replace the motor latch:
Upper Oven:
1. To have access to the door latch assembly, remove the 3 screws under the control panel which are fixing it.
2. Remove the electronic plate located on the access plate.
3. Remove the access plate located on the upper air channel by removing the screw.
4. Replace the motor latch with a new one and reassemble in opposite order and manner of removal.
Lower Oven:
1. Pull out the appliance approximately 4" from the cabinet.
2. Remove the 4 screws which are fixing the center trim and remove the center trim by pulling it from both
extremities.
3. Replace the motor latch by a new one and reassemble in opposite order and manner of removal.
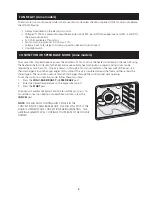
ADJUSTING OVEN TEMPERATURE
1. Press and hold the BAKE pad for 5 seconds.
2. The display now indicates the difference in degrees between the original factory temperature setting and the
current temperature setting. If the oven control has the original factory calibration, the display will read "00".
3. The temperature can now be adjusted up or down 35°F or 19°C, in 1°F or 1°C increments, by pushing the UP or
Down arrow pads or by entering a value with the numeric pads. Adjust the UP/DOWN arrow pads until the
desired amount of offset appears in the display. For models with numeric pads, enter the adjustment desired
with the number pad; to have a negative value press CLEAN pad. A minus sign (-) will appear before the
number to indicate the oven will be cooler by the displayed amount of degrees.
4. When you have made the desired adjustment, push the CANCEL pad to go back to the time of day display.
NOTE:
CHANGING CALIBRATION EFFECTS BOTH CONVENTIONAL AND CONVECTION MODES.


