


10
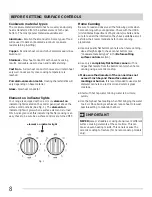
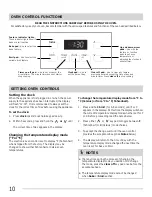
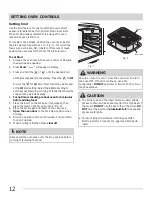
OVEN CONTROL FUNCTIONS
READ THE INSTRUCTIONS CAREFULLY BEFORE USING THE OVEN.
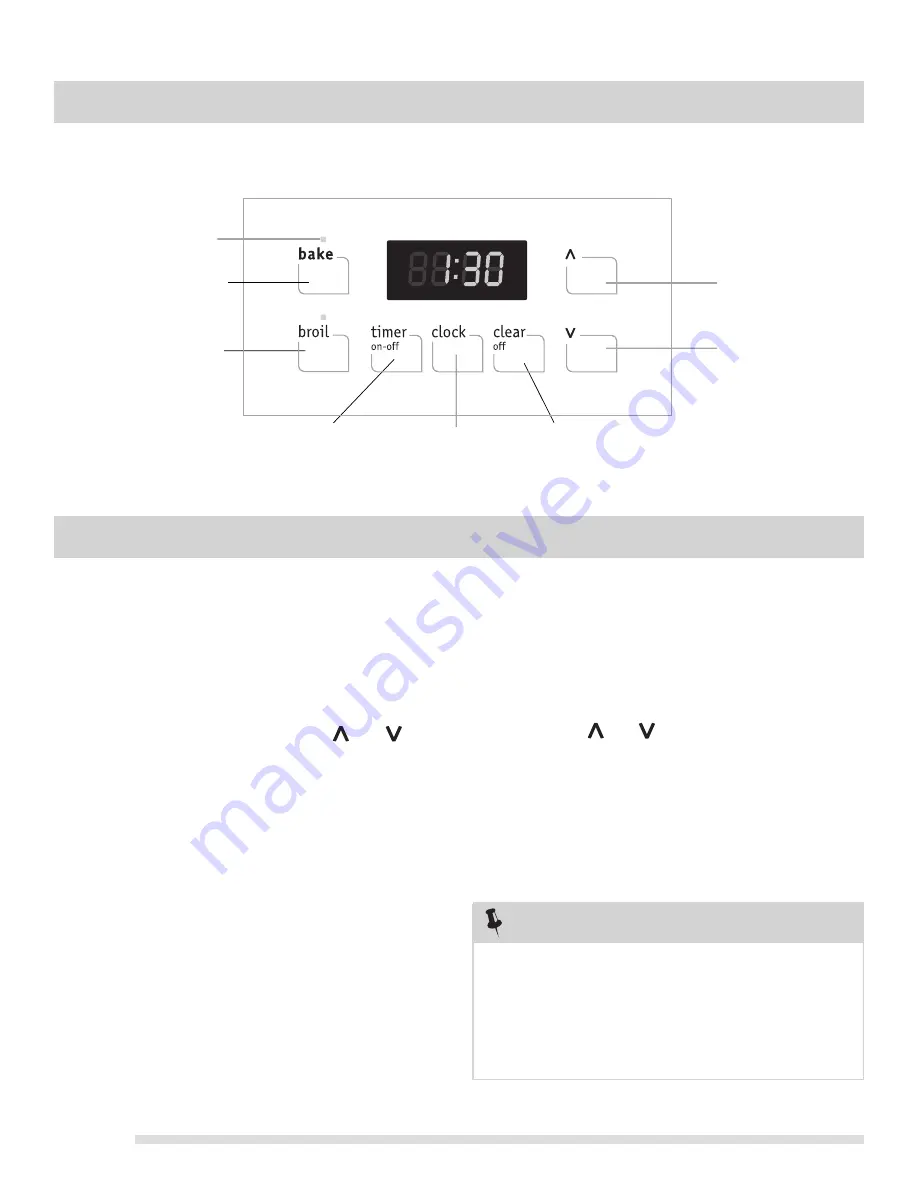
For satisfactory use of your oven, become familiar with the various pad features and functions of the oven as described below.
Up and down arrow
pads
— Use with the
feature or function
pads to set oven
temperature or
adjusting the clock and
minute timer.
Broil pad
— Use to select the
variable broil feature.
Bake pad
—Use to select the
bake feature.
Feature indicator lights
—
These indicator lights show if
bake or broil is active.
Clock pad
— Use to
set the time of day.
Clear off pad
— Use to clear any feature
previously entered except the time of day and
minute timer. Press
clear off
to stop cooking.
Timer on-off pad
— Use to set or cancel the
minute timer. The minute timer does not start or
stop cooking.
Changing the temperature display mode
(°F or °C)
The electronic oven control is set to display °F (Fahrenheit)
when shipped from the factory. The display may be
changed to show either Fahrenheit or Celsius oven
temperatures.
Setting the clock
When the appliance is first plugged in or when the power
supply to the appliance has been interrupted, the display
will flash "12:00". It is recommended to always set the
clock for the correct time of day before using the appliance.
To set the clock:
1. Press
clock
once (do not hold key pad down).
2. Within 5 seconds, press and hold the
or
until
the correct time of day appears in the display.
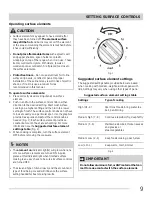
SETTING OVEN CONTROLS
To change the temperature display mode from °F to
°C (Celsius) or from °C to °F (Fahrenheit).
1. Press and hold
broil
(for 6-8 seconds) until F or C
appears in the display. At this time the display will show
the current temperature display mode whether set for F
or C. Before proceeding read the notes below.
2. Press either
or
key pad to toggle between
F
(Fahrenheit) or
C
(Celsius) mode choices.
3. To accept the change, wait until the oven control
provides the acceptance beep (See
Notes
below).
4. The display will return to the time of day with the
temperature display mode changed the next time the
oven is set for bake or broil.
NOTES
•
If at any time during the process of changing the
temperature display mode you decide not to change
the mode, press the
clear off
key pad once before the
acceptance beep.
•
The temperature display mode cannot be changed
when
bake
or
broil
is active.


