


109
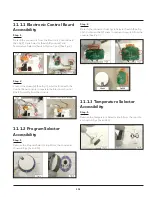
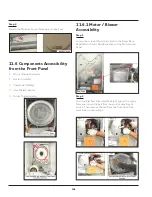
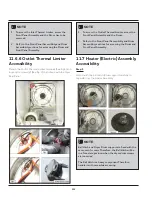
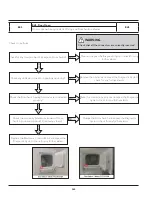
11.6.2 Drum Accessibility
Step: 3
Loosen the screws (3) that fixes with the Drum Support
Shaft (Ball Hitch) and carefully pull out the drum from the
dryer cabinet.
Step: 4
Loosen the Motor Cradle screws (2) fitted to the base panel
of the dryer.
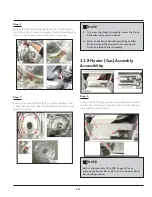
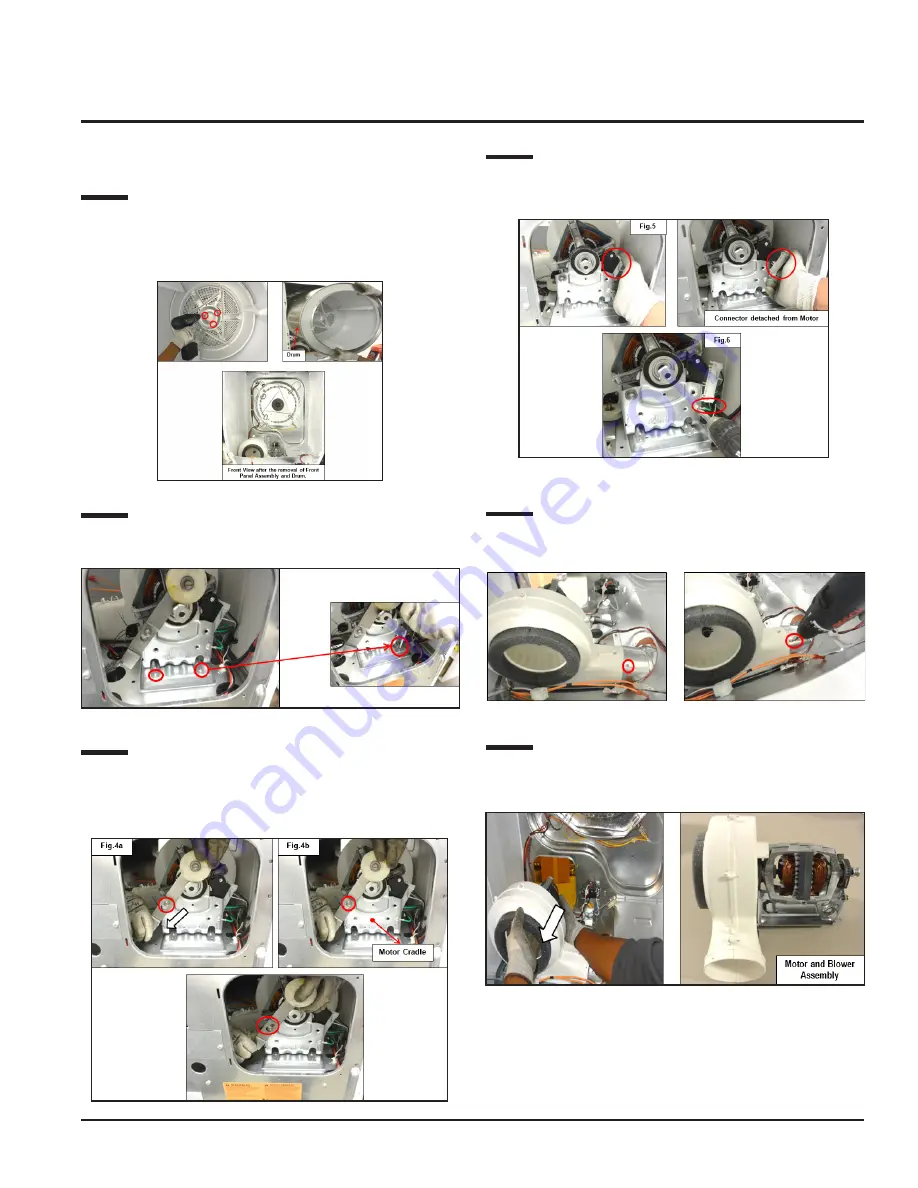
Step: 5
Remove the Idler Arm Assembly from the Motor Cradle
(Motor support) Figs. 4a and 4b by unlocking from the pivot
hinge.
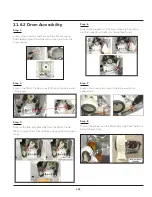
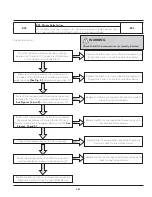
Step: 6
Detach the connector of the motor (See Fig. 5) and the
earth terminal from the Motor Cradle (See Fig. 6).
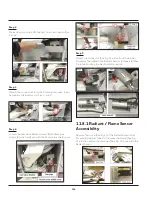
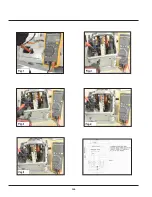
Step: 7
Loosen the screw that connects the Blower with the
exhaust duct.
Step: 8
Pull out the Blower and the Motor Assembly from the Front
Side of the machine.
Summary of Contents for FFLE3911QW
Page 1: ...Publication 5995666392 October 2015 Technical Service Manual Laundry Center ...
Page 2: ...I ...
Page 9: ...8 3 Product Features ...
Page 14: ...13 5 1 FFLE3911QW 5 1 1 Upper Cabinet Drum Heater 5 Exploded View and List of Parts ...
Page 17: ...16 5 1 2 Motor Blower Belt ...
Page 19: ...18 5 1 3 Control Panel ...
Page 21: ...20 5 2 FFLG4033QW 5 2 1 Upper Cabinet Drum Heater ...
Page 24: ...23 5 2 2 Motor Blower Belt ...
Page 27: ...26 5 2 3 Control Panel ...
Page 32: ...31 5 3 3 Wash Assembly POS NO DESCRIPTION 14 Screw 2 PLCS 15 Lock Hub Functional parts ...
Page 33: ...32 5 3 4 Cabinet Assembly ...
Page 69: ...68 User Interface of Laundry Center FFLG4033QW ...
Page 76: ...75 8 6 Wiring Diagram FFLE3911QW Electric Dryer Model ...
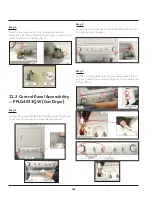
Page 77: ...76 8 7 Wiring Diagram FFLG4033QW Gas Dryer Model ...
Page 78: ...77 8 8 Wiring Diagram FFLE3911QW and FFLG4033QW Washer Model ...
Page 91: ...90 Wiring Diagram FFLE3911QW Wiring Diagram FFLG4033QW ...
Page 125: ...124 ...
Page 161: ...160 ...
Page 165: ...164 ...
Page 168: ...167 ...
Page 170: ...169 ...
Page 179: ...178 ...
Page 181: ...180 ...
Page 183: ...182 ...