background image

28

CARE & CLEANING

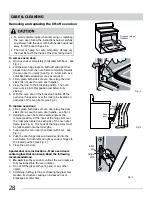
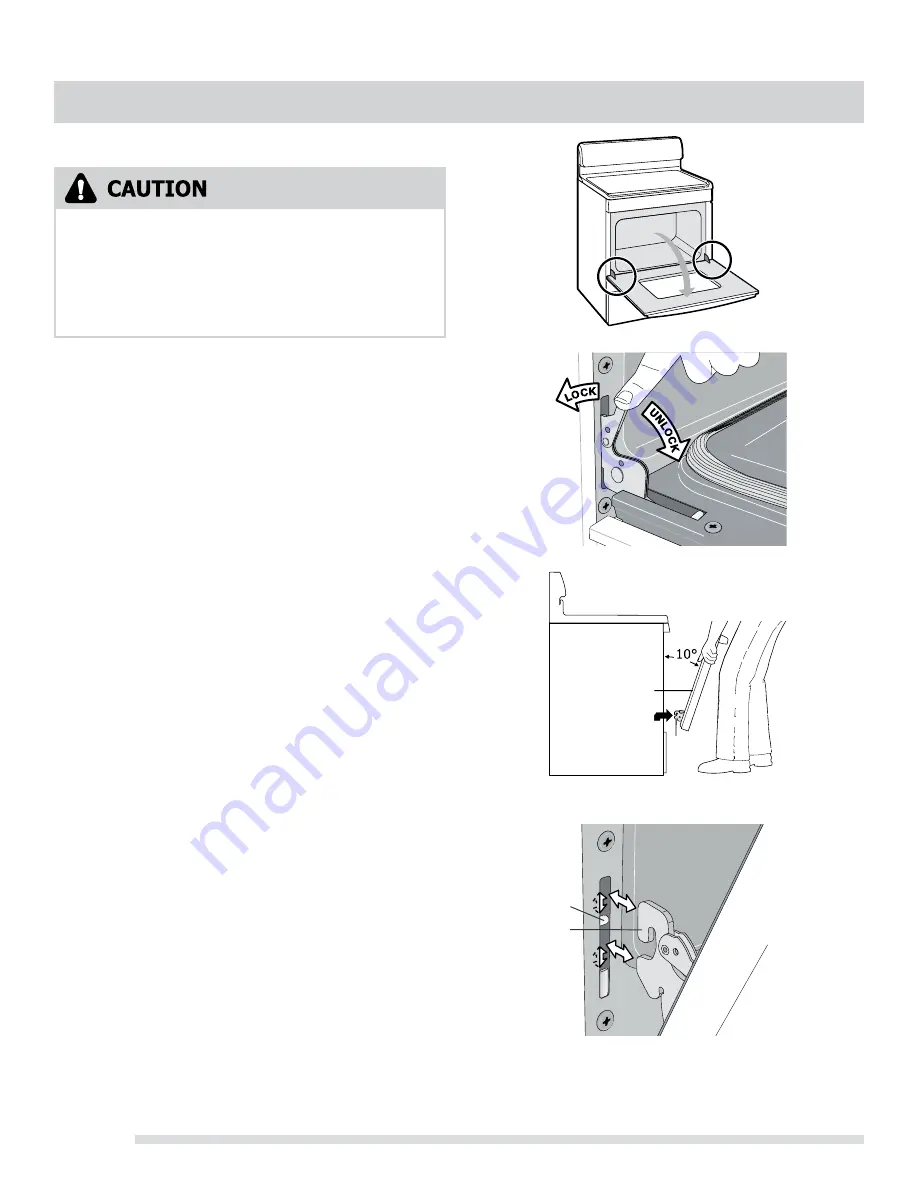
Fig. 3

• 

To avoid possible injury when removing or replacing 

the oven door, follow the instructions below carefully 

and always hold the door with both hands positioned 

away from the door hinge area.

• 

The door is heavy. For safe, temporary storage, lay 

the door flat with the inside of the door facing down.

To remove oven door:

1.  Open oven door completely (horizontal with floor - See 

Fig. 1).

2.  Pull the door hinge locks on both left and right door 

hinges down from the oven frame completely towards 

the oven door to unlock (See Fig. 2). A tool such as a 

small flat-blade screwdriver may be required.

3.  Firmly grasp both sides of oven door along the door 

sides (Do not use the oven door handle).

4.  Close the door to the broil stop position. The oven 

door will stop into this position just before fully 

closing.

5.  With the oven door in the broil stop position lift the 

oven door hinge arms over the roller pins located on 

each side of the oven frame (see fig. 4)

To replace oven door:

1.  Firmly grasp both sides of oven door along the door 

sides (Do not use the oven door handle - see fig 3).

2.  Holding the oven door at the same angle as the 

removal position, sit the hook of the hinge arm over 

the roller pins located on each side of the oven door 

frame (See Fig. 4). The hook of the hinge arms must 

be fully seated onto the roller pins.

3.  Fully open the oven door (horizontal with floor - See 

Fig. 1).

4.  Push the door hinge locks up towards and into the 

oven frame for both left and right oven door hinges to 

the locked position (See Fig. 2).

5.  Close the oven door.

Special door care instructions - Most oven doors 

contain glass that can break. Read the following 

recommendations:

1. 

Do not

 close the oven door until all the oven racks are 

fully positioned into the oven interior.

2.  Do not hit the glass with pots, pans, or any other 

object.

3.  Scratching, hitting, jarring or stressing the glass may 

weaken its structure causing an increased risk of 

breakage at a later time.

Removing and replacing the lift-off oven door

Oven door hinge 

locations

Fig. 1

Fig. 2

Fig. 4

roller

pin

hinge 

arm

Oven

door

Hinge

About

Summary of Contents for FGEF3030PB

Page 1: ... Rev F March 2015 Important Safety Instructions 3 5 Features at a Glance 6 Before Setting Oven Controls 7 8 Before Setting Surface Controls 9 10 Setting Surface Controls Ceramic cook top 11 14 Oven Control Functions 330 330i 15 Setting Oven Controls 16 22 Self Cleaning 23 24 Care Cleaning 25 28 Before You Call 29 31 Major Appliance Warranty back cover ...

Page 2: ...s bake or 12 Hour Energy Saving features 16 Changing oven temperature display F or C 16 Setting silent control feature 16 Setting oven lockout feature 17 Setting minute timer 17 Setting bake 18 Setting timed bake and delayed timed bake 18 19 Setting Quick Bake some models 20 Setting broil 21 Adjusting oven temperature 22 Operating oven light 22 Self Cleaning 23 24 Care Cleaning 25 28 Cleaning reco...

Page 3: ... related Tip Over Hazard A child or adult can tip the range and be killed Verify the anti tip device has been installed to floor or wall To check if the anti tip bracket is installed properly use both arms and grasp the rear edge of range back Carefully attempt to tilt range forward When properly installed the range should not tilt forward Refer to the anti tip bracket installation instructions su...

Page 4: ...s on or near the oven vent These items could melt or ignite Placement of interior oven racks Always place oven racks in desired location while oven is cool If rack must be moved while oven is hot use extreme caution Use potholders and grasp the rack with both hands to reposition Do not let potholders contact the hot heating elements in the oven Remove all utensils from the rack before moving Do no...

Page 5: ...ORTANT INSTRUCTIONS FOR USING YOUR COOKTOP Know which knob controls each surface heating unit Place a pan of food on the unit before turning it on and turn the unit off before removing the pan Use proper pan size This appliance is equipped with one or more surface units of different sizes Select utensils having flat bottoms large enough to cover the surface unit heating element The use of undersiz...

Page 6: ...m fan some models 16 Adjustable interior oven rack s Effortless Oven Rack system not shown some models 17 Large 1 piece oven door handle 18 Full width oven door with window 19 Storage drawer with large 1 piece door handle some models or lower cover panel some models 20 Easy to clean upswept cooktop 21 Ceramic smoothtop elements styles and color will vary by model 22 6 single radiant element some m...

Page 7: ...e place the bottom oven rack some models in the lowest rack position for baking and when roasting large cuts of meat Removing replacing arranging racks To remove pull the rack forward until it stops Lift up front of rack and slide out To replace fit the rack onto the guides on the oven walls Tilt the front of the rack upward and slide the rack back into place Arranging always arrange the oven rack...

Page 8: ...d 5 for the other connector arm 7 Once both connector arms are properly in place be sure to test the oven rack operation by gently closing the oven door The oven rack should move in and out of the oven freely when the door is opened or closed Never pick up hot oven rack parts Make sure the oven and oven racks are COMPLETELY cool and safe to touch before attempting to assemble or disassemble the Ef...

Page 9: ...d the pans and cookware in the oven for even heat to reach around the cookware See Fig 1 Fig 1 Element ON hot surface indicator lights Your appliance is equipped with two different types of radiant surface control indicator lights that will glow on the backguard the Element On indicator light and the Hot Surface indicator lights See Fig 2 The Element ON indicator lights are located on the control ...

Page 10: ...3 Fig 2 Fig 1 BEFORE SETTING SURFACE CONTROLS The ceramic glass cooktop has radiant surface elements located below the surface of the glass The patterns on the ceramic glass will outline the size and type of element available The single radiant element will have one round outline pattern shown keep warm zone is designed to keep food warm only The dual radiant element is flexible because you may se...

Page 11: ... these items melt on the cooktop they will damage the ceramic cooktop The size and type of utensil used and the amount and type of food being cooked will influence the setting needed for best cooking results The Element ON indicator lights will glow when one or more elements are turned ON A quick glance at these indicator lights when finished cooking is an easy check to be sure all control knobs a...

Page 12: ...urn the surface control knob clockwise See Fig 2 to begin heating both the inner and outer portions of the dual element If only the inner heating portion is needed for smaller cookware push in and turn the knob counter clockwise See Fig 1 3 When cooking is complete turn the dual radiant surface element OFF before removing the cookware Start most cooking operations on a higher setting and then turn...

Page 13: ...f a particular food is not listed start with the medium level and adjust as needed Most foods can be kept at serving temperatures by using the medium level Fig 2 Fig 1 with approximate setting for medium shown Do not allow aluminum foil or ANY material that can melt to make contact with the ceramic glass cooktop If these items melt on the cooktop they will damage the ceramic cooktop Unlike the sur...

Page 14: ...tops Start with hot tap water to bring water to boil more quickly Use the highest heat seating when first bringing the water to a boil Once boiling is achieved reduce heat to lowest possible setting to maintain that boil NEVER place or straddle a cooking utensil over 2 differ ent surface cooking areas at the same time This may cause the ceramic cooktop to fracture Do not allow aluminum foil or ANY...

Page 15: ...mer The minute timer does not start or stop cooking Also Timer On Off pad is used to set the continuous bake function Oven light pad Use to turn the interior oven light ON or OFF Quick Bake pad activates the Quick Bake feature Up and down arrow pads Use with the feature or function pads to set oven temperature bake time start time clean time when programming an automatic start time setting or adju...

Page 16: ...d each time a pad is pressed If desired the control can be programmed for silent operation Press and hold After 7 seconds the control will beep once This will block the controls from sounding when a pad is pressed To return the sound press and hold again for 7 seconds until the control beeps once Changing between continuous bake setting or 12 Hour Energy Saving feature The oven control has a built...

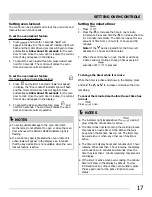
Page 17: ...ick Bake 1 Press and hold for 3 seconds Loc will appear in display the Door Locked indicator light will flash and the motor driven door lock will begin to close automatically Allow about 15 seconds for the oven door to lock Once the oven door is locked the current time of day will appear in the display 2 To cancel the oven lockout feature press and hold for 3 seconds The control will unlock the ov...

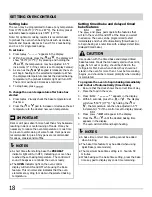
Page 18: ...he oven elements are cycling to maintain the selected baking temperature A bake time or start time setting cannot be added when broiling The bake time feature may be added when using Quick Bake some models The maximum bake time setting is 11 hours 59 minutes While baking with a bake time setting press the bake time key pad to display any cook time remaining Dark or dull pans absorb more heat than ...

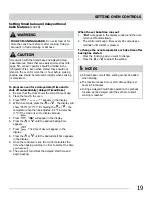
Page 19: ... will appear in the display 8 Press the or until the desired start time appears in the display 9 Once the controls are set the control calculates the time when baking will stop in order to start at the time you have set 10 The oven will turn ON at the delayed start time and begin heating Use caution with the timed bake and delayed timed bake features Foods that can easily spoil such as milk eggs f...

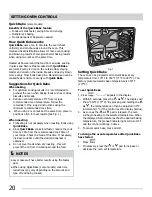
Page 20: ... roasting Preheating is not necessary when roasting foods using Quick Bake Since Quick Bake cooks food faster reduce the cook time by 25 from the recommended cook time of your recipe Check the food at this time If necessary increase cook time until the desired doneness is obtained Do not cover foods when dry roasting this will prevent the air from circulating around the food Fig 1 Setting Quick Ba...

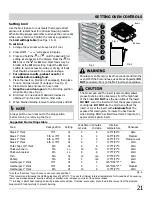
Page 21: ... increase your risk of food borne illness Broiling is direct heat cooking and will produce some smoke If smoke is excessive place food further away from the element Always watch food carefully to prevent burning The broiler pan and the insert some models allows grease to drain and be kept away from the high heat of the broiler DO NOT use the pan without the insert DO NOT cover the insert with foil...

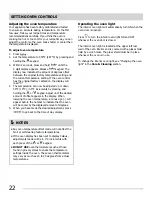
Page 22: ... holding the keypad 3 Within 2 seconds press and hold until the 2 digit display appears Release keypad The display now indicates the amount of degrees offset between the original factory temperature setting and the current temperature setting If the oven control has the original factory calibration the display will read 0 4 The temperature can now be adjusted up or down 35 F 19 C in 5 F increments...

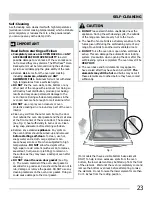
Page 23: ...any soil from the outer oven frame the door liner outside the oven door gasket and the small area at the front center of the oven bottom These areas See Fig 1 heat sufficiently to burn soil on Clean using soap and water before starting self clean Remove any excessive spillovers Any spills on the oven bottom should be wiped up and removed before starting self clean To clean use hot soapy water and ...

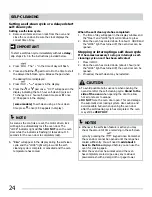
Page 24: ...cycle 1 Remove all items and oven rack from the oven and close the oven door Be sure the clock displays the correct time of day When the self clean cycle has completed 1 The time of day will appear in the display window and the Clean and LOCK light will continue to glow 2 Once the oven has cooled down for about 1 HOUR and the LOCK light has turned off the oven door can be opened 6 CLn will appear ...

Page 25: ...is recommended to use mild dish soap and water or a 50 50 solution of water and vinegar Porcelain enamel parts Porcelain enamel broiler pan and broiler pan insert if equipped Gentle scrubbing with a soapy no scratch cleaning pad will remove most spots Rinse with a 1 1 solution of clear water and ammonia If necessary cover difficult spots with an ammonia soaked paper towel for 30 to 40 minutes Rins...

Page 26: ...after the cooktop has cooled using the cooktop cleaning cream Metal marks can become permanent if not removed prior to future use Cookware cast iron metal ceramic or glass with rough or dirty bottoms can mark or scratch the cooktop surface To maintain the cooktop appearance DO NOT Slide anything metal or glass across the cooktop Use cookware with dirt or dirt build up on bottom replace with clean ...

Page 27: ...eld Replace bulb with a new 40 watt appliance bulb 4 Replace glass shield over bulb and snap wire holder into place 5 Turn power back on again at the main source or plug the range back in 6 The clock will then need to be reset To reset see Setting the Clock and Minute Timer in this Use Care Manual DO NOT use the following on the cooktop wire holder glass shield The interior oven light is located a...

Page 28: ...ven frame see fig 4 To replace oven door 1 Firmly grasp both sides of oven door along the door sides Do not use the oven door handle see fig 3 2 Holding the oven door at the same angle as the removal position sit the hook of the hinge arm over the roller pins located on each side of the oven door frame See Fig 4 The hook of the hinge arms must be fully seated onto the roller pins 3 Fully open the ...

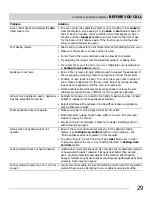
Page 29: ...are have sufficient room for appliance clearance Cannot move appliance easily Appliance must be accessible for service Cabinets not square or are built in too tightly to appliance sides Contact builder or installer to make appliance accessible Carpet interferes with appliance Provide sufficient space so appliance may be lifted over carpet Entire appliance does not operate Make sure power cord is p...

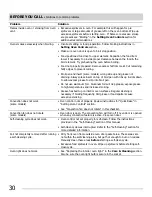
Page 30: ...se expose grease to high temperatures and increase smoking Grease has built up on interior oven surfaces Regular cleaning is necessary if broiling frequently Old grease or food spatters cause excessive smoking Convection does not work some models Oven control not set properly Review instructions for Quick Bake in Setting Oven Controls section See Convection fan does not rotate in this checklist Co...

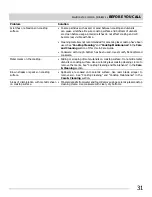
Page 31: ...Cookware with rough bottom has been used Use smooth flat bottomed cookware Metal marks on the cooktop Sliding or scraping of metal utensils on cooktop surface Do not slide metal utensils on cooktop surface Use a ceramic glass cooktop cleaning creme to remove the marks See Cooktop Cleaning and Maintenance in the Care Cleaning section Brown streaks or specks on cooktop surface Spillovers are cooked ...

Page 32: ...ompanies use of parts other than genu ine Electrolux parts or parts obtained from persons other than authorized service companies or external causes such as abuse misuse inadequate power supply accidents fires or acts of God CUSTOMER S SOLE AND EXCLUSIVE REMEDY UNDER THIS LIMITED WARRANTY SHALL BE PRODUCT REPAIR OR REPLACEMENT AS PROVIDED HEREIN CLAIMS BASED ON IMPLIED WARRANTIES INCLUDING WARRANT...

Reviews: