background image

6

OPERATING INSTRUCTIONS

My Favorite Cycle

The MY FAVORITE CYCLE option allows you to 

program your preferred cycle and options into 

one button.


Once Programmed, simply press 

the MY FAVORITE CYCLE button will select the 

programmed cycle and options. Pressing the


START/CANCEL pad and close the dishwasher 

door immediately will start the cycle.
To Program the MY FAVORITE CYCLE button:
1.  Select your preferred cycle and options
2.  Hold the MY FAVORITE CYCLE button for 3 

seconds.

The LED over the MY FAVORITE pad turns on 

indicating the MY FAVORITE CYCLE option has 

been programmed.


To change the MY FAVORITE 

CYCLE option simply repeat steps one and two 

above.

To Cancel a Cycle and Delay Start

Both running cycle and delay countdown can be 

cancelled at any time.
Open the dishwasher door and press the


START/

CANCEL pad until you hear a tone.


The running 

cycle or delay countdown is cancelled.
If desired, a new cycle can now be selected, by 

pressing


START/CANCEL pad and closing the door 

immediately, the new cycle will begin.

Delay Start

The DELAY START option allows you to 

automatically delay starting your dishwasher from 

1-24 hours.
Select your desired cycle and options, then press 

the DELAY START pad until the desired delay time 

displays in the status window.


The LEDs of selected 

cycle and options are illuminated. The status 

window displays the delay time and then displays 

‘Press Start’.
To start the delay countdown, press


START/CANCEL 

pad and close door immediately. 
The status window displays ‘Close’ after the


START/

CANCEL pad is pressed.
A tone will sound indicating that the countdown 

has started after the door is closed. The selected 

cycle starts when the countdown is completed.

Child Lock Controls

To prevent children from accidentally changing the 

dishwasher cycle or starting the dishwasher, lock 

the dishwasher controls by pressing the DELAY 

START pad until the status window displays “loc”.


To unlock the controls, press the DELAY START 

pad until “loc” is no longer displayed in the status 

window.

Heat Dry

The HEAT DRY option in combination with rinse 

aid will enhance drying performance.


HEAT DRY 

option is available on all cycles.
   The AIR DRY option will reduce temperature 

in the hot rinse of the selected wash cycle.


This 

option will slightly decrease energy usage but will 

increase the likelihood that dishware will not be 

dry.

Opening the door during cycle

If you open the door while a cycle is running or 

delay is counting down, the dishwasher will stop 

running.
The LEDs of selected cycle and options are 

illuminated, the status window displays the 

remaining cycle time or delay time and displays 

‘Press Start’.
To resume, press


START/CANCEL pad and close the 

dishwasher door immediately.
The status window displays ‘Close’ after the


START/

CANCEL pad is pressed.
A tone will sound indicating that the dishwasher 

will begin running from the point of interruption 

after the door is closed.
If the dishwasher door is kept open for too long, or 

the door is closed without


pressing


START/CANCEL 

pad, the running cycle or delay countdown will be 

cancelled.

Status Indicator Lights 

The CLEAN light will remain on after the door is 

opened.
When the SANITIZE option is selected and the 

criteria is met, the Sanitized indicator will display 

and remain on after the door is opened.


If the 

sanitization criteria is not achieved, the indicator 

will not display.


This can happen if the cycle is 

interrupted or if the sanitization temperature 

could not be reached due to incoming water 

temperature significantly below 120

0

F.

Green Light

When the GREEN LIGHT illuminates on the floor 

this indicates that the wash cycle is complete.

Blue Light

When the BLUE LIGHT illuminates on the floor 

this indicates that the wash cycle is operating.

To Cancel a Setting

If you have selected your cycle and options and 

decide to cancel, by pressing the


START/CANCEL 

pad, the unit will go into a stand-by mode, which 

all LEDs will go out.

Summary of Contents for FGID2476SF

Page 1: ...re of your Dishwasher 117886623 RevA April 2019 Important Safety Instructions 2 Product Registration 3 Features at a Glance 4 Operating Instructions 5 Preparing and Loading Dishes 9 Dishwasher Dispenser Detergents 13 Factors Affecting Performance 15 Care and Cleaning 16 Before You Call 17 Major Appliance Warranty 20 ...

Page 2: ...t allow children to play in or on the dishwasher Use only detergents and rinse agents recommended for use in a dishwasher Store dishwasher detergent and rinse agents out of the reach of children If the dishwasher drains into a food disposer make sure disposer is completely empty before running dishwasher Do not wash plastic items unless marked Dishwasher Safe or equivalent Check with manufacturer ...

Page 3: ...ptions available on all models NOTE Very Important Information Read Before Operating Your Dishwasher Normal Operating Sounds This dishwasher does not sound like most dishwashers IT S QUIETER Your Direct Feed Wash System dishwasher uses energy efficient motors for the wash and drain portions of the cycle you select Each cycle has a series of water fills and drains for washing and rinsing dishes As ...

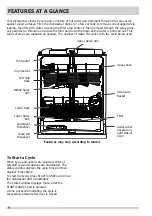
Page 4: ...ded The number of water fills varies with the cycle being used Tub Gasket Middle Spray Arm Lower Rack Cup Shelves Lower Spray Arm Detergent Dispenser Rinse Aid Dispenser Upper Spray Arm Upper Rack Silverware Basket Filter Serial Label located on right side of door Soft Grip Rack To Start a Cycle When cycle and options are selected LEDs of selected cycle and options are illuminated The status windo...

Page 5: ... food grease and soil from dishes more effectively and aids in drying performance by adding additional rinse aid and increasing the water temperature Recommended Cycle for typical use The Normal cycle with its factory default options of normal temperature and heated dry together provide the best all around performance This cycle selection is recommended for everyday use and is suitable for a large...

Page 6: ...TART pad until the status window displays loc To unlock the controls press the DELAY START pad until loc is no longer displayed in the status window Heat Dry The HEAT DRY option in combination with rinse aid will enhance drying performance HEAT DRY option is available on all cycles The AIR DRY option will reduce temperature in the hot rinse of the selected wash cycle This option will slightly decr...

Page 7: ...ogged filters or a restricted drain line has been detected Check and clean both filters and sump area and check for a pinched or blocked drain hose If the drain line is attached to a disposer check that the knockout plug has been removed i30 A leak or overflow of water has been detected in the bottom pan Look for loose connections at the water inlet valve and ensure the unit is properly leveled i5...

Page 8: ...dishes and silverware Default Surge Normal and Heat Options Scour spray Hi Temp Sanitize and Air 2 9 7 3 gal 11 0 27 7 liters 2 3 1 4 5 Washes 2 Rinses 30 Min Wash A fast wash for lightly soiled dishes and silverware Default Scour Normal and Heat Options Air 4 5 gal 17 1 liters 1 2 3 Washes 1 Rinse China Crystal For lightly soiled China and Crystal Default Spray Normal and Heat Options None Availa...

Page 9: ...s recommendations before washing items in question If the dishwasher drains into a Food Disposer be sure disposer is completely empty before starting dishwasher Loading the Upper Rack Features and appearance of racks and silverware basket may vary from your model The upper rack is designed for flexibility in loading a wide variety of items including cups glasses stemware small plates bowls etc Loa...

Page 10: ...r model The bottom rack is best for plates saucers bowls and cookware Large items should be placed along the edge so they do not block the spray arm rotation For best results place bowls casseroles and sauce pans with soiled surface facing down or toward the center Tilt slightly for better drainage Make sure tall items do not block spray arm rotation Be sure pan handles do not protrude through the...

Page 11: ...her short items or fold down both and use for long items such as utensils and spatulas Fold up to load tall glasses 10 place settings standard loading pattern Bottom Rack Bottom Rack Fold down Tines Bottom Rack The fold down tines in the lower and upper rack make it easy to load those extra large and hard to fit items The tines may be left up for normal use or folded down for more flexible loading...

Page 12: ...s like baby bottle caps jar lids corn cob holders etc can be placed in a covered section Close the cover to hold small items in place Use suggested loading patterns as shown to increase washability of the silverware Be sure nothing protrudes through bottom of basket or rack to block the spray arm Do not mix silver and stainless to avoid damaging the silver finish Loading the Silverware Basket Soft...

Page 13: ...ore starting cycle Store detergent in a cool dry location Moist or caked detergent may not dissolve properly To add detergent 1 Press the dispenser cover latch to open the main wash detergent cup 2 Add the recommended amount of detergent to the main wash cup 3 Slide the main wash cover back over the main wash cup to close DISHWASHER DISPENSER DETERGENTS Main Wash Cup Main Wash Cover Cover Latch NO...

Page 14: ... performance Try adding more detergent at the beginning of the main wash portion of the cycle As a rule use 1 teaspoon for each grain above 12 Unlatch the door open slowly and add detergent to the bottom of the tub Close the door to latch and the dishwasher will continue through the cycle Water Hardness Soft Water 0 3 grains Medium Hard Water 4 8 grains Hard Water 9 12 grains Amount of detergent t...

Page 15: ... the rinse aid dosage Press and hold the RINSE ONLY and DELAY START pad for 5 seconds until the status window shows rinse aid level Pressing the DELAY START pad increases the increment level L0 L6 Once the rinse aid level reaches L6 the status window will start back at level L0 Pressing the START button or just pausing for a few seconds confirms the rinse aid level setting the status window shows ...

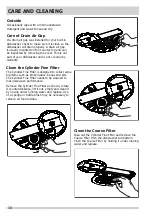
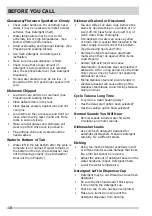
Page 16: ...e Filter as shown rotate it counterclockwise lift it out empty and clean it by rinsing under running water and replace Use of a sponge or bottle brush may be necessary to remove all food residue Outside Occasionally wipe with a mild nonabrasive detergent and water Rinse and dry Care of Drain Air Gap If a drain air gap was installed for your built in dishwasher check to make sure it is clean so the...

Page 17: ...mon experiences that are not the result of defective workmanship or material in your dishwasher Food Soils Left on Dishes Choose another cycle for longer washing time Choose the Hi Temp Wash option Check rack loading section for proper loading avoid nesting items Home water pressure may be too low should be 20 to 120 pounds per square inch psi Check incoming water temperature It should be at least...

Page 18: ...hand washing in a solution of 1 2 cup 120 ml bleach and one quart 1L of warm water Rinse thoroughly Iron deposits in water can cause a yellow or brown film A special filter installed in the water supply line will correct this problem See Removing Spots and Film Aluminum utensils can leave gray black marks when they rub against other items Load Properly Certain high acid foods can cause discolorati...

Page 19: ...o see if cycle is set correctly See Operating Instructions Is dishwasher set for Delay Start Option Make sure door is closed and latched Dishwasher Won t Fill Is water supply turned on Dishwasher Does Not Drain Properly If unit is hooked up to a food waste disposer make sure the disposer is empty Check to see if the knockout plug has been removed from inside the food waste disposer inlet Check to ...

Page 20: ...ectrolux parts or parts obtained from persons other than authorized service companies or external causes such as abuse misuse inadequate power supply accidents fires or acts of God DISCLAIMER OF IMPLIED WARRANTIES LIMITATION OF REMEDIES CUSTOMER S SOLE AND EXCLUSIVE REMEDY UNDER THIS LIMITED WARRANTY SHALL BE PRODUCT REPAIR OR REPLACEMENT AS PROVIDED HEREIN CLAIMS BASED ON IMPLIED WARRANTIES INCLU...

Reviews: