background image

38

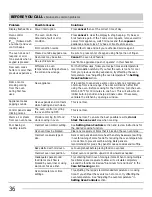
These areas are not within the self-cleaning area, but get hot

enough to burn on residue. Clean these areas before starting a

self-clean cycle. Burned-on residue may be cleaned with a stiff

nylon brush and water or a nylon scrubber. Be careful not to

damage the oven gasket.

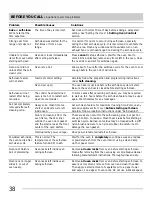
Oven rack finish is

dull or discoloring.

Soil not completely

removed after self-

cleaning cycle.

Self-clean feature

will not start.

The oven door must lock before the self-clean cycle will start.

Be sure the oven door is closed before starting self-clean.

Oven door did not

unlock after the self-

clean cycle.

Allow about 1 hour after the self-clean cycle for the oven to cool

enough before the oven door will unlock.

Set clock with correct time of day before adding a delay start

setting. See "Setting the clock" in 

Setting Oven Controls

section.

bake

 or 

self-clean

did not start at the

time expected.

The time of day is incorrect.

Problem

Possible Causes

Solutions

Oven is too hot.

Carefully follow the prepartion and programming instructions

under 

Self-cleaning.

Incorrect control setting.

Oven door open.

In some cases after cancelling self-clean, you may be required

to wait up to 4 hours before the self-clean feature may be used

again. Watch display for any messages.

Self-clean will not

restart after being

cancelled.

The control has determined

oven is too hot to restart self-

clean (some models).

Heavy soils. Clean time too

short or spillovers were left

inside oven.

Set self-clean feature for maximum cleaning time. Remove any

excessive spillovers from oven 

before starting self-clean

.

Carefully follow prepartion instructions under "Self-cleaning".

Interrupted by power outage.

Once power is restored restart self-clean.

Oven rack no longer

slides in or out of

oven easily.

Oven racks left inside oven

during self-clean.

Remove 

all oven racks

 from oven before starting self-clean.

Clean after removing from the oven using a mild, abrasive cleaner

following manufacturer's instructions. Thoroughly rinse and dry.

Oven racks left inside oven

during self-clean.

Remove 

all oven racks

 from oven before starting self-clean. To

ease rack movement, remove from oven and clean if needed.

Then apply a small amount of vegetable oil to a paper towel

and wipe oil on edges of oven racks. Do not use lubricant spays.

Failure to clean soil from the

oven frame, the door liner

outside the oven door gasket

and the small area at the front

center of the oven bottom.

Strong odor from

range or smells hot.

Self-clean was started for the

first times or from a new

range.

It is normal for odors to occur during self-clean, especially

during the first self-clean cycle. It is recommend to ventilate the

kitchen area. Open any windows and if available turn on an

exhaust fan or overhead range hood during the self-clean cycle.

Unable to remove

items from oven after

starting self-clean.

Oven door locks immeadiately

after setting self-clean.

Press 

cancel

 to stop self-clean. Wait for the oven door to

unlock. Once unlocked, remove any items left in the oven, close

the oven door and set for self-clean again.

Powdered ash inside

the oven cavity after

self-clean cycle.

This is normal. The

temperature of the self-clean

feature turned dirt to ash.

Wait for the oven to 

completely

 cool. Wipe away any residue

or powdered ash from the oven interior using a clean damp

cloth or paper towel.

BEFORE YOU CALL 

• Solutions to common problems

Summary of Contents for Gallery FGGF3054M

Page 1: ...8352 Gas Range 316901218 Rev A Jun 2011 Important Safety Instructions 3 6 Before Setting Oven Controls 7 9 Before Setting Surface Controls 10 11 Setting Surface Controls 12 Oven Control Functions 540 probe 13 Setting Oven Controls 14 28 Self Cleaning 29 31 Care Cleaning 32 35 Before You Call 36 39 Major Appliance Warranty back cover ...

Page 2: ... problems that might occur If you do need service help is only a phone call away Call Frigidaire Customer Services at 1 800 944 9044 Be sure to visit us online at www frigidaire com for a complete line of accessories Product Registration 2 Important Safety Instructions 3 6 Before Setting Oven Controls 7 9 Oven racks 7 8 Effortless Oven Rack system and assembly 9 Before Setting Surface Controls 10 ...

Page 3: ...tructions provided in the literature package for this range Ask your dealer to recommend a qualified technician and an authorized repair service Know how to disconnect the power to the range at the circuit breaker or fuse box in case of an emergency If the information in this manual is not followed exactly a fire or explosion may result causing property damage personal injury or death FOR YOUR SAF...

Page 4: ...Stepping leaning or sitting on the door or drawers of a range can result in serious injuries and also cause damage to the appliance DO NOT allow children to climb or play around the range The weight of a child on an open oven door may cause the range to tip resulting in serious burns or other injury NEVER use this appliance as a space heater to heat or warm the room Doing so may result in carbon m...

Page 5: ... IMPORTANT INSTRUCTIONS FOR USING YOUR COOKTOP Know which knob controls each surface burner Place a pan of food on the burner before turning it on and turn the burner off before removing the pan Always turn knob to the full LITE position when igniting top burners Visually check that burner has lit Then adjust the flame so it does not extend beyond the edge of the utensil Utensil handles should be ...

Page 6: ...d room SELF CLEANING OVENS WARNING Do not touch the oven during the self clean cycle Keep children away from oven during self clean cycle Failure to follow these instructions can result in burns If your gas range model design allows for L P conversion the L P conversion kit may be obtained from your local appliance dealer and should be installed by a qualified service technician Before installing ...

Page 7: ...cookware still on the racks To avoid damaging cookware or spilling food items always remove any cookware first IMPORTANT rack guides Fig 3 Most flat and offset oven racks slide on rack guides provided along the oven cavity sides For better access to food items in the oven slowly pull the oven rack straight out to the oven rack stop position before checking on food items or removing food dishes fro...

Page 8: ...rtless Oven Rack some models instructions are provided later in this section See important note below The bottom oven rack some models should only be used in the lowest oven rack position This rack should be used when placing large cuts of meat in the oven flat oven rack flat handle oven rack some models offset oven rack some models Effortless Oven Rack some models half oven rack with removable sh...

Page 9: ... arm 7 Once both connector arms are properly in place be sure to test the oven rack operation by gently closing the oven door The oven rack should move in and out of the oven freely when the door is opened or closed Fig 6 Effortless Oven Rack after assembly BEFORE SETTING OVEN CONTROLS left and right door connector brackets with connector arm ends shown in locked position pointing upwards connecto...

Page 10: ...proper burner adjustment A good flame is clear blue and hardly visible in a well lighted room Each cone of flame should be steady and sharp Adjust or clean burner if flame is yellow orange CAUTION Correct flame setting Incorrect flame setting CAUTION IMPORTANT Do not place aluminum foil or ANY material that can melt on the range cooktop If these items melt they may damage the cooktop Fig 1 NOTE Co...

Page 11: ...ossible rusting store in a dry place and keep uncovered After each use clean with a stiff brush and hot water only then rinse Dry immediately Do not clean griddle in the dishwasher Using the griddle Remove the center burner grate some models and carefully replace with the griddle For best results preheat the griddle for 5 minutes on medium or a medium low setting Slow preheating provides more even...

Page 12: ...flame as needed Do not place flammable items such as plastic wrappings spoon holders or plastic salt and pepper shakers on the cooktop when it is in use These items could melt or ignite Potholders towels or wooden spoons could catch fire if placed too close to the range cooktop CAUTION DO NOT cook with a surface control knob left in the lite position The electronic ignitor will continue to spark T...

Page 13: ... and maximum time or temperature settings that may be entered into the control An entry acceptance tone 1 beep will sound each time a keypad is touched the oven lock keypad is delayed 3 seconds An entry error tone 3 short beeps will sound if the entry of the temperature or time is below the minimum or above the maximum settings for the feature bake time Use to enter the length of baking time neede...

Page 14: ...r 24 hour display mode The oven control is factory preset to show the time of day with a 12 hour clock This setting may be changed to provide the time of day with a 24 hour clock To set 12 or 24 hour display mode Step Press 1 Press and hold set clock for 6 seconds 2 Press self clean to toggle between 12 Hr dAY or 24 Hr dAY display modes See Figs 4 5 and release keypad when the mode you prefer is d...

Page 15: ...and hold lock keypad for 3 seconds door Loc will appear in the display until the oven door is completely locked Press and hold lock keypad for 3 seconds Once the oven door has unlocked the door Loc message will no longer display See Fig 3 To cancel the oven lock feature Step Press NOTE NOTES To avoid possible damage to the oven door latching mechanism do not attempt to force open the oven door whe...

Page 16: ...h any other active oven feature The timer will display hours and minutes until 1 hour remains When less than 1 hour remains the display will count down in minutes and seconds Once the timer has less than 1 minute remaining only seconds will display If both the oven and timer are active the timer information will display by default To momentarily display information for any other active oven featur...

Page 17: ...pans absorb more heat than shiny bakeware resulting in dark or overbrowning of foods It may be necessary to reduce the oven temperature or cook time to prevent overbrowning of some foods Dark pans are recommended for pies Shiny pans are recommended for cakes cookies and muffins IMPORTANT Always use pot holders or oven mitts when working with a hot oven When cooking the oven interior oven racks and...

Page 18: ...clean The self clean feature will not accept bake time instructions Refer to the self clean section for details on how to select different self clean cycle times The delay start setting may be added to the quick preheat convect or convect convert features A delay start setting cannot be added to broil Once the delay start feature has started the cooking process press the bake time keypad once to d...

Page 19: ...ast features If the oven door is opened when a convect feature is active the convect fan will stop rotating until the oven door is closed Benefits of the convection features Foods cook more evenly Multiple rack baking No special pans or bakeware needed NOTES Suggestions for convect baking For optimum results it is recommended to preheat the oven before baking foods such as cookies biscuits and bre...

Page 20: ...emperature eliminating the need for any guesswork To avoid damaging the probe do not use kitchen utensils such as tongs to pull on the probe cable or handles Always insert and remove the probe using the provided handles See Fig 2 and always use a pot holder to protect hands from possible burns Do not store the probe inside the oven Always remove the probe from the oven when finished Use only the o...

Page 21: ...fter reaching the target temperature 1 Press keypad and hold for 6 seconds 2 Press keypad and toggle until the Continu message appears Fig 3 then press to accept To set the oven to automatically stop cooking and start keep warm once reaching target temperature 1 Press keypad and hold for 6 seconds 2 Press keypad and toggle until CAnCEL message appears Fig 4 then press to accept Fig 3 Fig 4 Choosin...

Page 22: ...hed By default the oven will automatically change to a keep warm setting HLd and the actual probe temperature will alternate in the display keep warm will maintain the oven temperature at 170 F 77 C for 3 hours unless otherwise cancelled To stop cooking at any time press cancel handle The U S Department of Agriculture states Rare fresh beef is popular but you should know that cooking it to only 14...

Page 23: ...he food or if the food is done press cancel and remove food and probe from the oven Probe cont d NOTES During the cooking process the internal food temperature will display by default To review the target temperature press the keypad once After 6 seconds the display will revert back to the internal food temperature To assure temperature accuracy do not remove the probe from the food or receptacle ...

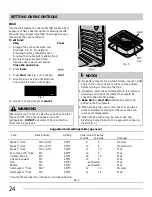
Page 24: ... 25 15 Well Chicken boneless 5th 450 F 10 8 Well Fish 5th 550 F as directed Well Shrimp 4th 550 F as directed Well Hamburger 1 thick 6th 550 F 12 10 Medium Hamburger 1 thick 5th 550 F 14 12 Well Insert Broil pan Fig 2 Fig 4 Fig 3 NOTES Use the off set rack if you choose to use rack position 6 Fig 1 4 5 6 To stop broil at any time press cancel WARNING Should an oven fire occur close the oven door a...

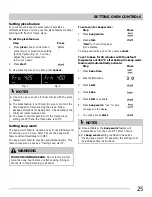
Page 25: ...g or sickness WARNING NOTES Fig 1 Fig 2 To set oven for keep warm 1 Press bake time 2 Enter 3 0 minutes 3 Press start 4 Press bake 5 Press start to activate 6 Press keep warm HLd for hold will appear in the display 7 To accept press start To set to bake for 30 minutes with the default temperature of 350 F after baking the keep warm feature will automatically activate Step Press Once activated the ...

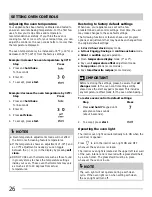
Page 26: ...determined oven control settings Over time the user may make changes to these default settings The following functions or features have user program options or adjustments that may have been changed from the original default settings 12 or 24 hour clock display mode 6 Hour Engergy Savings or continuous bake mode Silent or audible keypad operation Oven temperature display mode F or C Any oven tempe...

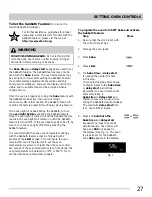
Page 27: ...e to step 6 Refer to the bake time or delay start instructions Remember the oven will shut off after completing a bake time or delay start and therefore may only be used once during the Sabbath Jewish Holidays The maximum delay start time is 11 hours 59 minutes 6 Press and hold both the bake time and delay start keypads for at least 3 seconds simultaneously The control will beep and SAb will appea...

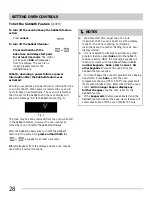
Page 28: ...ure At the same time press and hold both the keypads for at least 3 seconds SF will disappear from the display and the oven may be used with all normal functions Fig 1 SETTING OVEN CONTROLS If a delay start time longer than 12 hours maximum of 24 hours is desired set the display mode for the 24 hour setting For detailed instructions see the section Setting 12 or 24 hour display modes It is not adv...

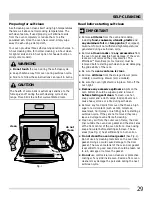
Page 29: ...me models or warming drawer some models Be sure the oven light shield is in place Turn off the oven light Remove any excessive spillovers Spills on the oven bottom should be wiped up and removed before starting self clean To clean use hot soapy water and a cloth Large food spillovers can cause heavy smoke or a fire during self clean Remove any food spills from oven that have a high sugar or acid c...

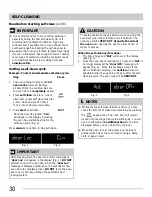
Page 30: ... Fig 3 Fig 4 Whenever the self clean feature is active you may check the amount of clean time remaining by pressing the keypad once The oven door will remain locked until the range has cooled sufficiently You will need to allow about 1 additional hour to the time displayed before you can open the oven door When the oven is cool wipe away any residue or powdered ash from the oven interior using a d...

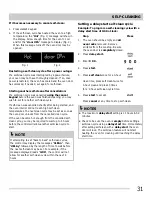
Page 31: ...h high self clean temperatures the next clean cycle may be set as soon as the oven door unlocks from the cancelled clean cycle If the oven became hot enough from the cancelled self clean cycle you may be required to wait up to 4 hours before the control will allow another self clean cycle to start NOTES The maximum delay start setting is 11 hours 59 minutes Check to be sure the oven is empty befor...

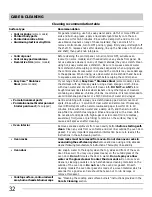
Page 32: ... and be sure to squeeze excess water from dishcloth before wiping the control panel Control knobs some models Painted body parts Painted decorative trim Aluminum plasticorvinyltrim If your range finish is Easy Care Stainless Steel some models clean the stainless with warm soapy water using a clean sponge or cloth Rinse with clean water and dry with a soft clean cloth DO NOT use ANY store bought cl...

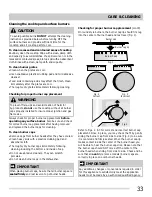
Page 33: ...mmediately after the grates are cool Thoroughly dry grates immediately following cleaning Always check for proper burner cap placement before operating any surface burner Also be sure and check for correct burner cap placement after having removed and replaced the burner caps for cleaning Checking for proper burner cap placement IMPORTANT When placing burner caps be sure that all burner caps are s...

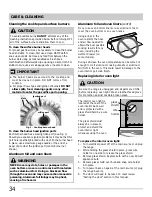
Page 34: ...arts are COOL before replacing oven light Wear a leather faced glove for protection against possible broken glass CAUTION Aluminum foil and oven liners Using a liner in the oven restricts the heat and air flow needed to obtain the best possible cooking results for any oven including the warmer drawer on some models Do not use oven bottom liners or use aluminum foil to cover the oven bottom or any ...

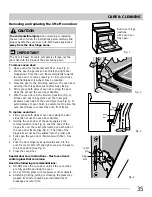
Page 35: ...re fully positioned inside the oven Do not hit door glass with cookware or other objects Scratching hitting jarring or stressing the glass may weaken its structure causing an increased risk of breakage at a later time Special door care instructions Most oven doors contain glass that can break To replace oven door 1 Firmly grasp both sides of oven door along the door sides Do not use the oven door ...

Page 36: ...on oven rack Bake started with cold oven Incorrect oven rack position Adjust oven rack position upward or downward as needed Inadequate space around food items or air flow is blocked by oven liner or using aluminum foil as a liner Try centering food in oven for single items When cooking multiple food items space cookware to allow air to circulate completely around the food items Review Aluminum fo...

Page 37: ...oor Convect fan turns on with features that should run without a fan some models For some models the convect fan may turn ON while preheating Oven control displays Prob ERR The probe is not recognized by the oven control If the error code persists the probe may be damaged or the probe cable has a short Floor is not level weak or unstable If floor under range is sagging or sloping contact a carpent...

Page 38: ...tion instructions under Self cleaning Interrupted by power outage Once power is restored restart self clean Oven rack no longer slides in or out of oven easily Oven racks left inside oven during self clean Remove all oven racks from oven before starting self clean Clean after removing from the oven using a mild abrasive cleaner following manufacturer s instructions Thoroughly rinse and dry Oven ra...

Page 39: ...ner head slots and ignition ports See Cleaning the cooktop and surface burners in the Care Cleaning section for additional cleaning instructions Burner caps are missing or not seated properly Check that all surface burner caps are level and seated correctly on surface burner heads See Cleaning the cooktop and surface burners in the Care Cleaning section Oven smokes excessively when broiling Oven d...

Page 40: ...services performed by unauthorized service companies use of parts other than genuine Electrolux parts or parts obtained from persons other than authorized service companies or external causes such as abuse misuse inadequate power supply accidents fires or acts of God CUSTOMER S SOLE AND EXCLUSIVE REMEDY UNDER THIS LIMITED WARRANTY SHALL BE PRODUCT REPAIR OR REPLACEMENT AS PROVIDED HEREIN CLAIMS BA...

Reviews: