PREPARATION
CHANGING BLOWER DISCHARGE (Optional)
The blower is shipped with its discharge facing DOWN. Follow
these steps ONLY if:
•
the position of the blower discharge needs to be moved so
ductwork does not interfere with floor joists, plumbing or
wiring below.
•
it is necessary to rotate the blower discharge to the RIGHT
or LEFT.
CUT COUNTERTOP OPENING
1. Lay out and cut the cooktop cut-out far enough FORWARD
so downdraft will fit behind it.
2. Set cooktop in place and slide it as far forward as possible.
Center and square it with edges of countertop.
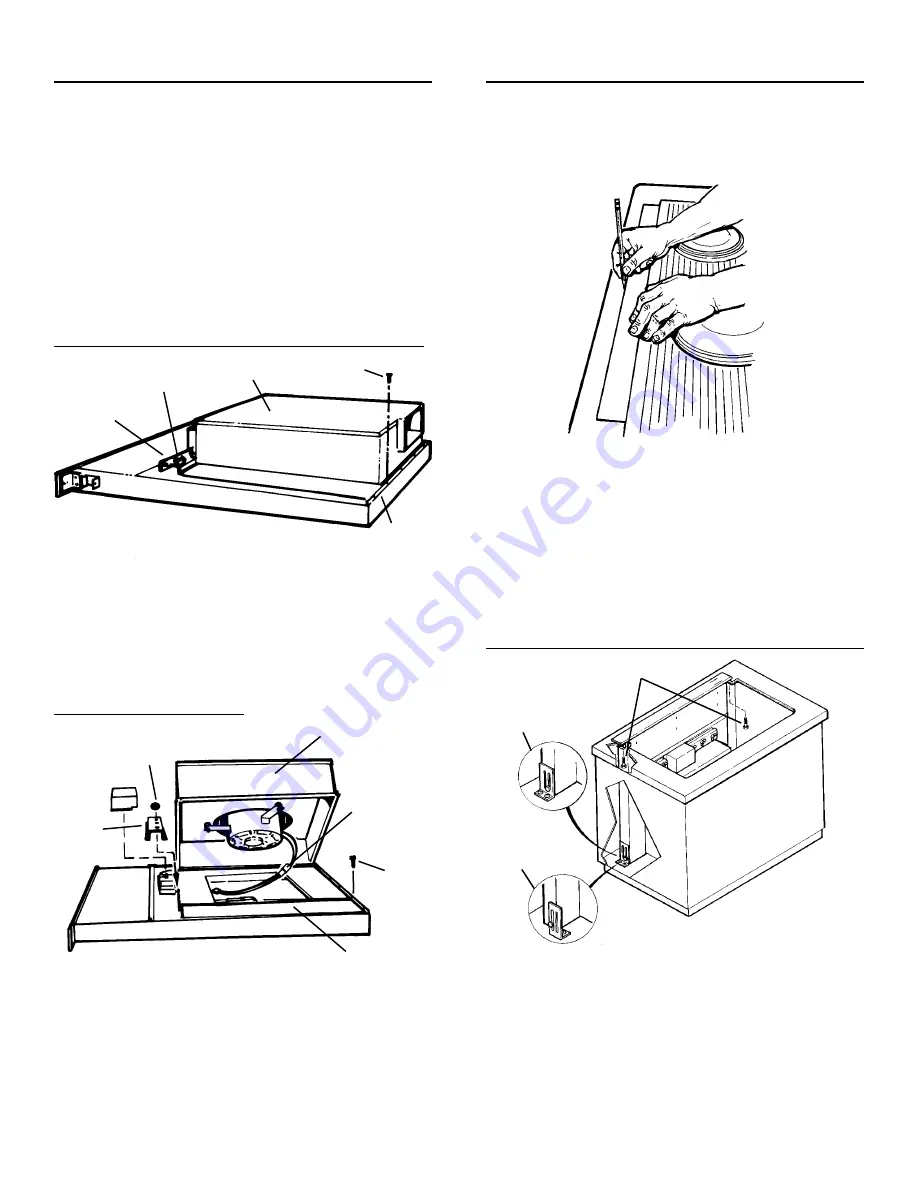
3. Place the plastic template against the back flange of the
cooktop and center it. Trace around template to mark the
downdraft opening.
4. Remove cooktop from countertop.
5. Cut downdraft opening. Be careful not to chip edges of
countertop.
MOUNT THE UNIT
Place the unit on its back on a table or work surface.
DOWN DISCHARGE - MOVING BLOWER LEFT OR RIGHT
1. Set downdraft into opening. Extend leveling brackets to floor
of cabinet so downdraft sits straight. (Note: Leveling brackets
can be removed and re-attached in other positions. Bottom
flange may have to face inward in tight cabinet installations.)
2. Secure the downdraft to the countertop as follows: Hold the
downdraft against the back of countertop cut-out and tighten-
ing the 2 mounting screws (one on each end of unit) on
underside of countertop. Use a wood shim between screw
and underside of granite countertops.
3. Screw leveling brackets to bottom of cabinet. Tighten screws
holding leveling bracket to unit on each side.
LEVELING BRACKET -
FLANGE FACING IN
LEVELING BRACKET -
FLANGE FACING OUT
MOUNTING SCREWS
1.
Remove the 4 nuts and 2 clamp channels.
2. Carefully lift blower and disconnect motor plug if necessary.
Reposition blower and RECONNECT MOTOR PLUG.
3. Use supplied cover plate to close open space (if any).
4. Replace clamp channels and use nuts to secure the blower
in its new position.
5. Use sheet metal screws through bottom flange to secure
bottom of blower.
COVER PLATE
CLAMP
CHANNEL
NUT
BLOWER
MOTOR
PLUG
SHEET
METAL
SCREW
LEFT OR RIGHT DISCHARGE
CLAMP
CHANNEL
NUTS
SHEET
METAL
SCREW
BOTTOM
FLANGE
BLOWER
1.
Loosen the 4 nuts and 2 clamp channels.
2. Slide blower to desired position.
3. Use supplied cover plate to close open space (if any).
4. Tighten nuts to secure top of blower and use sheet metal
screws through bottom flange to secure bottom of blower.
3


