background image

Summary of Contents for LFGF3020MBA

Page 1: ...s 11 15 Features at a Glance 7 Self Cleaning 16 17 Before Setting Oven Controls 8 Care Cleaning 18 20 Before Setti ng Surface Controls 9 Setting Surface Controls 10 Oven Control Functions 200 11 www frg daire com USA 1 800 944 9044 www frigidaire ca Canada 1 800 265 8352 rD ...

Page 2: ...ut the service life of your new appliance We view your purchase as the beginning of a relationship To ensure our ability to continue serving you please use this page to record important product information Need help Visit the Frigidaire web site at www frigidaire com Before you call for service there are a few things you can do to help us serve your better Read this Use Care manual It contains ins...

Page 3: ...all tape and packaging before using the range Destroy the carton and plastic bags after unpacking the range Never allow children to play with packaging material Proper Installation Be su re you r appliance is properly installed and grounded bya qualified technician in accordance with the National Fuel Gas Code ANSI Z223 latest edition or in Canada CAN CGA B149 1 and CAN CGA B149 2 and the National...

Page 4: ...Do not repair or replace any part of the appliance u nless specifically recommended in the manuals All other servicing should be done only by a qualified technician This may reduce the risk of personal injury and damage to the range For electric ignition models only Do not attempt to operate the range during a power failure If the power fails always turn off the range If the range is not turned of...

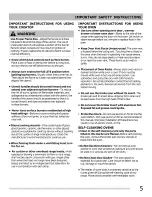
Page 5: ...in combination with each other IMPORTANT INSTRUCTIONS FOR USING YOUR OVEN Use care when opening oven door warmer drawer or lower oven door Stand to the side of the range when opening the door of a hot oven Let hot air or steam escape before you remove or replace food in the oven Keep Oven Vent Ducts Unobstructed The oven vent is located below the backguard Touching the surfaces in this area when t...

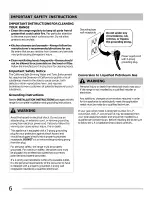
Page 6: ... to follow this warning can cause serious injury fire or death This appliance is equipped with a 3 prong grounding plug for your protection against shock hazard and should be plugged directly into a properly grounded receptacle DO NOT cut or remove the grounding prong from this plug For personal safety the range must be properly grounded For maximum safety the power cord must be plugged into an el...

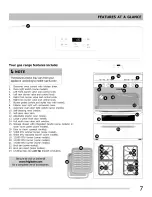
Page 7: ...erior oven light with removable cover 9 Automatic oven door light switch some models 10 Self cleaning oven interior 11 Self clean door latch 12 Adjustable interior oven rack s 13 Large 1 piece oven door handle 14 Full width oven door with window 15 Storage drawer with integrated handle some models or lower cover panel some models 16 Easy to clean upswept cooktop 17 5 000 BTU simmer burner some mod...

Page 8: ... The offset oven rack some models is designed to place the base of the rack about 1 2 of a rack position lower than normal This rack design provides several additional possible positions between the standard positions Air circulation in the oven For best baking results allow 2 4 5 10 cm around the cookware for proper air circulation and be sure pans and cookware do not touch each other the oven do...

Page 9: ...rial types The most popular materials available are Aluminum Excellent heat conductor Some types of food will cause it to darken Anodized aluminum cookware resists staining pitting Copper Excellent heat conductor but discolors easily Stainless Slow heat conductor with uneven cooking results Is durable easy to clean and resists staining Cast Iron A slow heat conductor however will retain heat very ...

Page 10: ...on When setting any surface control knob to the LITE position all electronic surface ignitors will spark at the same time However only the surface burner you are setting will ignite i ii _ i i I OFF LITE hl 6 s 4 3 2 LoI Fig 1 NEVERplaceorstraddlea cooking utensil over2 different surface cooking areas at the same time Do not place aluminum foil or ANY material that can melt on the range cooktop If...

Page 11: ...nd unlocks the oven door lockout is active or when the self clean cycle feature is active Clear off pad Use to clear any feature previously entered except the time of day and minute timer Press clear off to stop cooking Also use clear off to activate oven lockout feature Setting the clock When the appliance is first plugged in or when the power supply to the appliance has been interrupted the disp...

Page 12: ...ds until a tone sounds hr will appear in display for continuous cooking The current time of day will return to the display To cancel the continuous bake setting press timer on off and hold for 6 seconds until a tone sounds 12hr will appear in display indicating that the control has returned to the 12 Hour Energy Saving feature To cancel the minute timer before the set time has run out Presstimer o...

Page 13: ...s To change the oven temperature after bake has started 1 Press bake Visually check the bake temperature and that it needs to be changed 2 Press the _ or V pad to increase or decrease the set temperature to the desired new oven temperature The oven indicator light on the electronic display will turn ON and OFFwhen using the Bake feature and during preheat This is normal and indicates that the oven...

Page 14: ...gs and times refer to Fig 3 9 When broiling is finished press clear off Always pull the oven rack out to the stop position before turning or removing the food Fig 1 Fig 2 Insert Broil pan Should an oven fire occur close the oven door and turn i the oven OFF If the fire continues use a fire extinguisher DO NOT put water or flour on the fire Flour may be explosive The broiler pan and the insert some...

Page 15: ...rs such as those found in grocery stores to checkthe temperature settings inside your oven These oven thermometers may vary as much as 20 to 40 degrees from actual temperatures Setting oven lockout The control can be programmed to lock the oven door and lockout the oven control pads To set the oven lockout feature 1 Pressclear off and hold for 3 seconds Loc will appear indisplay the Door Locked in...

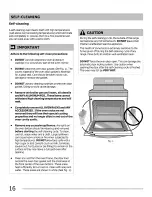
Page 16: ...pillovers Any spills on the oven bottom should be wiped up and removed before starting the self cleaning cycle To clean use hot soapy water and a cloth Large spillovers can cause heavy smoke or fire when subjected to high temperatures DO NOTallow food spills with a high sugar or acid content such as milk tomatoes sauerkraut fruit juices or pie filling to remain on the surface as they may leave a d...

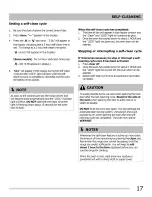
Page 17: ...the oven has cooled down for about i HOUR and the LOCK light hasturned off the oven door can be opened 3 Restart self clean cycle once all conditions have been corrected As soon as the controls are set the motor driven lock will begin to close automatically and the LOCK indicator light will flash DO NOT open the oven door while the light is flashing allow about 15 seconds for the oven door to lock...

Page 18: ...rubbing cleaners Only use kitchen cleaners that are especially made for cleaning stainless steel Always be sure to wipe the cleaners off from the surface as bluish stains may occur during heating that cannot be removed Porcelain enamel broiler pan and broiler Gentle scouring with a soapy non abrasive scouring pad will remove pan insert if equipped most spots Rinse with a 1 1 solution of clear wate...

Page 19: ... following cleaning including the bottom and inside of cap Do not use abrasive cleaners They can scratch porcelain Do not clean burner caps in the dishwasher Do not operate surface burners without burner caps properly in place See IHPORTANT notes Always keep the surface burner caps in place whenever a surface burner is in use When replacing the burner caps be sure the burner caps are seated firmly...

Page 20: ...g the lift off oven door The oven door is heavy For safe temporary storage lay the oven door flat with the inside of the door facing down Oven door hinge locations with oven door fully open Fig 1 To remove oven door 1 Open oven door completely horizontal with floor Fig l 2 Pull the door hinge locks on both left and right door hinges down from the oven frame completely towards the oven door Fig 2 A...

Page 21: ...nob to LITE until burner ignites and then turn control knob to desired flame size Burner ports are clogged With the burner OFF use a small gauge wire or needle to burner head slots and ignition ports See Cleaning the cooktop and surface burners in the Care Cleaning section for additional cleaning instructions Range power cord is disconnected from outlet electric ignition models only Be sure power ...

Page 22: ...ppen for pie oven vent spillovers or large amounts of grease left on the oven bottom Wipe up excessive spillovers before starting oven If flames or excessive smoke are present see Broiling in the Setting Oven Controls section F code error for example F10 Fll clear the display stop beeping Try the bake or broil feature again If the F13 F14 F15 F30 F31 or F90 F code error repeats remove power from a...

Page 23: ......

Page 24: ... service companies or external causes such as abuse misuse inadequate power supply accidents fires or acts of God DISCLAIMER OF IMPLIED WARRANTIES LIMITATION OF REMEDIES CUSTOMER S SOLE AND EXCLUSIVE REMEDY UNDER THIS LIMITED WARRANTY SHALL BE PRODUCT REPAIR OR REPLACEMENT AS PROVIDED HEREIN CLAIMS BASED ON IMPLIED WARRANTIES INCLUDING WARRANTIES OF MERCHANTABILITY OR FITNESS FOR A PARTICULAR PURP...

Page 25: ...s 11 15 Features at a Glance 7 Self Cleaning 16 17 Before Setting Oven Controls 8 Care Cleaning 18 20 Before Setting Surface Controls 9 Setting Surface Controls 10 Oven Control Functions 200 11 www frg daire com USA 1 800 944 9044 www frigidaire ca Canada 1 800 265 8352 rD ...

Page 26: ...ut the service life of your new appliance We view your purchase as the beginning of a relationship To ensure our ability to continue serving you please use this page to record important product information Need help Visit the Frigidaire web site at www frigidaire com Before you call for service there are a few things you can do to help us serve your better Read this Use Care manual It contains ins...

Page 27: ...all tape and packaging before using the range Destroy the carton and plastic bags after unpacking the range Never allow children to play with packaging material Proper Installation Be su re you r appliance is properly installed and grounded bya qualified technician in accordance with the National Fuel Gas Code ANSI Z223 latest edition or in Canada CAN CGA B149 1 and CAN CGA B149 2 and the National...

Page 28: ...Do not repair or replace any part of the appliance u nless specifically recommended in the manuals All other servicing should be done only by a qualified technician This may reduce the risk of personal injury and damage to the range For electric ignition models only Do not attempt to operate the range during a power failure If the power fails always turn off the range If the range is not turned of...

Page 29: ...in combination with each other IMPORTANT INSTRUCTIONS FOR USING YOUR OVEN Use care when opening oven door warmer drawer or lower oven door Stand to the side of the range when opening the door of a hot oven Let hot air or steam escape before you remove or replace food in the oven Keep Oven Vent Ducts Unobstructed The oven vent is located below the backguard Touching the surfaces in this area when t...

Page 30: ... to follow this warning can cause serious injury fire or death This appliance is equipped with a 3 prong grounding plug for your protection against shock hazard and should be plugged directly into a properly grounded receptacle DO NOT cut or remove the grounding prong from this plug For personal safety the range must be properly grounded For maximum safety the power cord must be plugged into an el...

Page 31: ...erior oven light with removable cover 9 Automatic oven door light switch some models 10 Self cleaning oven interior 11 Self clean door latch 12 Adjustable interior oven rack s 13 Large 1 piece oven door handle 14 Full width oven door with window 15 Storage drawer with integrated handle some models or lower cover panel some models 16 Easy to clean upswept cooktop 17 5 000 BTU simmer burner some mod...

Page 32: ... The offset oven rack some models is designed to place the base of the rack about 1 2 of a rack position lower than normal This rack design provides several additional possible positions between the standard positions Air circulation in the oven For best baking results allow 2 4 5 10 cm around the cookware for proper air circulation and be sure pans and cookware do not touch each other the oven do...

Page 33: ...rial types The most popular materials available are Aluminum Excellent heat conductor Some types of food will cause it to darken Anodized aluminum cookware resists staining pitting Copper Excellent heat conductor but discolors easily Stainless Slow heat conductor with uneven cooking results Is durable easy to clean and resists staining Cast Iron A slow heat conductor however will retain heat very ...

Page 34: ...on When setting any surface control knob to the LITE position all electronic surface ignitors will spark at the same time However only the surface burner you are setting will ignite i ii _ i i I OFF LITE hl 6 s 4 3 2 LoI Fig 1 NEVERplaceorstraddlea cooking utensil over2 different surface cooking areas at the same time Do not place aluminum foil or ANY material that can melt on the range cooktop If...

Page 35: ...nd unlocks the oven door lockout is active or when the self clean cycle feature is active Clear off pad Use to clear any feature previously entered except the time of day and minute timer Press clear off to stop cooking Also use clear off to activate oven lockout feature Setting the clock When the appliance is first plugged in or when the power supply to the appliance has been interrupted the disp...

Page 36: ...ds until a tone sounds hr will appear in display for continuous cooking The current time of day will return to the display To cancel the continuous bake setting press timer on off and hold for 6 seconds until a tone sounds 12hr will appear in display indicating that the control has returned to the 12 Hour Energy Saving feature To cancel the minute timer before the set time has run out Presstimer o...

Page 37: ...s To change the oven temperature after bake has started 1 Press bake Visually check the bake temperature and that it needs to be changed 2 Press the _ or V pad to increase or decrease the set temperature to the desired new oven temperature The oven indicator light on the electronic display will turn ON and OFFwhen using the Bake feature and during preheat This is normal and indicates that the oven...

Page 38: ...gs and times refer to Fig 3 9 When broiling is finished press clear off Always pull the oven rack out to the stop position before turning or removing the food Fig 1 Fig 2 Insert Broil pan Should an oven fire occur close the oven door and turn i the oven OFF If the fire continues use a fire extinguisher DO NOT put water or flour on the fire Flour may be explosive The broiler pan and the insert some...

Page 39: ...rs such as those found in grocery stores to checkthe temperature settings inside your oven These oven thermometers may vary as much as 20 to 40 degrees from actual temperatures Setting oven lockout The control can be programmed to lock the oven door and lockout the oven control pads To set the oven lockout feature 1 Pressclear off and hold for 3 seconds Loc will appear indisplay the Door Locked in...

Page 40: ...pillovers Any spills on the oven bottom should be wiped up and removed before starting the self cleaning cycle To clean use hot soapy water and a cloth Large spillovers can cause heavy smoke or fire when subjected to high temperatures DO NOTallow food spills with a high sugar or acid content such as milk tomatoes sauerkraut fruit juices or pie filling to remain on the surface as they may leave a d...

Page 41: ...the oven has cooled down for about i HOUR and the LOCK light hasturned off the oven door can be opened 3 Restart self clean cycle once all conditions have been corrected As soon as the controls are set the motor driven lock will begin to close automatically and the LOCK indicator light will flash DO NOT open the oven door while the light is flashing allow about 15 seconds for the oven door to lock...

Page 42: ...rubbing cleaners Only use kitchen cleaners that are especially made for cleaning stainless steel Always be sure to wipe the cleaners off from the surface as bluish stains may occur during heating that cannot be removed Porcelain enamel broiler pan and broiler Gentle scouring with a soapy non abrasive scouring pad will remove pan insert if equipped most spots Rinse with a 1 1 solution of clear wate...

Page 43: ... following cleaning including the bottom and inside of cap Do not use abrasive cleaners They can scratch porcelain Do not clean burner caps in the dishwasher Do not operate surface burners without burner caps properly in place See IHPORTANT notes Always keep the surface burner caps in place whenever a surface burner is in use When replacing the burner caps be sure the burner caps are seated firmly...

Page 44: ...g the lift off oven door The oven door is heavy For safe temporary storage lay the oven door flat with the inside of the door facing down Oven door hinge locations with oven door fully open Fig 1 To remove oven door 1 Open oven door completely horizontal with floor Fig l 2 Pull the door hinge locks on both left and right door hinges down from the oven frame completely towards the oven door Fig 2 A...

Page 45: ...nob to LITE until burner ignites and then turn control knob to desired flame size Burner ports are clogged With the burner OFF use a small gauge wire or needle to burner head slots and ignition ports See Cleaning the cooktop and surface burners in the Care Cleaning section for additional cleaning instructions Range power cord is disconnected from outlet electric ignition models only Be sure power ...

Page 46: ...ppen for pie oven vent spillovers or large amounts of grease left on the oven bottom Wipe up excessive spillovers before starting oven If flames or excessive smoke are present see Broiling in the Setting Oven Controls section F code error for example F10 Fll clear the display stop beeping Try the bake or broil feature again If the F13 F14 F15 F30 F31 or F90 F code error repeats remove power from a...

Page 47: ......

Page 48: ... service companies or external causes such as abuse misuse inadequate power supply accidents fires or acts of God DISCLAIMER OF IMPLIED WARRANTIES LIMITATION OF REMEDIES CUSTOMER S SOLE AND EXCLUSIVE REMEDY UNDER THIS LIMITED WARRANTY SHALL BE PRODUCT REPAIR OR REPLACEMENT AS PROVIDED HEREIN CLAIMS BASED ON IMPLIED WARRANTIES INCLUDING WARRANTIES OF MERCHANTABILITY OR FITNESS FOR A PARTICULAR PURP...

Page 49: ...s 11 15 Features at a Glance 7 Self Cleaning 16 17 Before Setting Oven Controls 8 Care Cleaning 18 20 Before Setting Surface Controls 9 Setting Surface Controls 10 Oven Control Functions 200 11 www frg daire com USA 1 800 944 9044 www frigidaire ca Canada 1 800 265 8352 rD ...

Page 50: ...ut the service life of your new appliance We view your purchase as the beginning of a relationship To ensure our ability to continue serving you please use this page to record important product information Need help Visit the Frigidaire web site at www frigidaire com Before you call for service there are a few things you can do to help us serve your better Read this Use Care manual It contains ins...

Page 51: ...all tape and packaging before using the range Destroy the carton and plastic bags after unpacking the range Never allow children to play with packaging material Proper Installation Be su re you r appliance is properly installed and grounded bya qualified technician in accordance with the National Fuel Gas Code ANSI Z223 latest edition or in Canada CAN CGA B149 1 and CAN CGA B149 2 and the National...

Page 52: ...Do not repair or replace any part of the appliance u nless specifically recommended in the manuals All other servicing should be done only by a qualified technician This may reduce the risk of personal injury and damage to the range For electric ignition models only Do not attempt to operate the range during a power failure If the power fails always turn off the range If the range is not turned of...

Page 53: ...in combination with each other IMPORTANT INSTRUCTIONS FOR USING YOUR OVEN Use care when opening oven door warmer drawer or lower oven door Stand to the side of the range when opening the door of a hot oven Let hot air or steam escape before you remove or replace food in the oven Keep Oven Vent Ducts Unobstructed The oven vent is located below the backguard Touching the surfaces in this area when t...

Page 54: ... to follow this warning can cause serious injury fire or death This appliance is equipped with a 3 prong grounding plug for your protection against shock hazard and should be plugged directly into a properly grounded receptacle DO NOT cut or remove the grounding prong from this plug For personal safety the range must be properly grounded For maximum safety the power cord must be plugged into an el...

Page 55: ...erior oven light with removable cover 9 Automatic oven door light switch some models 10 Self cleaning oven interior 11 Self clean door latch 12 Adjustable interior oven rack s 13 Large 1 piece oven door handle 14 Full width oven door with window 15 Storage drawer with integrated handle some models or lower cover panel some models 16 Easy to clean upswept cooktop 17 5 000 BTU simmer burner some mod...

Page 56: ... The offset oven rack some models is designed to place the base of the rack about 1 2 of a rack position lower than normal This rack design provides several additional possible positions between the standard positions Air circulation in the oven For best baking results allow 2 4 5 10 cm around the cookware for proper air circulation and be sure pans and cookware do not touch each other the oven do...

Page 57: ...rial types The most popular materials available are Aluminum Excellent heat conductor Some types of food will cause it to darken Anodized aluminum cookware resists staining pitting Copper Excellent heat conductor but discolors easily Stainless Slow heat conductor with uneven cooking results Is durable easy to clean and resists staining Cast Iron A slow heat conductor however will retain heat very ...

Page 58: ...on When setting any surface control knob to the LITE position all electronic surface ignitors will spark at the same time However only the surface burner you are setting will ignite i ii _ i i I OFF LITE hl 6 s 4 3 2 LoI Fig 1 NEVERplaceorstraddlea cooking utensil over2 different surface cooking areas at the same time Do not place aluminum foil or ANY material that can melt on the range cooktop If...

Page 59: ...nd unlocks the oven door lockout is active or when the self clean cycle feature is active Clear off pad Use to clear any feature previously entered except the time of day and minute timer Press clear off to stop cooking Also use clear off to activate oven lockout feature Setting the clock When the appliance is first plugged in or when the power supply to the appliance has been interrupted the disp...

Page 60: ...ds until a tone sounds hr will appear in display for continuous cooking The current time of day will return to the display To cancel the continuous bake setting press timer on off and hold for 6 seconds until a tone sounds 12hr will appear in display indicating that the control has returned to the 12 Hour Energy Saving feature To cancel the minute timer before the set time has run out Presstimer o...

Page 61: ...s To change the oven temperature after bake has started 1 Press bake Visually check the bake temperature and that it needs to be changed 2 Press the _ or V pad to increase or decrease the set temperature to the desired new oven temperature The oven indicator light on the electronic display will turn ON and OFFwhen using the Bake feature and during preheat This is normal and indicates that the oven...

Page 62: ...gs and times refer to Fig 3 9 When broiling is finished press clear off Always pull the oven rack out to the stop position before turning or removing the food Fig 1 Fig 2 Insert Broil pan Should an oven fire occur close the oven door and turn i the oven OFF If the fire continues use a fire extinguisher DO NOT put water or flour on the fire Flour may be explosive The broiler pan and the insert some...

Page 63: ...rs such as those found in grocery stores to checkthe temperature settings inside your oven These oven thermometers may vary as much as 20 to 40 degrees from actual temperatures Setting oven lockout The control can be programmed to lock the oven door and lockout the oven control pads To set the oven lockout feature 1 Pressclear off and hold for 3 seconds Loc will appear indisplay the Door Locked in...

Page 64: ...pillovers Any spills on the oven bottom should be wiped up and removed before starting the self cleaning cycle To clean use hot soapy water and a cloth Large spillovers can cause heavy smoke or fire when subjected to high temperatures DO NOTallow food spills with a high sugar or acid content such as milk tomatoes sauerkraut fruit juices or pie filling to remain on the surface as they may leave a d...

Page 65: ...the oven has cooled down for about i HOUR and the LOCK light hasturned off the oven door can be opened 3 Restart self clean cycle once all conditions have been corrected As soon as the controls are set the motor driven lock will begin to close automatically and the LOCK indicator light will flash DO NOT open the oven door while the light is flashing allow about 15 seconds for the oven door to lock...

Page 66: ...rubbing cleaners Only use kitchen cleaners that are especially made for cleaning stainless steel Always be sure to wipe the cleaners off from the surface as bluish stains may occur during heating that cannot be removed Porcelain enamel broiler pan and broiler Gentle scouring with a soapy non abrasive scouring pad will remove pan insert if equipped most spots Rinse with a 1 1 solution of clear wate...

Page 67: ... following cleaning including the bottom and inside of cap Do not use abrasive cleaners They can scratch porcelain Do not clean burner caps in the dishwasher Do not operate surface burners without burner caps properly in place See IHPORTANT notes Always keep the surface burner caps in place whenever a surface burner is in use When replacing the burner caps be sure the burner caps are seated firmly...

Page 68: ...g the lift off oven door The oven door is heavy For safe temporary storage lay the oven door flat with the inside of the door facing down Oven door hinge locations with oven door fully open Fig 1 To remove oven door 1 Open oven door completely horizontal with floor Fig l 2 Pull the door hinge locks on both left and right door hinges down from the oven frame completely towards the oven door Fig 2 A...

Page 69: ...nob to LITE until burner ignites and then turn control knob to desired flame size Burner ports are clogged With the burner OFF use a small gauge wire or needle to burner head slots and ignition ports See Cleaning the cooktop and surface burners in the Care Cleaning section for additional cleaning instructions Range power cord is disconnected from outlet electric ignition models only Be sure power ...

Page 70: ...ppen for pie oven vent spillovers or large amounts of grease left on the oven bottom Wipe up excessive spillovers before starting oven If flames or excessive smoke are present see Broiling in the Setting Oven Controls section F code error for example F10 Fll clear the display stop beeping Try the bake or broil feature again If the F13 F14 F15 F30 F31 or F90 F code error repeats remove power from a...

Page 71: ......

Page 72: ... service companies or external causes such as abuse misuse inadequate power supply accidents fires or acts of God DISCLAIMER OF IMPLIED WARRANTIES LIMITATION OF REMEDIES CUSTOMER S SOLE AND EXCLUSIVE REMEDY UNDER THIS LIMITED WARRANTY SHALL BE PRODUCT REPAIR OR REPLACEMENT AS PROVIDED HEREIN CLAIMS BASED ON IMPLIED WARRANTIES INCLUDING WARRANTIES OF MERCHANTABILITY OR FITNESS FOR A PARTICULAR PURP...

Page 73: ...s 11 15 Features at a Glance 7 Self Cleaning 16 17 Before Setting Oven Controls 8 Care Cleaning 18 20 Before Setti ng Surface Controls 9 Setting Surface Controls 10 Oven Control Functions 200 11 www frg daire com USA 1 800 944 9044 www frigidaire ca Canada 1 800 265 8352 rD ...

Page 74: ...ut the service life of your new appliance We view your purchase as the beginning of a relationship To ensure our ability to continue serving you please use this page to record important product information Need help Visit the Frigidaire web site at www frigidaire com Before you call for service there are a few things you can do to help us serve your better Read this Use Care manual It contains ins...

Page 75: ...all tape and packaging before using the range Destroy the carton and plastic bags after unpacking the range Never allow children to play with packaging material Proper Installation Be su re you r appliance is properly installed and grounded bya qualified technician in accordance with the National Fuel Gas Code ANSI Z223 latest edition or in Canada CAN CGA B149 1 and CAN CGA B149 2 and the National...

Page 76: ...Do not repair or replace any part of the appliance u nless specifically recommended in the manuals All other servicing should be done only by a qualified technician This may reduce the risk of personal injury and damage to the range For electric ignition models only Do not attempt to operate the range during a power failure If the power fails always turn off the range If the range is not turned of...

Page 77: ...in combination with each other IMPORTANT INSTRUCTIONS FOR USING YOUR OVEN Use care when opening oven door warmer drawer or lower oven door Stand to the side of the range when opening the door of a hot oven Let hot air or steam escape before you remove or replace food in the oven Keep Oven Vent Ducts Unobstructed The oven vent is located below the backguard Touching the surfaces in this area when t...

Page 78: ... to follow this warning can cause serious injury fire or death This appliance is equipped with a 3 prong grounding plug for your protection against shock hazard and should be plugged directly into a properly grounded receptacle DO NOT cut or remove the grounding prong from this plug For personal safety the range must be properly grounded For maximum safety the power cord must be plugged into an el...

Page 79: ...erior oven light with removable cover 9 Automatic oven door light switch some models 10 Self cleaning oven interior 11 Self clean door latch 12 Adjustable interior oven rack s 13 Large 1 piece oven door handle 14 Full width oven door with window 15 Storage drawer with integrated handle some models or lower cover panel some models 16 Easy to clean upswept cooktop 17 5 000 BTU simmer burner some mod...

Page 80: ... The offset oven rack some models is designed to place the base of the rack about 1 2 of a rack position lower than normal This rack design provides several additional possible positions between the standard positions Air circulation in the oven For best baking results allow 2 4 5 10 cm around the cookware for proper air circulation and be sure pans and cookware do not touch each other the oven do...

Page 81: ...rial types The most popular materials available are Aluminum Excellent heat conductor Some types of food will cause it to darken Anodized aluminum cookware resists staining pitting Copper Excellent heat conductor but discolors easily Stainless Slow heat conductor with uneven cooking results Is durable easy to clean and resists staining Cast Iron A slow heat conductor however will retain heat very ...

Page 82: ...on When setting any surface control knob to the LITE position all electronic surface ignitors will spark at the same time However only the surface burner you are setting will ignite i ii _ i i I OFF LITE hl 6 s 4 3 2 LoI Fig 1 NEVERplaceorstraddlea cooking utensil over2 different surface cooking areas at the same time Do not place aluminum foil or ANY material that can melt on the range cooktop If...

Page 83: ...nd unlocks the oven door lockout is active or when the self clean cycle feature is active Clear off pad Use to clear any feature previously entered except the time of day and minute timer Press clear off to stop cooking Also use clear off to activate oven lockout feature Setting the clock When the appliance is first plugged in or when the power supply to the appliance has been interrupted the disp...

Page 84: ...ds until a tone sounds hr will appear in display for continuous cooking The current time of day will return to the display To cancel the continuous bake setting press timer on off and hold for 6 seconds until a tone sounds 12hr will appear in display indicating that the control has returned to the 12 Hour Energy Saving feature To cancel the minute timer before the set time has run out Presstimer o...

Page 85: ...s To change the oven temperature after bake has started 1 Press bake Visually check the bake temperature and that it needs to be changed 2 Press the _ or V pad to increase or decrease the set temperature to the desired new oven temperature The oven indicator light on the electronic display will turn ON and OFFwhen using the Bake feature and during preheat This is normal and indicates that the oven...

Page 86: ...gs and times refer to Fig 3 9 When broiling is finished press clear off Always pull the oven rack out to the stop position before turning or removing the food Fig 1 Fig 2 Insert Broil pan Should an oven fire occur close the oven door and turn i the oven OFF If the fire continues use a fire extinguisher DO NOT put water or flour on the fire Flour may be explosive The broiler pan and the insert some...

Page 87: ...rs such as those found in grocery stores to checkthe temperature settings inside your oven These oven thermometers may vary as much as 20 to 40 degrees from actual temperatures Setting oven lockout The control can be programmed to lock the oven door and lockout the oven control pads To set the oven lockout feature 1 Pressclear off and hold for 3 seconds Loc will appear indisplay the Door Locked in...

Page 88: ...pillovers Any spills on the oven bottom should be wiped up and removed before starting the self cleaning cycle To clean use hot soapy water and a cloth Large spillovers can cause heavy smoke or fire when subjected to high temperatures DO NOTallow food spills with a high sugar or acid content such as milk tomatoes sauerkraut fruit juices or pie filling to remain on the surface as they may leave a d...

Page 89: ...the oven has cooled down for about i HOUR and the LOCK light hasturned off the oven door can be opened 3 Restart self clean cycle once all conditions have been corrected As soon as the controls are set the motor driven lock will begin to close automatically and the LOCK indicator light will flash DO NOT open the oven door while the light is flashing allow about 15 seconds for the oven door to lock...

Page 90: ...rubbing cleaners Only use kitchen cleaners that are especially made for cleaning stainless steel Always be sure to wipe the cleaners off from the surface as bluish stains may occur during heating that cannot be removed Porcelain enamel broiler pan and broiler Gentle scouring with a soapy non abrasive scouring pad will remove pan insert if equipped most spots Rinse with a 1 1 solution of clear wate...

Page 91: ... following cleaning including the bottom and inside of cap Do not use abrasive cleaners They can scratch porcelain Do not clean burner caps in the dishwasher Do not operate surface burners without burner caps properly in place See IHPORTANT notes Always keep the surface burner caps in place whenever a surface burner is in use When replacing the burner caps be sure the burner caps are seated firmly...

Page 92: ...g the lift off oven door The oven door is heavy For safe temporary storage lay the oven door flat with the inside of the door facing down Oven door hinge locations with oven door fully open Fig 1 To remove oven door 1 Open oven door completely horizontal with floor Fig l 2 Pull the door hinge locks on both left and right door hinges down from the oven frame completely towards the oven door Fig 2 A...

Page 93: ...nob to LITE until burner ignites and then turn control knob to desired flame size Burner ports are clogged With the burner OFF use a small gauge wire or needle to burner head slots and ignition ports See Cleaning the cooktop and surface burners in the Care Cleaning section for additional cleaning instructions Range power cord is disconnected from outlet electric ignition models only Be sure power ...

Page 94: ...ppen for pie oven vent spillovers or large amounts of grease left on the oven bottom Wipe up excessive spillovers before starting oven If flames or excessive smoke are present see Broiling in the Setting Oven Controls section F code error for example F10 Fll clear the display stop beeping Try the bake or broil feature again If the F13 F14 F15 F30 F31 or F90 F code error repeats remove power from a...

Page 95: ......

Page 96: ... service companies or external causes such as abuse misuse inadequate power supply accidents fires or acts of God DISCLAIMER OF IMPLIED WARRANTIES LIMITATION OF REMEDIES CUSTOMER S SOLE AND EXCLUSIVE REMEDY UNDER THIS LIMITED WARRANTY SHALL BE PRODUCT REPAIR OR REPLACEMENT AS PROVIDED HEREIN CLAIMS BASED ON IMPLIED WARRANTIES INCLUDING WARRANTIES OF MERCHANTABILITY OR FITNESS FOR A PARTICULAR PURP...

Reviews: