background image

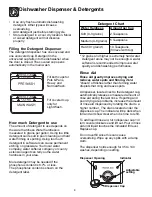
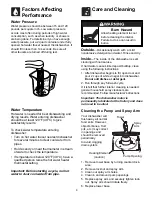
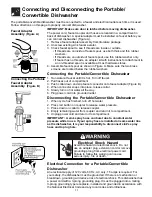
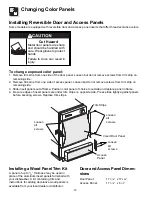
10

Care of Drain Air Gap

If a drain air gap was installed for your built-in
dishwasher, check to make sure it is clean so the
dishwasher will drain properly. Drain air gaps are
usually mounted on countertop and can be
inspected by removing the cover. A drain air gap is
not part of your dishwasher and is not covered by
this warranty.

Care and Cleaning 

continued

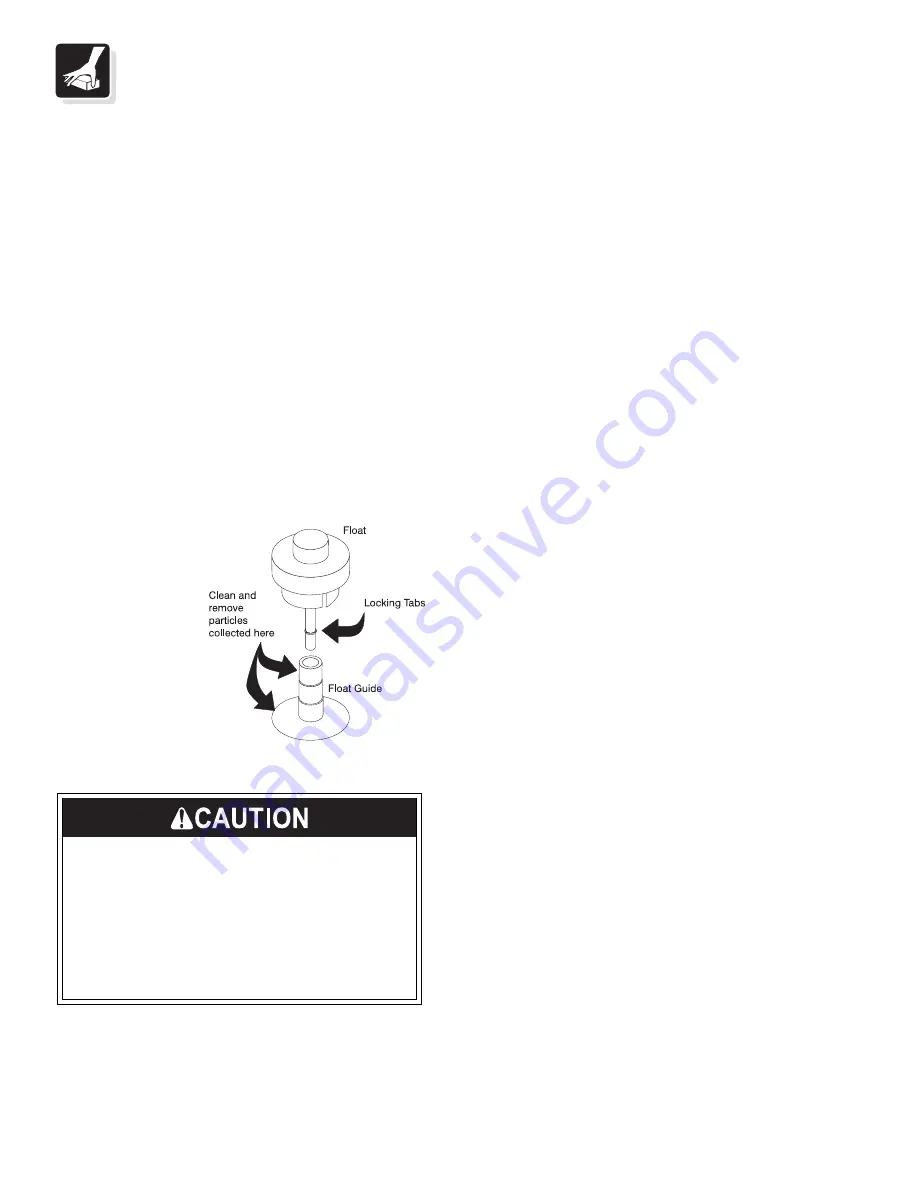
Float

—is used to measure water level in

dishwasher. Refer to 

Dishwasher Features on

page 3 for exact location.
• Clean float with household cleanser containing

vinegar or bleach to dissolve any buildup.
Cleaning will prevent float from sticking and
stopping a water fill or allowing dishwasher to
overflow.

• Pull up firmly to

lift float out.
Clean around
areas shown in
illustration.

• To replace float,

push down until
float locks into
place.

• Float should

move up and
down freely
about one inch
when replaced
on tube.

Property Damage Hazard

Freezing temperatures may cause water
lines to rupture. Be sure all supply lines to
and circulating lines within dishwasher are
protected.

Failure to do so could result in property
damage.

Winterizing

A dishwasher that will not be used for an extended
length of time or is located where temperatures
may fall below freezing must be winterized.

Winterizing the Built-in Dishwasher

1. Turn off water supply.
2. Pour one gallon of nontoxic RV or Marine water

system antifreeze (available from a hardware
or recreational vehicle store) into bottom of tub.

3. Set for any wash cycle. Close door. Allow

dishwasher to run for 3 minutes to distribute
antifreeze into dishwasher’s water system.

Before unit is put back into use, antifreeze must be
removed. To remove, fill both detergent cups with
dishwasher detergent and operate through a
complete normal cycle 

without dishes.

Winterizing the Portable/Convertible
Dishwasher

1.  Connect coupler and hose assembly to faucet.

Do not turn on water.

2.  Plug the electrical cord into a properly grounded

electrical outlet.

3.  Pour one gallon of nontoxic RV or Marine water

system antifreeze (available from a hardware
or recreational vehicle store) into bottom of tub.

4.  Set for any wash cycle. Close door. Allow

dishwasher to run for 3 minutes. This will
distribute antifreeze into dishwasher’s water
system.

5.  Unplug the electrical cord.
6.  Disconnect hoses from water supply and drain

water from hoses. Return hoses to storage
compartment.

Before unit is put back into use, antifreeze must be
removed. To remove, fill both detergent cups with
dishwasher detergent and operate through a
complete normal cycle 

without dishes.
Summary of Contents for MDR251RHR0

Page 1: ...Instructions 4 5 Preparing and Loading Dishes 5 7 Dishwasher Dispenser and Detergents 8 Factors Affecting Performance 9 Care and Cleaning 9 10 Connecting Portable Dishwasher 11 Changing Color Panels 12 Solutions to Common Dishwasher Problems 13 14 Troubleshooting 14 Consumer Services Warranty Service 15 16 Versión en español 15 Dishwasher Use Care Manual 18 Built In Portable READ AND SAVETHESE INS...

Page 2: ...ed dishwasher safe or the equivalent Check with manufacturer for recommendations if not marked Items that are not dishwasher safe may melt and create a potential fire hazard If the dishwasher drains into a food disposer make sure disposer is completely empty before running dishwasher Disconnect electrical power to dishwasher before servicing Repairs should be done by a qualified technician Do not ...

Page 3: ... drain Next the dishwasher fills with water to a level even with the heating element This water is constantly pumped through the rotating spray arm and center wash tower and sprayed onto the dishes Soiled water is pumped out and replaced with clean water during a cycle The number of water fills depends upon the cycle being used Leveling Legs Heating Element page 9 Normal Water Fill Level Float pag...

Page 4: ...ructions Pots Pans For pots pans casseroles and dinnerware with dried on or baked on soils 1 Add detergent to both cups Close lid on covered cup 2 Press POTS PANS HEAVY WASH button 3 Select desired energy Options 4 Turn dial to POTS PANS 5 To start firmly close door Heavy Wash For heavily soiled dishes and silverware 1 Add detergent to both cups Close lid on covered cup 2 Press POTS PANS HEAVY WAS...

Page 5: ...Cycle Chart Cycles Water approx Time approx Washes Rinses Pots Pans 2 washes 3 rinses 8 8 gal 33 3 liters 7 3 imp gal 91 min HeavyWash 82 min 2 washes 2 rinses 7 0 gal 26 5 liters 5 8 imp gal NormalWash 73 min 2 washes 1 rinse 5 3 gal 20 1 liters 4 4 imp gal Light Wash 64 min 1 wash 1 rinse 2 9 imp gal 3 5 gal 13 2 liters Rinse Hold 14 min 1 rinse 1 3 imp gal 6 1 liters 1 6 gal Dish Preparation It...

Page 6: ...t the sides and not across the front so they do not block the detergent dispenser preventing it from opening Preparing and Loading Dishes Loading the Top Rack Glasses and cups Place glasses and cups against outside pins at an angle Cups with a concave bottom will collect water Small plates and saucers Place dishes between middle two rows of pins Plasticware Load plasticware in the top rack to avoi...

Page 7: ...n door and add dish 4 Firmly close door to latch and resume cycle Preparing and Loading Dishes continued Loading the Silverware Basket Load sharp items with handles up Be sure items do not protrude through the holes in the basket and stop the rotation of the spray arm Load silverware so items are mixed in each section to prevent nesting Water spray cannot effectively reach nested items ...

Page 8: ...anent etching on glassware Your local water company water softener company or county extension agent can tell you the water hardness in your area More detergent may be needed if the phosphorus content is 8 7 or less The phosphorus content is shown on the detergent label Adjustable setting Dispenser Opening Dispenser Cap Rinse Aid Rinse aid greatly improves drying and reduces water spots and filmin...

Page 9: ...ou have enough water pressure put a 2 quart container under fully opened hot water faucet nearest the dishwasher It should fill in less than 14 seconds Be sure all other faucets are turned off during test Water Temperature Hot water is needed for best dishwashing and drying results Water entering dishwasher should be at least 120 F 49 C to give satisfactory results To check water temperature enter...

Page 10: ...s located where temperatures may fall below freezing must be winterized Winterizing the Built in Dishwasher 1 Turn off water supply 2 Pour one gallon of nontoxic RV or Marine water system antifreeze available from a hardware or recreational vehicle store into bottom of tub 3 Set for any wash cycle Close door Allow dishwasher to run for 3 minutes to distribute antifreeze into dishwasher s water sys...

Page 11: ... snaps into place release collar 5 Slowly turn on hot water all the way 6 Plug power cord into grounded outlet Disconnecting the Portable Convertible Dishwasher 1 When cycle has finished turn off hot water 2 Press red button on coupler to release water pressure 3 Press down on collar to release coupler 4 Empty remaining water from coupler and return it to compartment 5 Unplug power cord and return...

Page 12: ...trim strip from one side of access panel Loosen but do not remove screws from trim strip on remaining side 3 Slide insert panels out of frame Position color panel of choice to outside and replace panel in frame 4 Be sure edges of insert panels are under trim strips on opposite side Press strips tightly against panels before securing screws Replace trim strips Installing Reversible Door and Access ...

Page 13: ...ave water pressure checked by a plumber Use less detergent and make sure water temperature is not higher than 150 F 66 C Underload to assure thorough rinsing Use the COOL DRY Option Chipped dishes and glasses can result from rough handling and improper loading Do not put glasses in direct contact with other items Place glasses securely against pins Crazing of older china and pottery happens when i...

Page 14: ...easpoons 10 ml cream of tartar per quart 1 L of water for 1 2 hour Scour with soap filled steel wool pad rinse and dry Knife handles become loose when the cement is exposed to very hot water Test wash a single knife for several weeks Damaged knives should be professionally re cemented Troubleshooting Noise problems It is normal to hear swishing and pulsating sounds These sounds mean that water is ...

Page 15: ...ts in workmanship or material or for appliances not in ordinary household use The consumer shall pay for such service calls 3 Damages caused by services performed by persons other than authorized Frigidaire servicers use of parts other than Frigidaire Genuine Renewal Parts obtained from persons other than such servicers or external causes such as abuse misuse inadequate power supply or acts of God...

Page 16: ...ravellingcostsfordistancesinexcessof48kilometres 30miles fromthenearestFRIGIDAIRE PARTS AND SERVICE authorized service depot This warranty plus the statutory warranties mentioned are the only warranties given to the consumer owner for this product WARRANTYPERIOD Forthefirstyearafterpurchasebytheoriginalconsumer owner For the second and third year after purchase by the originalconsumer owner For th...

Reviews: