background image

Summary of Contents for PLHT19WEB6

Page 1: ...emova_ 6 Features at a GUance 7 Temperature Controls 8 Looking inside 9 11 Water Dispenser ice Service 12 o 14 Food Storage Energy Saving Tips 15 Normam Operating Sounds 1 6 Care Cleaning 17 18 EspaSol 21 Warranty 19 Before You Call 20 READ AND SAVE THESE INSTRUCTIONS p_ 241_9_9oo _1oo6 ...

Page 2: ...ur Common sense and caution must be practiced when installing operating and maintaining any appliance Please record your mode and eeria numbers below for future reference This information is found on your serial plate located inside the refrigerator compartment NOTE Use only soap and water to clean serial plate Model Number Serial Number Purchase Date Ser a P ate Please complete and mail in the Pr...

Page 3: ...cian ELECTRICAL mNFORMATmON IMPORTANT Turning the refrigerator temperature The refrigerator must be ptugged into its own dedicated 115 VoJt 60 Hz AC onJy etectric outbt The power cord of the appliance is equipped with a three prong grounding plug for your protection against electrical shock hazards It must be plugged directly into a properly grounded three prong receptacle The receptacle must be i...

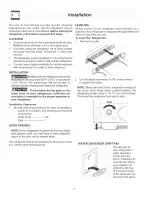
Page 4: ... operation ol your refrigerator nsta adon Clearances o Allow the following clearances for ease of installation proper air circulation and plumbing and electrical connections Sides Top 3 8 Back 1 DOOR OPENING NOTE If your refrigerator is placed with the door hinge side against a wall you may have to allow additiona space so the door can be opened wider Your refrigerator should be positioned to allo...

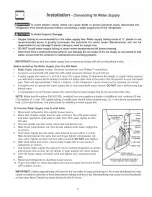
Page 5: ...elf piercing type shutoff valve A compression nut and ferrule sleeve for connecting the water supply line to the ice maker inlet valve NOTE Water line kit number 53039179501 available from y0ur appliance dealer at additional Cost Contains 25 feet 1 1 7 6 meters of X inch QD copper tubing a saddle type shutoff valve nonpiercing 2 _ inch brass compression nuts 2 ferrules sleeves and instructions for...

Page 6: ...p hinge and lift door off bottom hinge pro 4 Reverse this procedure to reinstall freezer door _Pin Center Hinge 4 Detach the water tube from the connector located below the door The connector releases when you press its outer sleeve inward NOTE If refrigerator has been used have a container ready to catch excess water Irom tube 5 Remove the bottom hinge screws and hinge holding the door as its wei...

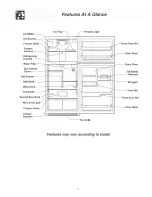
Page 7: ...eii Drawer Cover Half Shelf Wine Rack Full Special item Mid Level Li Crisper Crisper Drawers Toe Griime Fixed Door Bin Door Rack Dairy Door Tamm Bottme Retainer Snugger Door Bin Fixed Door Bin Door Rack Features may vary according to model ...

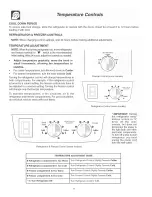
Page 8: ...o be adjusted to a warmer setting Turning the freezer control will change only the freezer temperature To maintain temperatures a fan circulates air in the refrigerator and freezer compartments For good circulation do not block cold air vents with food terns Recommended SefTlllg Freezer Control some models_ I Cored I ualuszm I_rs l 6 J Refrigerator Control some models Fresh 0 _ ___ j Refrigerator ...

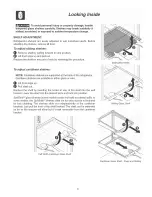
Page 9: ...es Cantilever shelves are available in either glass or wire Lift front edge up Pull shelf out Replace the shelf by inserting the hooks at rear of the shelf into the wall bracket Lower the shelf into the desired slots and lock into position SpiflSafe _M glass shelves some models catch and hold accidental spills In some models the SpillSafe TM shelves slide out for easy access to food and for fast c...

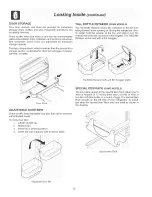
Page 10: ...ce bin in desired position 4 Lower bin onto supports until locked in place Adjustable Door Bin TALL BOTTLE RETAINER SOME MODELS The Tali Bottie Retainer keeps tali containers in the bin from failing forward when opening or ciosing the refrigerator door To instali hoid the retainer at the top and siide it over the outside wali of the bin as shown in the diagram The TaHH BottHe Retainer works best w...

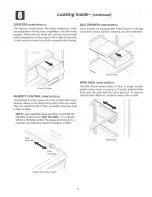
Page 11: ... extend the Hfeof fresh vegetaNes that keep best in high humidity Humidity Control set on High Humidity or in a drawer without a Humidity Control This keeps incoming airto a minimum and maintains maximum moisture content Low J Crisper Humidity Control DEU DRAWER SOME MODELS Some models are equipped with a Deli Drawer for storage of luncheon meats spreads cheeses and other deli items Deli Drawer WI...

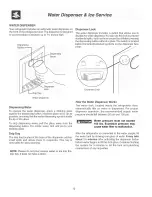
Page 12: ...ter pull the glass away from the dispensing button For colder water first add ice to your drinking glass Drip Tray The drip tray located at the base of the dispenser catches small spills and allows them to evaporate This tray is removable for easy cleaning NOTE Please do not pour excess water or ice into the ddp tray t does not have a drain Disoenser Lock How the Water Dispenser Works The water ta...

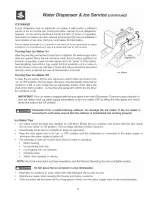
Page 13: ...our model has an adjustable freezer shelf place the shelf in the lower position so that the wire signal arm will hit the ice when the container is fuji i i ii ice Maker IMPORTANT Your ice maker is shipped with the wire signal arm in the ON position To ensure proper function of Chem cals from a maffunctioning softener can damage the ice maker if the ice make is connected to soft water ensure that t...

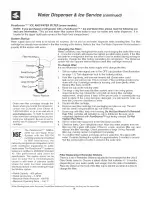
Page 14: ...reinstalling the refrigerator The dispenser system wiii also operate without filtration with filter cartridge removed To change filter it is not necessary to turn the water supply off to change the filter 1 Set ice maker wire signal arm to the OFF up position See illustration on page 13 Turn dispenser lock to the locked position 2 Hold filter cup firmly and unscrew towards left Some water could le...

Page 15: ...ood to the freezer at one time This overloads the freezer slows the rate of freezing and can raise the temperature of frozen foods Leave a space between the packages so cold air can circulate freely allowing food to freeze as quickly as possible Avoid storing hard to freeze foods such as ice cream and orange juice on the freezer door shelves These foods are best stored in the freezer interior wher...

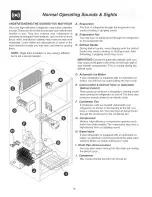
Page 16: ...nts on the back wain of your freezer compartmenL Th s b nQrma I during the defrost cycie Do Automatic ice Maker if your refrigerator is equipped with an automatic ice maker you wiii hear ice cubes failing into the ice bin E Cold Control Defrost Timer or Automatic Defrost Control These parts can produce a snapping or clicking sound when turning the refrigerator on and off The timer also produces so...

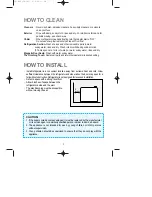
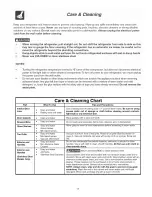
Page 17: ...Handles Exterior and Handles Stainless Steel Models Only Care Cleaning Chart What To Use Tips and Precautions Use 2 tablespoons of baking soda in 1 quart of warm water Be sure to wring Soap and water excess water out of sponge or cloth before cleaning around controls Baking soda and water light bulb or any electrical part Soap and water Wipe gaskets with a clean soft cloth Soap and water Do not wa...

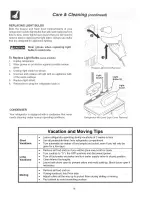
Page 18: ...r needs cleaning under normal operating conditions Freezer Light Cover Removal Light Refrigerator Mid Level Light Cover Removal Vacation and Moving Tips Short Vacations Long Vacations Leave refrigerator operating during vacations of 3 weeks or less Use all perishable items from refrigerator compartment Turn automatic ice maker off and empty ice bucket even if you will only be gone for a few days R...

Page 19: ...d service companies or external causes such as abuse misuse inadequate power supply accidents fires or acts of God DISCLAIMER OF IMPLIED WARRANTIES LIMITATION OF REMEDIES CUSTOMER S SOLE AND EXCLUSIVE REMEDY UNDER THIS LIMITED WARRANTY SHALL BE PRODUCT REPAIR OR REPLACEMENT AS PROVIDED HEREIN CLAIMS BASED ON IMPLIED WARRANTIES INCLUDING WARRANTIES OF MERCHANTABILITY OR FITNESS FOR A PARTICULAR PUR...

Page 20: ...emperature to stabilize satisfactory Refrigerator temperature too cold Set refrigerator control to a warmer setting Allow 24 hours for Freezer temperature is temperature to stabilize Then check freezer temperatures and adjust satisfactory as needed The cabinet is not level Refrigerator is noisy or vibrates Floor is weak Interior needs to be cleaned Odors in refrigerator Foods that produce odors sh...

Reviews: