


7
HELPFUL HINTS
•
With the canister valve still in closed position, reattach the
regulator to the new canister using an adjustable wrench.
Tighten nut until it feels snug but be careful not to over
tighten as you will damage the gasket inside the stem nut.
•
Check to make sure that the red gas line hose is still
securely attached to the regulator.
•
Open the canister valve all the way by turning counter
clockwise until it stops. This valve seals at both the fully
open and fully closed positions. Failure to completely open
or close the valve could result in premature loss of CO
2
pressure.
•
Open the regulator shut-off valve by moving it down to the
6 o’clock position.
•
Check gauge pressure. Adjust the regulator shut-off valve
as necessary until the pressure reads between 12 to 14
psi.
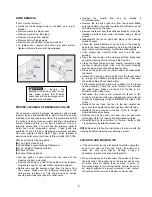
CANISTER VALVE
CO
2
CANISTER
NUT
SHUT-OFF VALVE
REGULATOR
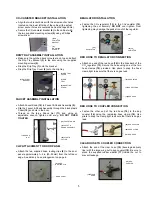
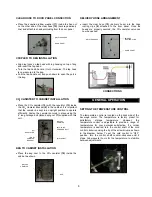
TIPS ON INSTALLING THE KEG TO THE CABINET
•
Installing the keg to the cabinet is a two-person team
effort.
NEVER
lift a full ½ keg alone. Doing so may cause
severe injury.
•
With the door fully open and the help of another person,
lift the keg vertically on both sides until the keg is above
the bottom of the cabinet interior.
•
Set the edge of the keg on top of the stainless protective
plate located on the bottom of the cabinet interior. Slide
the keg back until it is fully inside the cabinet.
•
Care must be taken to avoid damage to the evaporator
coils located on the back side of the cabinet interior.
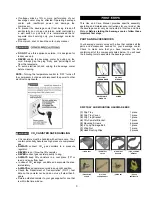
SAFE KEG HANDLING
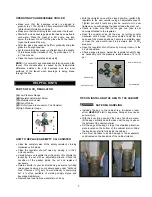
OPERATING YOUR BEVERAGE COOLER
•
Make sure that the beverage cooler is plugged in
properly to a 115V, 60Hz AC only electrical outlet. Refer
to Electrical Information on page 2.
•
Make sure that the drip tray is secured under the faucet.
•
Start with a clean beverage glass that has been wetted in
cold water. Place the glass at a 45º angle, one inch
below the faucet. Do not let the glass touch the faucet.
Open the faucet all the way.
•
After the glass has reached half full, gradually bring the
glass to an upright position.
•
Let the remaining beverage run straight down the middle.
This insures proper release of CO
2
by producing a ¾” to
a 1” foam head.
•
Close the faucet completely and quickly.
NOTE:
It is normal to see condensation forming around the
faucet. This condensation is caused by the temperature
difference between the cold beverage and the inner
surfaces of the faucet when beverage is being drawn
through the line.
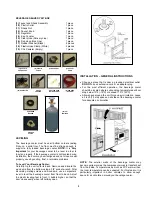
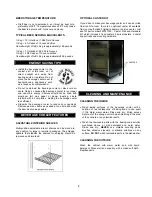
PARTS OF A CO
2
REGULATOR
(A)
Low Pressure Gauge
(B)
Regulator Adjustment Screw
(C)
Adjustment Lock Nut
(D)
Shut-off Valve
(E)
CO
2
Nut (used to connect to CO
2
Canister)
(F)
High Pressure Gauge
B
C
E
A
D
F
HOW TO REPLACE AN EMPTY CO
2
CANISTER
•
Close the canister valve of the empty canister by turning
clockwise until it stops.
•
Close the regulator shut-off valve by moving it in the 3
o’clock position.
•
Carefully remove regulator from the empty CO
2
canister by
loosening the nut with an adjustable wrench. Check the
condition of the gasket inside the nut and replace if
necessary.
•
Return canister to your local carbonic gas source for filling
(we suggest looking in your yellow pages under “Carbonic
Gas”. Sources of CO
2
vary from community to community
but it is often available at welding supply stores and
beverage distributors).
•
Remove dust cap from new canister nut, if any.


