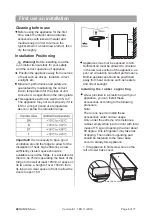
First use an installation
lo wer base cover
Maximum performance and safety are
guaranteed by maintaining the correct
indoor temperature for the class of unit
concerned, as specified on the rating plate.
This appliance performs well from N to T.
The appliance may not work properly if it is
left for a longer period at a temperature
above or below the indicated range.
Important!
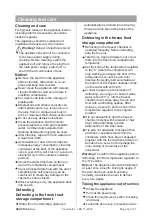
It is necessary to have good
ventilation around the fridge to allow for the
dissipation of heat, high efficiency an low
sufficiently cleared space should be
available around the fridge. It is advisable for
there to be 75mm separating the back of the
fridge to the wall at least 100mm of space on
its two sides, a height of over 100mm from
its top and a clear space in front to allow the
doors to open 160
°.
Appliances must not be exposed to rain.
Sufficient air must be allowed to circulate
in the low rear section of the appliance, as
poor air circulation can affect performance.
Built-in appliances should be positioned
away from heat sources such as heaters
and direct sunlight.
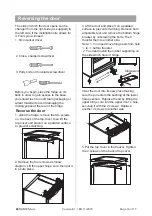
screw provided in a plastic bag with your
appliance, you can install these
accessories according to the following
procedure.
Note:
There is no need to install these
accessories under normal usage.
Only under the extreme circumstances,
cabinet empty while load on door with total
mass of 15 kg and opening the door about
90 degree ,this refrigerator may take risk
of tipping. Then rubber supporting pad
should be fastened to the lower base
cover to steady this appliance.
Installing
the
rubber
supporting
Before using the appliance for the first
time, wash the interior and all internal
accessories with lukewarm water and
meutral soap in order to remove the
typical smell of a brand new product, then
dry thoroughly.
Installation Positioning
Warning!
Before installing, read the
instruction carefully for your safety
and the correct operation of appliance.
Position the appliance away from sources
of heat such as stoves, radiators, direct
sunlight, etc.
Cleaning before use
1.Tilt appliance to find screw hole on the
left of lower base cover.
Page 8 of 17
Version E1.1 EN 11/2016
BERLIN165-A+++

