background image


30


Homemade fries  

For the best result we advise to use prebaked fries (e.g. frozen fries). If you want to 

make homemade fries, follow steps below.  

1.


Peel the potatoes and cut them into fries.  

2.


Soak the fries in a bowl of water for at least 30 minutes, take them out and dry 

them properly with some paper towel.  

3.


Pour ½ spoon of oil in a bowl, add the fries and mix carefully until all fries are 

equally covered with oil.  

4.


Remove  the  fries  from  the  bowl  with  your  hands  or  a  kitchen  utensil  so 

redundant oil stays behind in the bowl. Put the fries in the basket.  

NOTE: don’t pour the fries from the bowl into the basket to avoid redundant from 
ending up in the pan.  
5.


Bake the fries as mentioned earlier.   


V.


USE 


1.


Place the appliance on a stable, flat and heat resistant surface. 

2.


Place the basket correctly in the pan and the pan in the baking oven.  

3.


Pull the cord entirely out of the cable storage.   

CAUTION: Do not put oil or any other liquid in the pan.   
CAUTION: Don’t put anything on top of the appliance. .  
4.


Put  the  plug  into  the  socket.  You  will  hear  a  sound  signal.  The 

temperature  symbol  will  blink  and  the  appliance  goes  into  standby 
mode.   

5.


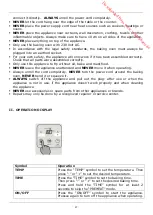
Press the “TEMP” symbol and set the desired temperature by pressing  
the “-” or “+” symbol. Press the “ON/OFF” symbol to start preheating. 

(Standard  temperature  is  set  on  180°C.  The  appliance  will  remember 
the last chosen temperature after each use).  

NOTE: press and hold the “TIME” symbol for at least 2 seconds to skip the 

preheating. 


6.


When  the  preheating  is  completed  you  will  hear  a  sound  signal. 

Without  operation  within  5  minutes,  the  appliance  will  go  back  into 
standby mode.   
 

7.


Carefully pull the pan out of the appliance. 

You will hear a sound signal. 
 

8.


Place the food into the basket.  


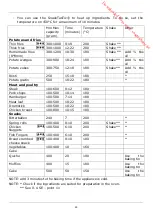
NOTE: Do not fill the basket more than  4/5, or the mentioned amount  indicated in 

the above grid. Larger quantities will give a lesser result.  


CAKE  FUNCTION:  put  the  cake  dough  into  the  baking  tin,  the  baking  tin  into  the 

basket and place the basket in the pan.   


Downloaded from www.vandenborre.be

Summary of Contents for SNACKTASTIC 4702

Page 1: ...entivement le mode d emploi avant d utiliser cet appareil Conservez le soigneusement USER MANUAL Read the user manual attentively before using this appliance Keep the manual carefully GEBRAUCHSANLEITUNG Lesen Sie diese Gebrauchsanleitung gründlich bevor Sie das Apparat benutzen Bitte sorgfältig aufbewahren D o w n l o a d e d f r o m w w w v a n d e n b o r r e b e ...

Page 2: ...1 Moule à cake avec anse Nous nous réservons le droit de faire des changements techniques DESCRIPTION OF THE APPLIANCE 1 Basket 2 Release button 3 Basket handle 4 Air inlet 5 Operation display 6 Safety switch 7 Pan 8 Ventilation grid 9 Cable storage 10 Extractable cable 11 Baking tin with handle We reserve the right to execute technical modifications BESCHREIBUNG DES GERÄTES 1 Korb 2 Release Knopf...

Page 3: ...dgrepen of de bedieningsknoppen aan terwijl het toestel in werking is LET OP Ook na het uitschakelen van het toestel blijven er hete oppervlakken die verbrandingsgevaar opleveren Laat het toestel dus volledig afkoelen alvorens het te verplaatsen te reinigen of op te bergen Dit toestel mag niet gebruikt worden door kinderen van 0 tot 8 jaar Dit toestel mag gebruikt worden door kinderen vanaf 8 jaar...

Page 4: ...t natte handen aanraken en deze ook NOOIT in of onder water of enige andere vloeistof dompelen Enkel reinigen met een vochtige doek Indien het toestel toch nat of vochtig zou worden onmiddellijk de stekker uit het stopcontact trekken NOOIT aparte timers of afstandbedieningssystemen gebruiken Verwijder na gebruik steeds onmiddellijk de stekker uit het stopcontact Doe dit ook als het toestel niet in...

Page 5: ... boven op het toestel Het bakoventje enkel gebruiken met 230 Volt wisselstroom In overeenstemming met de wettelijke veiligheidsnormen moet het bakoventje steeds aangesloten worden op een stopcontact met aarding Voor uw eigen veiligheid zal het apparaat enkel werken indien het correct gemonteerd werd Controleer of alle onderdelen correct gemonteerd werden Dit apparaat is enkel bestemd voor het olie...

Page 6: ...eratuur te verhogen Bij iedere druk verlaagt resp verhoogt de temperatuur met 5 C Bij het continu drukken op het of symbool kan de temperatuur worden ingesteld van 80 C tot 200 C b Druk om de baktijd te verlagen Druk om de baktijd te verhogen Bij iedere druk verlaagt resp verhoogt de baktijd met 1 minuut Bij het continu drukken op het of symbool kan de baktijd worden ingesteld van 1 tot 60 minuten...

Page 7: ...k ingrediënt kan verschillen van merk tot merk en ook van grootte vorm inhoud kunnen aangegeven instellingen niet altijd helemaal overeenkomen TIPS Kleinere ingrediënten vereisen vaak een iets kortere bereidingstijd dan grotere ingrediënten Tijdens het bakproces kan opschudden zie punt V GEBRUIK van kleine ingrediënten het bakresultaat gunstig beïnvloeden Het toevoegen van een beetje olie op verse...

Page 8: ...0 Aardappel gratin 500 18 22 180 Vlees en gevogelte Steak 100 600 8 12 180 Varkenskoteletjes 100 500 10 14 180 Hamburger 100 500 7 14 180 Vleesbrood 100 500 18 22 180 Drumstick 100 500 18 22 180 Kipfilet 100 800 10 15 180 Snacks Bitterballen 240 7 200 Loempia 100 400 8 10 200 Opschudden Chicken Nuggets 100 500 6 10 200 Opschudden Fish Fingers 100 400 6 10 200 Gepaneerde kaassnack 100 400 8 10 180 ...

Page 9: ...stendige ondergrond 2 Plaats de korf correct in de lade en de lade in het bakoventje 3 Trek het snoer volledig uit het kabelvak OPGELET doe geen olie of enig andere vloeistof in de lade OPGELET plaats niets bovenop het toestel 4 Steek de stekker in het stopcontact Een geluidssignaal zal weerklinken Het temperatuur symbool zal knipperen en het toestel zet zich in standby modus 5 Druk op het TEMP sy...

Page 10: ...ontgrendelingsknop van de korf tijdens het opschudden TIP om het gewicht te verminderen kan u de korf uit de lade halen en enkel de korf opschudden Haal hiervoor de lade met korf uit het toestel plaats het op een hittebestendig oppervlak en druk op de ontgrendelingsknop om de korf los te maken 12 Wanneer het geluidssignaal 5 keer weerklinkt is het ingestelde programma afgelopen Het toestel gaat te...

Page 11: ...elementen met een afwasborstel om klevende voedselresten te verwijderen VII OPBERGING 1 Trek de stekker uit het stopcontact en laat het toestel helemaal afkoelen 2 Controleer dat alle onderdelen proper en droog zijn 3 Berg het snoer op in het daarvoor voorziene vak en druk het vast in het daarvoor voorziene slot VIII NUTTIGE TIPS BIJ STORINGEN Storing Mogelijke oorzaak Oplossing De SnackTasTic wer...

Page 12: ...rt aardappel Gebruik een andere soort aardappelen Het krokante hangt af van de hoeveelheid water en olie in de frietjes Droog de frietjes zorgvuldig voor ze in te smeren met olie Frietjes zijn niet krokant Het krokante hangt af van de hoeveelheid water en olie in de frietjes Snij kleinere frietjes Smeer wat meer olie Foutcode E1 E2 E3 Breng het toestel binnen bij een erkend hersteller Breng het to...

Page 13: ...rmen XI AANSPRAKELIJKHEID Alle aansprakelijkheden zowel naar de gebruiker s als naar alle derden die zouden voortvloeien uit NIET naleving van alle in deze gebruiksaanwijzing vermelde veiligheidsvoorschriften kunnen onder geen enkel beding ten laste worden gelegd van de fabrikant Bij NIET naleving van deze veiligheidsvoorschriften vrijwaart de gebruiker van het bakoventje of welke persoon dan ook ...

Page 14: ...s soient au courant des dangers potentiels Maintenez l appareil et le câble électrique hors portée des enfants de moins de 8 ans Le nettoyage et l entretien ne peut pas se faire par des enfants Les appareils de cuisson doivent être placés sur une surface stable à l aide des poignées si présentes afin d éviter de reverser les liquides brûlants et de faire basculer ou glisser l appareil L appareil e...

Page 15: ...cée s échappe de l appareil Ne tirez le tiroir que lorsqu il n y a plus de fumée foncée Toujours placer l appareil sur une surface stable comme un plan de travail ou une table pour éviter que l appareil ne bascule ou ne glisse Ne tirez JAMAIS le câble électrique pour débrancher l appareil de la prise secteur N utilisez JAMAIS de rallonges ou de multirpises Branchez toujours l appareil à une prise ...

Page 16: ...endant au moins 2 secondes sur le symbole TIME pour sauter le mode PREHEAT préchauffement ON OFF Appuyez sur le symbole ON OFF pour démarrer l appareil Appuyez une seconde fois pour couper l appareil lorsqu il est en fonctionnement a Appuyez sur pour diminuer la température Appuyer sur pour augmenter la température Avec chaque pression la température diminue resp augmente de 5 C Lorsque le symbole...

Page 17: ...les ingrédients ATTENTION ces réglages sont indicatifs Comme chaque ingrédient peut être différent selon la marque taille forme contenu les réglages indiqués peuvent différer CONSEILS Des plus petits ingrédients demandent généralement un temps de cuisson plus court que des plus grands ingrédients Lors du processus de cuisson de plus petits ingrédients il peut être favorable de secouer les ingrédie...

Page 18: ...re 500 18 22 180 Viande et volaille Steak 100 600 8 12 180 Côtelettes de porc 100 500 10 14 180 Hamburger 100 500 7 14 180 Pain de viande 100 500 18 22 180 Drumstick 100 500 18 22 180 Blanc de poulet 100 800 10 15 180 Encas Boulettes apéro 240 7 200 Rouleau de printemps 100 400 8 10 200 Secouer Nuggets de poulet 100 500 6 10 200 Secouer Fish Fingers 100 400 6 10 200 Encas au fromage panné 100 400 ...

Page 19: ...entaire ne finisse dans le tiroir 5 Cuisez les frites comme indiqué ci dessus V UTILISATION 1 Placez l appareil sur une surface plane stable et thermorésistante 2 Placez le panier correctement dans le tiroir et le tiroir dans le fourneau 3 Tirez le câble entièrement du compartiment à câble ATTENTION Ne versez pas d huile ou d autres liquides dans le tiroir ATTENTION Ne mettez rien sur l appareil 4...

Page 20: ...s confirmation des réglages et les symboles sont illuminés 11 Certains ingrédients doivent être secoués au milieu du processus de cuisson Afin de secouer les ingrédients prenez la poignée retirez le tiroir de l appareil et secouez Remettez le tiroir dans l appareil Ce n est pas nécessaire d interrompre le processus de cuisson en poussant sur le symbole ON OFF il arrête automatiquement lorsque le t...

Page 21: ...le revêtement antiadhésif 3 Retirez d abord la fiche de la prise secteur et laissez refroidir entièrement le fourneau avant de le nettoyer CONSEIL pour favoriser le refroidissement vous pouvez retirer le tiroir de l appareil 4 Nettoyez l extérieure de l appareil uniquement avec un chiffon humide 5 Le panier et le tiroir peuvent être nettoyés dans de l eau savonneuse chaude et une brosse de vaissel...

Page 22: ... être secoués Les ingrédients qui sont superposés p ex des frites doivent être secoués à la moitié du temps de cuisson Les ingrédients frits ne sont pas croustillants Les encas choisis ne conviennent pas à une cuisson au four Utilisez toujours des encas au four ou enduisez les légèrement avec de l huile pour un résultat plus croustillant Je n arrive pas à mettre le tiroir correctement Il y a trop ...

Page 23: ...ntie il suffit de conserver le bon d achat Définition de la garantie La garantie couvre la réparation et ou le remplacement gratuit des pièces reconnues défectueuses par nos services techniques et au cas où le défaut est imputable aux vices de construction de fabrication ou de matériel La garantie n est valable que pour le premier utilisateur Les frais de transport sont TOUJOURS à charge de l ache...

Page 24: ...de d emploi ne peuvent à aucune condition être inculpées au fabricant En cas de non respect des prescriptions de sécurité l utilisateur de l appareil ou toute autre personne ne pas ayant appliqué ces prescription de sécurité préserve le fabriquant de toutes responsabilités qui de ce fait pourraient être inculpées au fabriquant D o w n l o a d e d f r o m w w w v a n d e n b o r r e b e ...

Page 25: ...liance is in action ATTENTION please After switching off the appliance surfaces stay hot which causes burning danger Let the appliance cool down completely before replacing it cleaning it or putting it away This appliance shall not be used by children from 0 year to 8 years This appliance can be used by children aged from 8 years and above if they are continuously supervised This appliance can be ...

Page 26: ...l systems Immediately switch off the appliance and pull out the plug after use or when the appliance is NOT in use if the appliance does not function properly and when cleaning the appliance Check if the food is golden yellow and never dark or brown Remove burned pieces NEVER cover the ventilation grid when the appliance is operating NEVER put oil in the pan This may cause fire NEVER touch the ins...

Page 27: ... NEVER leave the appliance unattended and NEVER move it when operating Always unroll the cord completely NEVER turn the power cord around the baking oven NEVER bend it or squeeze it ALWAYS switch off the appliance and pull out the plug after use or when the appliance is not in use if the appliance doesn t work properly and when cleaning the appliance NEVER use accessories or spare parts from other...

Page 28: ...sing the baking oven for the first time it is recommended to clean the pan and the basket See VI MAINTENANCE Clean the pan and the basket with hot soapy water and a soft sponge These pieces are dishwasher proof Ensure that the voltage marked on the appliance is the same as your main voltage IV SETTINGS The chart below indicates which settings should be used for which food ATTENTION these settings ...

Page 29: ...teak 100 600 8 12 180 Pork chops 100 500 10 14 180 Hamburger 100 500 7 14 180 Meat loaf 100 500 18 22 180 Drumstick 100 500 18 22 180 Chicken breast 100 800 10 15 180 Snacks Bitterballen 240 7 200 Spring rolls 100 400 8 10 200 Shake Chicken Nuggets 100 500 6 10 200 Shake Fish Fingers 100 400 6 10 200 Bread crumbed cheese snack 100 400 8 10 180 Vegetables 100 400 10 160 Cake Quiche 400 20 190 Use t...

Page 30: ...oil or any other liquid in the pan CAUTION Don t put anything on top of the appliance 4 Put the plug into the socket You will hear a sound signal The temperature symbol will blink and the appliance goes into standby mode 5 Press the TEMP symbol and set the desired temperature by pressing the or symbol Press the ON OFF symbol to start preheating Standard temperature is set on 180 C The appliance wi...

Page 31: ...on the basket while shaking TIP to minimize the weight you can remove the basket out of the pan and only shake the basket To do so remove pan with basket from the appliance place on a heat resistant surface and press the release button to release the basket 12 When you hear the sound signal 5 times the set program is finished The appliance goes back into standby mode Remove the pan from the applia...

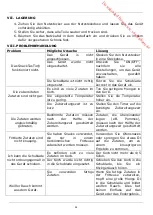
Page 32: ...t and let the appliance cool down completely 2 Make sure all parts are clean and dry 3 Store the cord in the cable storage and fix the cord by inserting it into the cord fixing slot VIII TROUBLE SHOOTING Problem Possible cause Solution The SnackTasTic does not work The plug is not plugged in Insert the plug into the socket The ON OFF symbol wasn t pressed Press ON OFF after having chosen all setti...

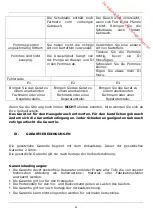
Page 33: ...t smaller fries Grease with a little bit more oil Error code E1 E2 E3 Bring the appliance to a recognized service center Bring the appliance to a recognized service center Bring the appliance to a recognized service center If you still have troubles immediately bring your appliance to your sales point The appliance has been developed for household use When using it for professional purpose the con...

Page 34: ...w the appliance away with the normal household waste at the end of its life but hand it in at an official collection point for recycling By doing so you will help to preserve the environment XI LIABILITIES All liabilities towards both consumer s and third parties which could result from not observing all the safety regulations prescribed in this user manual shall under no circumstances be charged ...

Page 35: ...N SIE Verbrennungsgefahr Durch die Verwendung dieses Geräts entstehen heiβe Oberfläche Fassen Sie nur die Handgriffen oder Bedienungsknöpfe an wenn das Gerät in Betrieb ist BEACHTEN SIE Auch nach dem Ausschalten des Geräts sind die Oberfläche noch warm und gibt es noch Verbrennungsgefahr Lassen Sie das Gerät also völlig abkühlen bevor Reinigung und Lagerung Dieses Gerät darf von Kinder ab 8 Jahre ...

Page 36: ...n wenn es beschädigt oder gefallen ist wenn es eine Störung gibt oder wenn die Schnur oder den Stecker beschädigt ist Bringen Sie in all diesen Fällen das Gerät nach eine anerkannte Reparaturstelle Das Bedienfeld die Elektroschnur und der Stecker NIE mit nassen Hände berühren und NIE in Wasser oder eine andere Flüssigkeit tauchen Reinigung ausschließlich mit einem leicht feuchten Tuch Falls das Ge...

Page 37: ...ie die Schnur NIE über die Kante einer Anrichte oder über die Tischkante hängen Halten Sie das Netzkabel IMMER von heißen Oberflächen z B Kochplatten Ofen entfernt Setzen Sie den Backofen NIE in der Nähe von Vorhänge Mauerdekorierungen Textilien oder anderer brennbarer Gegenstände NICHTS auf das Gerät stellen Der Backofen nur mit 230 Volt Wechselstrom anwenden Der Backofen muss immer an eine Netzs...

Page 38: ...öhen Bei jedem Tastendruck senkt erhöht die Temperatur um 5 Grad Wenn Sie das TEMP Symbol gedrückt halten können Sie die Temperatur von 80 bis 200 Grad einstellen b Drücken Sie um die Zubereitungszeit zu senken Drücken Sie um die Zubereitungszeit zu erhöhen Bei jedem Tastendruck senkt erhöht die Zubereitungszeit mit 1 Minute Wenn Sie das TIME Symbol gedrückt halten können Sie die Zubereitungszeit ...

Page 39: ...Marke Größe Form und Inhalt abweichen ist es möglich dass die angegebenen Einstellungen nicht immer ganz übereinstimmen HINWEISE Kleinere Zutaten erfordern gewöhnlich eine etwas kürzere Zubereitungszeit als größere Zutaten Während des Zubereitungsprozesses is est möglich dass das Schütteln kleinerer Zutaten das Backergebnis positiv beeinflusst s Punkt V ANWENDUNG Das Hinzufügen eines wenigen Öls a...

Page 40: ...inekoteletts 100 500 10 14 180 Hamburger 100 500 7 14 180 Hackbraten 100 500 18 22 180 Drumstick 100 500 18 22 180 Hähnchenbrust 100 800 10 15 180 Snacks Bitterballen 240 7 200 Frühlingsrolle 100 400 8 10 200 Schütteln Chicken Nuggets 100 500 6 10 200 Schütteln Fish Fingers 100 400 6 10 200 Panierte Käsesnack 100 400 8 10 180 Gemüse 100 400 10 160 Gebäck Quiche 400 20 190 Benutz die Kuchenform Muf...

Page 41: ... flachen stabilen und hitzebeständigen Oberfläche auf 2 Stellen Sie den Korb korrekt in der Schublade und die Schublade in den Backofen 3 Ziehen Sie das Netzkabel vollständig aus dem Kabelfach ACHTUNG kein Öl oder andere Flüssigkeiten in der Schublade gießen ACHTUNG nichts auf das Gerät stellen 4 Stecken Sie den Stecker in die Steckdose Ein Signalton ertönt Das Temperatursymbol blinkt und das Gerä...

Page 42: ...bole sind erleuchtet 11 Einige Zutaten müssen nach etwa der Hälfte der Zubereitungszeit geschüttelt werden Um die Zutaten zu schütteln ziehen Sie die Schublade am Griff aus dem Gerät und schütteln Sie sie Dann führen Sie die Schublade wieder in das Gerät Sie brauchen nicht den Zubereitungsvorgang mit dem ON OFF Knopf zu unterbrechen Das Gerät stellt sich automatisch ab und stellt sich nach dem Ein...

Page 43: ...sind mit einer Antihaftsbeschichtung überzogen Verwenden Sie zur Reinigung keine metallischen Küchenutensilien oder scheuernden Reinigungsmittel da dies die Antihaftsbeschichtung beschädigen kann 10 Ziehen Sie den Netzstecker aus der Netzsteckdose und lassen Sie das Gerät vollständig abkühlen HINWEIS entnehmen Sie die Pfanne so dass das Gerät schneller abkühlen kann 11 Wischen Sie die Außenseiten ...

Page 44: ... Sie den Timer auf die benötigte Zubereitungszeit ein Die Zutaten werden ungleichmäßig gebraten Bestimmte Zutaten müssen nach der Hälfte der Zubereitungszeit geschüttelt werden Zutaten die übereinander liegen z B Pommes müssen nach der Hälfte der Zubereitungszeit geschüttelt werden Frittierte Zutaten sind nicht knusprig Sie haben Snacks verwendet die nur in einem herkömmlichen Fritteuse zubereitet...

Page 45: ...iner Reparaturstelle Wenn Sie die Störung noch immer NICHT eheben konnten bitte wenden Sie sich an Ihre Verkaufsstelle Das Gerät ist für den Hausgebrauch entworfen Für den beruflichen gebrauch ändern sich die Garantiebedingungen Jeder Schaden ungeeigneten Gebrauch zufolge erlischt die Garantie IX GARANTIEBEDINGUNGEN Die gesetzliche Garantie beginnt mit dem Ankaufstag Dauer der gesetzlichen Garanti...

Page 46: ...MWELT Setzen Sie dieses Gerät am Ende seiner Lebensdauer nicht beim normalen Hausmüll aber geben Sie es ab in einem offiziellen Sammelpunkt zur Recycling So helfen Sie die Umwelt zu schützen XI HAFTUNG Alle Haftung ebenso nach Gebraucher als auch nach allen Dritten die erwachsen sollten durch nicht Folgen dieser Gebrauchsanweisung geht auf keinen Fall zu Laste des Fabrikanten Bei nicht folgen der ...

Page 47: ...SnackTasTic be Trouvez nous sur facebook www fb com fritel vanratingen For all supplementary information recipes and practical tips about all our appliances please visit our website www fritel com or www SnackTasTic be Find us on facebook www fb com fritel vanratingen Extra informationen rezepte und praktischen tipps über alle unseren produkte finden sie auf www fritel com oder www SnackTasTic be ...

Page 48: ...48 www FRITEL com J van Ratingen nv Stadsheide 11 B 3500 Hasselt E mail info fritel com V2016 01 2 D o w n l o a d e d f r o m w w w v a n d e n b o r r e b e ...

Reviews: