background image


14

4.


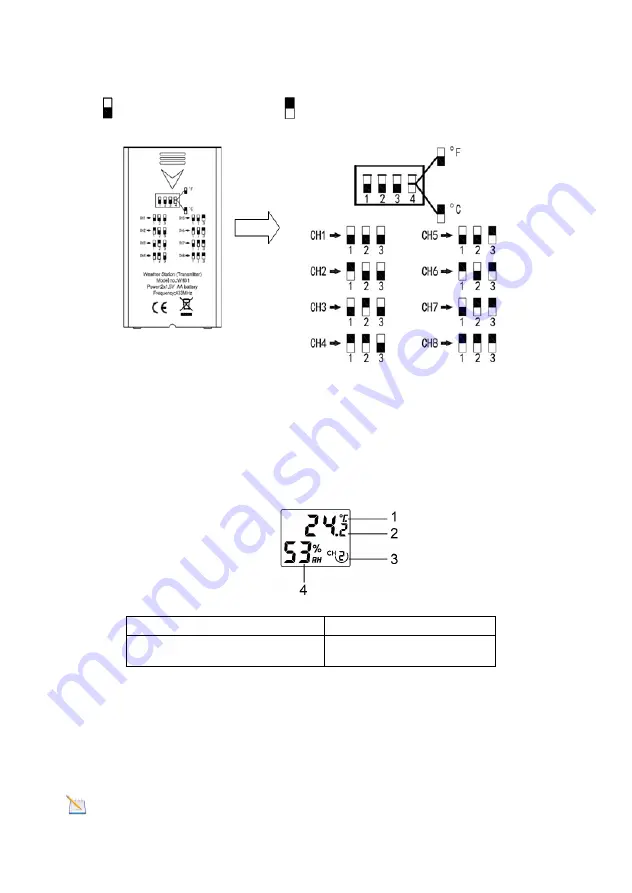
Temperature Units of Measure:

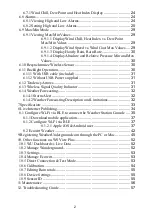
 To change the transmitter display units 

of measure (°F vs. °C), change Dip Switch 4, as referenced in 
 

  Switch in down position.    Switch in up position. 


Figure 11: Dip Switch diagram 


5.


Insert two AA batteries. 
 

6.


Verify the correct channel number (CH) and temperature units of 

measure (°F / °C) are on the display, as shown in 

Verweisquelle konnte nicht gefunden werden.


Figure 12: sensor LCD display 

1.Temperature units (°C/°F )    3. Channel number 

2.Temperature


4. Relative humidity


7.


Close the battery door. 

8.


Repeat for the additional remote transmitters, verifying each remote is 
on a different channel.   


5.5 Best Practices for Wireless Communication 

Note: 

To insure proper communication, mount the remote sensor(s) 

upright on a vertical surface, such as a wall. 

Do not lay the sensor flat. 

To change the transmitter display units 

of measure (°F vs. °C), change Dip Switch 4, as referenced in Figure . 


Verify the correct channel number (CH) and temperature units of 

measure (°F / °C) are on the display, as shown in   

Fehler! 

Verweisquelle konnte nicht gefunden werden.


4. Relative humidity


Repeat for the additional remote transmitters, verifying each remote is 

To insure proper communication, mount the remote sensor(s) 

Do not lay the sensor flat. 


Summary of Contents for WH3900

Page 1: ...9 5 2 6 1 Before you mount 9 5 2 6 2 Mounting 9 5 2 7 Reset Button and Transmitter LED 10 5 3 Optional sensors 11 5 4 Indoor Outdoor Thermo Hygrometer 8 Channel optional 13 5 5 Best Practices for Wire...

Page 2: ...Arrows 31 6 13 Wireless Signal Quality Indicator 31 6 14 Weather Forecasting 32 6 14 1 Storm Alert 32 6 14 2 Weather Forecasting Description and Limitations 32 7 Specification 33 8 Live Internet Publi...

Page 3: ...a building or home Only install the weather station on a clear dry day 3 Quick Start Guide Although the manual is comprehensive much of the information contained may be intuitive In addition the manua...

Page 4: ...ucture ground or roof top 3 Avoid wind and rain obstructions The rule of thumb is to install the sensor array at least four times the distance of the height of the tallest obstruction For example if t...

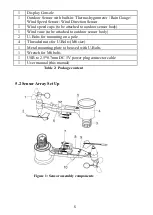
Page 5: ...sensor body 1 Wind vane to be attached to outdoor sensor body 2 U Bolts for mounting on a pole 4 Threaded nuts for U Bolts M6 size 1 Metal mounting plate to be used with U Bolts 1 Wrench for M6 bolts...

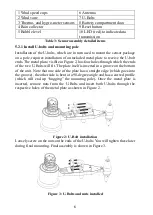
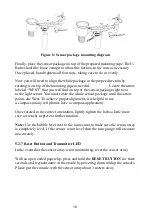
Page 6: ...s four holes through which the ends of the two U Bolts will fit The plate itself is inserted in a groove on the bottom of the unit Note that one side of the plate has a straight edge which goes into t...

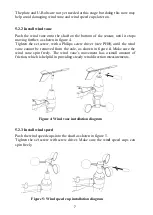
Page 7: ...nt has a small amount of friction which is helpful in providing steady wind direction measurements Figure 4 Wind vane installation diagram 5 2 3 Install wind speed Push the wind speed cups into the sh...

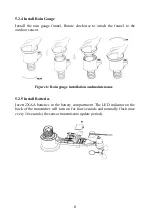
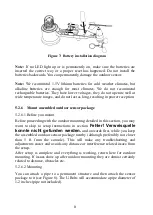
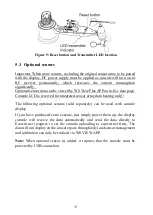
Page 8: ...the outdoor sensor Figure 6 Rain gauge installation and maintenance 5 2 5 Install Batteries Insert 2XAA batteries in the battery compartment The LED indicator on the back of the transmitter will turn...

Page 9: ...Before proceeding with the outdoor mounting detailed in this section you may want to skip to setup instructions in section Fehler Verweisquelle konnte nicht gefunden werden and onwards first while yo...

Page 10: ...arrow points due West To achieve proper alignment it is helpful to use a compass many cell phones have a compass application Once rotated in the correct orientation lightly tighten the bolts a little...

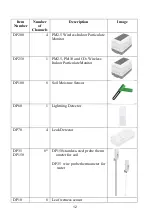
Page 11: ...LCD is reserved for integrated sensor array data hosting only The following optional sensors sold separately can be used with console display If you have purchased extra sensors just simply power them...

Page 12: ...ate Monitor DP250 1 PM2 5 PM10 and CO2 Wireless Indoor Particulate Monitor DP100 8 Soil Moisture Sensor DP60 1 Lightning Detector DP70 4 Leak Detector DP35 DP150 8 DP150 stainless steel probe therm om...

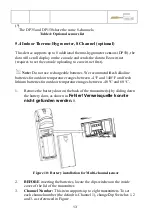
Page 13: ...er Verweisquelle konnte nicht gefunden werden 0 Figure 10 Battery installation for Multi channel sensor 2 BEFORE inserting the batteries locate the dip switches on the inside cover of the lid of the t...

Page 14: ...8 Repeat for the additional remote transmitters verifying each remote is on a different channel 5 5 Best Practices for Wireless Communication Note To insure proper communication mount the remote sens...

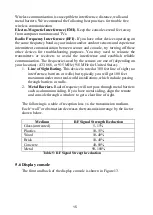
Page 15: ...ne of depending on your location 433 868 or 915 MHz 915 MHz for United States 1 Line of Sight Rating This device is rated at 300 feet line of sight no interference barriers or walls but typically you...

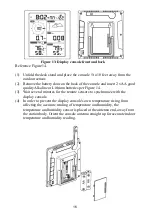
Page 16: ...line or Lithium batteries per Figure 14 3 Wait several minutes for the remote sensors to synchronize with the display console 4 In order to prevent the display console s own temperature rising from af...

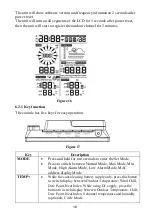
Page 17: ...c Pressure graphic 3 RF signal icon 11 Weather forecast 4 8 Channel Indoor Outdoor Thermo Hygrometer recycle icon optional 12 Date 5 Outdoor temperature 13 WIFI signal icon 6 Outdoor humidity 14 Time...

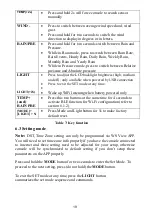
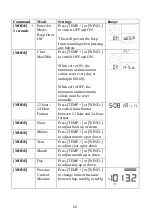
Page 18: ...tion Figure 17 Key Description MODE Press and hold for two seconds to enter the Set Mode Press to switch between Normal Mode Max Mode Min Mode High Alarm Mode Low Alarm Mode MAC address display Mode T...

Page 19: ...ny time Wake up WiFi listening when battery powered only TEMP and RAIN PRE Press this two buttons at the same time for 4 seconds to activate BLE function for Wi Fi configuration refer to section 8 1 2...

Page 20: ...minimum and maximum values must be reset manually MODE 12 hour 24 Hour Format Press TEMP or WIND to switch hour format between 12 hour and 24 hour format MODE Hour Press TEMP or WIND to adjust hour up...

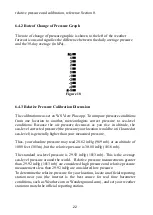
Page 21: ...n 6 4 Barometric Pressure Display 6 4 1 Viewing Absolute vs Relative Pressure Press and hold RAIN PRE for two seconds switch between Rain and Pressure While in Pressure mode Press RAIN PRE to switch b...

Page 22: ...re your location would be at if located at sea level is generally higher than your measured pressure Thus your absolute pressure may read 28 62 inHg 969 mb at an altitude of 1000 feet 305 m but the re...

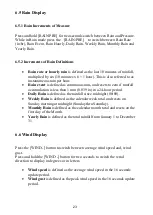
Page 23: ...mulation is less than 1 mm 0 039 in in a 24 hour period Daily Rain is defined as the rainfall since midnight 00 00 Weekly Rain is defined as the calendar week total and resets on Sunday morning at mid...

Page 24: ...hygrometer sensors WH31 If you have the extra sensors press the TEMP button to switch between Outdoor Temperature Wind Chill Dew Point Heat Index 8 channel temperature and humidity Circle Mode 6 8 Al...

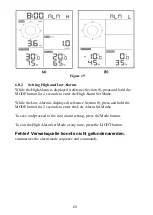
Page 25: ...next alarm setting press the Mode button To exit the High Alarm Set Mode at any time press the LIGHT button Fehler Verweisquelle konnte nicht gefunden werden summarizes the alarm mode sequence and com...

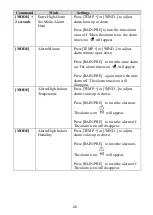
Page 26: ...e alarm time icon will appear Press RAIN PRE again to turn the time alarm off The alarm time icon will disappear MODE Alarm High Indoor Temperature Press TEMP or WIND to adjust alarm value up or down...

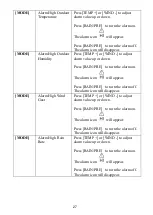
Page 27: ...rn the alarm on The alarm icon will appear Press RAIN PRE to turn the alarm off The alarm icon will disappear MODE Alarm High Wind Gust Press TEMP or WIND to adjust alarm value up or down Press RAIN P...

Page 28: ...ppear MODE Alarm Low Outdoor Temperature Press TEMP or WIND to adjust alarm value up or down Press RAIN PRE to turn the alarm on The alarm icon will appear Press RAIN PRE to turn the alarm off The ala...

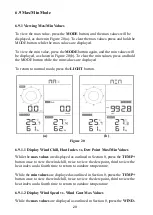
Page 29: ...ll twice to view the dew point third to view the heat index and a fourth time to return to outdoor temperature While the min values are displayed as outlined in Section 0 press the button once to view...

Page 30: ...nd the console will re register the sensor array and 1 8 channel sensors 6 11 Backlight Operation Press LIGHT button for 2s will wake up Wi Fi chip from power saving state the date display will turn t...

Page 31: ...able 10 Tendency indicators summarization 6 13 Wireless Signal Quality Indicator The wireless signal strength displays reception quality If no signal is lost the signal strength indicator will display...

Page 32: ...In general if the rate of change of pressure increases the weather is generally improving sunny to partly cloudy If the rate of change of pressure decreases the weather is generally degrading cloudy r...

Page 33: ...e many tools at their disposal to predict weather conditions including weather radar weather models and detailed mapping of ground conditions 7 Specification Outdoor data Transmission distance in open...

Page 34: ...the table below Hosting Service Website Description Ecowitt Weather https www ecowitt net Ecowitt is a new weather server that can host a bunch of sensors that other services don t support Weather Un...

Page 35: ...tup like live data calibration date time zone etc will be WLAN and it is not so distance sensitive Note1 The Wi Fi chip equipped on this console supports 802 11b mode with 2 0 MHz CLK rate Thus some l...

Page 36: ...cept to use an incorrect password on purpose Then after final outdoor installation come back and change the password after clearing console history That will start uploading to the services with a cle...

Page 37: ...device refer to Section 8 1 2 1 8 1 2 1 Run the WS View Plus app from your mobile device s home screen When prompted Allow WS View Plus to access your location choose Allow While Using App If you do n...

Page 38: ...arch the device Please ensure your phone enable Bluetooth and the device are close to each other within 5m 5 If you have more than one device they will all be listed Select the device The last four di...

Page 39: ...ord 8 Upload your data to www ecowitt net Tap ON and select an upload interval in minutes Make a note of the MAC address You will need this to create an account on www ecowitt net 9 Upload your data t...

Page 40: ...into this panel 11 Upload your data to WeatherObservationsWebsite net Register an account and station at https register metoffice gov uk Enter the Station ID and Password into this panel 12 Upload you...

Page 41: ...ill be displayed If you have more than one device they will all be listed To change any of the console settings click on the device field 15 Select the device to see the live date Your mobile device s...

Page 42: ...gistration on the page Press the button and select enter your email address Set a password for your ecowitt account Press Submit Enter the captcha you received from your email box and press submit It...

Page 43: ...et home index id STATIONID Note If you want to share your station data with other users you may the Share option under the Menu to create a share link It will show a page such as this where you can lo...

Page 44: ...44 List display Weather Map...

Page 45: ...h the PC or Mac If you have not already done setup for wunderground com during the Wi setup you can do so later Perform the following steps Registering WeatherUnderground com through the If you have n...

Page 46: ...ound com and select the Join link at the top of the page and sign up 2 Click My Profile and select My Devices to register your station 3 Select Add New Device 4 Find Personal Weather Station Select ot...

Page 47: ...47 5 Select Address or Manual option and find your local position Press Next 6 This time you will be asked details about your weather station Go ahead and fill out the form...

Page 48: ...ion ID and key password Note Your station ID will have the form KSSCCCC where K is for USA station I for international SS is your state CCCC is your city and is the station number in that city In the...

Page 49: ...weather station dashboard ID STA TIONID It will show a page such as this where you can look at today s data and historical data as well There are also some very useful mobile apps The URLs provided h...

Page 50: ...detailed forecast and PWS station data https itunes apple com us app wu storm id955957721 Weather Underground Forecast iOS and Android application for forecasts viewing radar images animated wind clo...

Page 51: ...ay google com store apps details id com wunderground android wea ther hl en PWS Weather Station Monitor View weather conditions in your neighborhood or even right in your own backyard Connects to wund...

Page 52: ...from the main settings menu If your mobile device is in another network no device s will show up in this list and you will not be able to select a device for displaying the Live Data screen WU Dashboa...

Page 53: ...nits or default home page for the app by selecting Settings on the submenu 10 4 Manage Ecowitt Once you created your ecowitt account successful on the WS View or default home page for the Once you cre...

Page 54: ...on data by pressing your device on this screen 10 6 Calibration When on the Live Data screen you can press the More button upper right to enter the calibration screen on the submenu to You may view yo...

Page 55: ...ware is available 10 9 Sensor ID On Live Data page press More and select Sensors following View sensor ID signal strength and battery power condition 1 bars means 1 4 successful successive signal rece...

Page 56: ...r clockwise and lift to expose the rain gauge mechanism and clean with a damp cloth Remove any dirt debris and insects If bug infestation is an issue spray the array lightly with insecticide Figure Ra...

Page 57: ...scribed in Section 5 2 With an open ended paperclip press the reset button for 3 seconds to re sync the console with the sensor array about 10 feet away The LED next to the battery compartment will fl...

Page 58: ...the mounting pole may result in the tipping bucket incorrectly incrementing rainfall Make sure you have a stable level mounting solution Data not reporting to Wunderground com 1 Confirm your password...

Page 59: ...nd connects to 2 4 GHz routers If you own a 5 GHz router and it is a dual band router you will need to disable the 5 GHz band and enable the 2 4 GHz band 4 The console does not support guest networks...

Page 60: ...semble the device The dealer will contact the service department Never expose the device to water Protect the device from vibrations Only use recommended batteries Never mix batteries Always replace e...

Page 61: ...cht Amtsgericht Koeln HRB 64734 Geschaeftsfuehrer Peter Haefele Carl Schulte UStId DE237971721 WEEE Reg Nr 66110125 declaration of conformity Hereby we declare HS Group GmbH Co KG Escherstr 31 50733 D...

Reviews: