background image

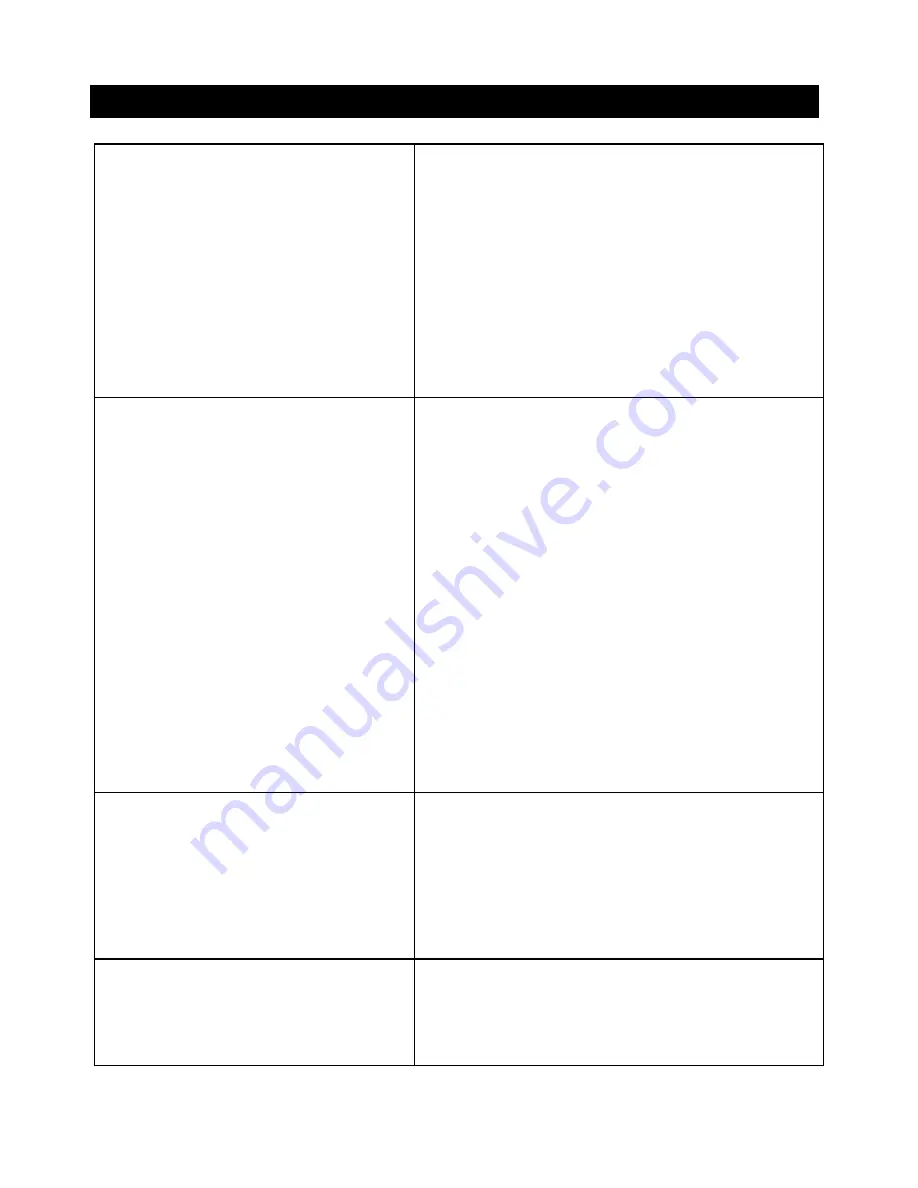
--Too much or not enough air mixes for the flame. 
--Elevation is the principal cause, however cold weather
can affect the mixture. Burner adjustment may be
required. --Grill is in a windy location.   

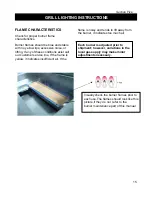
Burner flames are not light blue. 

--Normal preheat 500-600degrees, takes about 10-
15 min. Cold weather and wind may effect your 
preheat time.
--If you are using volcanic rock or briquettes they can 
increase the preheat time and maximum 
temperature. 

Grill takes a long time to preheat. 

--Ensure the temperature gauge is functioning 
properly. Hold a flame to the probe or compare the 
grill gauge to an oven thermometer place in the grill.
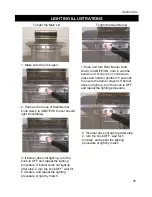
--Ensure correct start procedure. Prior to lighting grill, 
the gas control knobs should be off. The propane 
bottle should be off. If not, wait 15 minutes. Turn tank 
all the way on.. Turn left burner to ignite, wait 5 
seconds ignite. Repeat for additional burners.
--Check all gas connections for leaks with bubble 
test. If leaks are found, replace the part or tighten the 
fitting.
--If it is a natural gas grill, ensure there is proper 
pressure to the grill. Refer to the user manual. 
Example: Gas line stubbed off o pool heater may 
exhibit deference in pressure.    .

Grill only heats to 200-300 degrees. 

--Check the voltage at the outlet.
--If an extension cord is required, ensure it is a 16 
gauges, grounded cord.
--Ensure the on/off switch is on.
--Ensure the load does not exceed the 40 pounds 
operational capacity.
--Ensure the spit is fully inserted in the motor.
--Ensure there is no encumbrance or drag. 

Rotisserie motor will not turn 
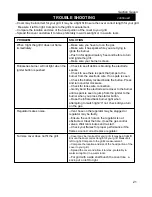
TROUBLE SHOOTING

continued

22

Section Seven

Summary of Contents for 720

Page 1: ...Frontgate Design Series I Model 720 730 0170 OUTDOOR GRILLS Installation Instructions and Use Care Guide C23Y07PN 2 ...

Page 2: ... manual and on your appliance Always read and obey all safety messages This is the safety alert symbol This symbol alerts you to potential hazards that can kill or hurt you and others All safety messages will follow the safety alert symbol and either the word DANGER or WARNING These words mean You can be killed or seriously injured if you don t immediately follow instructions You can be killed or ...

Page 3: ...l to an LP gas tank that exceeds this capacity If an external electrical source is utilized The outdoor cooking gas appliance when installed must be electrically grounded in accordance with local codes or in the absence of local codes with the National Electrical Code ANSI NFPA 70 or the Canadian Electrical Code CSA C22 1 NOTE The normal flow of gas through the regulator and hose assembly can crea...

Page 4: ...pliance is not intended to be installed in or on boats or recreational vehicle When your gas grill is not in use the gas must be turned off at LP gas tank The gas must be turned off at the supply cylinder when the outdoor cooking gas appliance is not in use LP gas tank must be stored outdoors is a well ventilated area and out of reach of children Disconnected LP gas tanks must not be stored in a b...

Page 5: ...l produces intense heat that can increase accident potential When using this appliance basic safety practices must be followed including the following Do not repair or replace any part of the grill unless specifically recommended in this manual All other service should be referred to a qualified technician This grill is not intended to be installed in or recreational vehicles or boats Children sho...

Page 6: ...n air flow or trap excessive heat in the control area For proper lighting and performance of the burners keep the burner ports clean It is necessary to clean them periodically for optimum performance The burners will only operate in one position and must be mounted correctly for safe operation Clean the grill with caution To avoid steam burns do not use a wet sponge or cloth to clean the grill whi...

Page 7: ...on requires one AA battery be installed to operate To install the battery included with the grill remove the battery box housing by using the threaded cap Install the battery with the positive pole facing toward you Replace and tighten the battery box cap after the battery is installed Installation of Warming Rack Install the warming rack on to the warming rack bracket 6 Section Two ...

Page 8: ...s or in the absence of local codes with National Fuel Code ANSI Z223 1a 2002 Installation in Canada must be in accordance with the Standard Can1 b149 1 and or 2 installation code for gas burning appliances and equipment and local codes Natural Gas Installation The gas inlet supply pressure should be between 5 and 14 w c A step down regulator is required if the line pressure is in excess of 14 w c ...

Page 9: ...tach the other end of the gas hose assembly to a standard QCC 1 screw on 20 lb L P cylinder The L P cylinder must be provided with a shutoff valve terminating in an L P gas supply cylinder outlet specified as applicable for connection NO 510 in the standard for compressed gas cylinder valve outlet and inlet connection ANSI CGA V 1 The L P gas supply cylinder must be constructed and marked in accor...

Page 10: ...ooking grids to the burner you choose to light Press the burner control knob and rotate left to the HI setting Continue to press the knob in until the burner igniters The burner should light immediately If the burner does not light in 4 seconds turn the knob OFF wait 5 minutes and try again Always turn the control knobs to the OFF position when not in use If the grill will not light after several ...

Page 11: ...ns for the rear rotisserie burner When the rear burner has reached desired cooking temperature insert the pointed end of the rotisserie rod into the rotisserie motor shaft and secure the other end of the rod in the right hand bracket If needed remove the cooking grates for more room Adjust the counterbalance weight to balance the heavier side of the meat and avoid lopsided rotation of the rotisser...

Page 12: ...llar to protect the cylinder valve The cylinder must be provided with a shut off valve terminating in an L P gas supply cylinder valve outlet specified as applicable for connection type QCC1 in the standard for compressed gas cylinder valve outlet and inlet connection ANSI CGA V 1 Manifold pressure 10 25 4cm water column W C L P GAS HOOK UP Ensure that the rubber O Ring on the LP cylinder valve ar...

Page 13: ...e regulator assembly from the tank valve by turning the quick coupling nut counterclockwise INSTALLER FINAL CHECK LIST 9 Specified clearance maintained 24 61cm from combustibles 9 All internal packaging removed 9 Knobs turn freely 9 Burners are tight and sitting properly on orifices 9 Pressure regulator connected and set Gas connections to grill using hose regulator assembly provided pre set for 1...

Page 14: ... part water You will need a spray bottle brush or rag to apply the solution to the fittings For the initial leak test make sure the L P cylinder is full TO TEST 1 Make sure the control valves are in the OFF position and turn on the gas supply 2 Check all connections from the LP gas regulator and supply valve up to and including the connection to the manifold pipe assembly the pipe that goes to the...

Page 15: ...low 5 minutes for any accumulated gas to dissipate Keep your face and hands as far away from the grill as possible Insert a lit match attached to the lighting rod through the cooking grids to the burner see next page Press the control knob and rotate left to the HI Light setting continue to press the knob until the burner ignites Burner should light immediately If the burner does not light in 4 se...

Page 16: ... line If the flame is yellow it indicates insufficient air If the flame is noisy and tends to lift away from the burner it indicates too much air Each burner is adjusted prior to shipment however variations in the local gas supply may make minor adjustments necessary Visually check the burner flames prior to each use The flames should look like this picture if they do not refer to the burner maint...

Page 17: ...burner stays lit If burner does not light up turn the knob to OFF and repeat the lighting procedure 3 If burner does not light up turn the knob to OFF and repeat the lighting procedure If burner does not light up after step 2 turn the knob OFF wait for 5 minutes and repeat the lighting procedure or light by match 2 If burner does not light up after step 2 turn the knob OFF wait for 5 minutes and r...

Page 18: ...ticles will fall and burn If the grill is allowed to cool before cleaning cleaning will be more difficult ENSURE THAT THE GAS SUPPLY AND THE KNOBS ARE IN THE OFF POSITION MAIN GRILL BURNER CLEANING Ensure the gas supply is off and the knobs are in the OFF position Make sure the grill is cool Clean the exterior of the burner with a wire brush Clear stubborn scale with a metal scraper Clear any clog...

Page 19: ...all customer service at 1 800 537 8484 1 Make sure to center the burner over the orifice STAINLESS STEEL There are many different stainless steel cleaners available Always use the mildest cleaning procedure first scrubbing in the direction of the grain Do not use steel wool as it will scratch the surface To touch up noticeable scratches in the stainless steel sand very lightly with dry 100 grit em...

Page 20: ...an the burner tubes before assembling your grill and at least once a month in late summer or early fall when spiders are most active Also perform this burner tube cleaning procedure if your grill has not been used for an extended period of time WHEN TO LOOK FOR SPIDERS You should inspect the burners at least once a year or immediately after any of the following conditions occur 1 The smell of gas ...

Page 21: ...ner circulates gently throughout the grill cooking the meat or poultry without any direct flame touching it This method greatly reduces flare ups when cooking extra fatty cuts because there is no direct flame to light the fats and juices that drip down during cooking Place a drip pan slightly smaller than the cut of meat on the flame tamer surface under the meat being cooked This will allow you to...

Page 22: ...bstructed Clear the hole close the gas control valves Wait ten minutes and re start Check your flames for proper performance if the flames are not correct replace regulator Regulator makes noise Check to see if debris is blocking the electrode sparks Check to see there is spark that jumps to the burner from the electrode wire If no spark is seen Check the battery located inside the button Press an...

Page 23: ... control knobs should be off The propane bottle should be off If not wait 15 minutes Turn tank all the way on Turn left burner to ignite wait 5 seconds ignite Repeat for additional burners Check all gas connections for leaks with bubble test If leaks are found replace the part or tighten the fitting If it is a natural gas grill ensure there is proper pressure to the grill Refer to the user manual ...

Page 24: ...s Diagram Liquid Propane LP Models 23 Section Eight 75 74 52 53 72 73 01 02 03 04 05 06 07 08 09 10 11 12 13 14 15 16 17 18 19 20 21 23 24 25 26 27 28 29 30 31 32 33 34 35 36 37 38 39 40 41 42 44 45 49 50 51 54 55 56 57 58 59 22 43 46 47 48 ...

Page 25: ...lectronic Ignition Button 20 1 Rotisserie Burner 53 1 Control Panel Face Plate 19 1 Gas Collector 52 1 Control Panel Bracket 18 1 Rotisserie Motor 51 6 Manifold Retainer Bracket 17 1 Rotisserie Motor Bracket 50 1 Valve Manifold 16 2 Bowl Assembly Bracket 49 1 Electronic Ignition 15 1 Left Side Shelf Top 48 1 Regulator LP 14 1 Left Side Shelf 47 1 Gas Valve Rear Burner 13 1 Side Panel Left 46 5 Gas...

Page 26: ...Natural Gas NG Components Grill Parts Diagram 25 Natural Gas NG Models 64 67B 67A 66 65 61 62 Section Eight Natural Gas NG Components Grill Parts Diagram ...

Page 27: ...s List 26 Section Eight 1 Quick connect Fitting 67B 1 12 PVC Hose 67A 1 Regulator NG 66 1 Regulator Gas Hose NG 65 1 Rotisserie Burner Orifice NG 64 1 Gas Valve NG Rotisserie Burner 62 5 Gas Valve NG Main Burner 61 QTY DESCRIPTION REF ...

Page 28: ...of gas to another You will also need a data plate indicating what type of gas is used by the grill GRILL HINTS The doneness of meat whether rare medium or well done is affected to a large degree by the thickness of the cut Expert chefs say it is impossible to have a rare doneness with a thin cut of meat The cooking time is affected by the kind of meat the size and shape of the cut the temperature ...

Page 29: ...e Potatoes Sweet Season with Italian dressing butter or margarine 8 to 20 minutes Medium 1 2 inch slices Onion Grill turning once Brush occasionally with melted butter or margarine Medium 12 to 20 minutes Fresh Beets Carrots Turnips Slice Dot with butter or margarine Wrap in heavy duty foil Grill turning occasionally VEGETABLES SPECIAL INSTRUCTIONS AND TIPS APPROXIMATE TIME FLAME SIZE WEIGHT OR TH...

Page 30: ... Grill turning and brushing frequently with melted butter margarine oil or marinade Up to 1 hour Low or Medium 2 to 3 pounds POULTRY Slit skin Grill turning once 5 to 10 minutes Low Hot dogs Trim edges Grill turning once 4 to 8 minutes High 1 inch slices Ham steaks precooked Grill turning occasionally During last few minutes brush with barbecue sauce turn several times 30 to 40 minutes Medium Ribs...

Page 31: ...hops Marinade 1 large onion 2 tbs lemon juice or vinegar 2 tbs oil tsp powdered mustard 2 tsp Worcestershire sauce tsp freshly ground black pepper 1 tsp sugar tsp paprika 1 clove garlic Peel grate onion and add rest of the ingredients except the pork chops Mix well Pour over chops and marinate one hour in a cool place Turn the BBQ grill on full Heat 10 minutes BBQ the chops brushing with the marin...

Page 32: ...n grill Slice meat across grain in thin slices Place on hot platter Squeeze lemon juice over Wrap meat and any of the following toppings in tortillas chopped tomatoes guacamole sour cream taco sauce BEEF AND LAMB KABOBS Serve 4 lb boneless sirloin or beef cut into 1 cubes lb boneless loin of lamb cut into 1 cubes 2 3 c water divided c chopped onion 2 tbs soy sauce c vegetable oil divided 1 tbs dar...

Page 33: ...er this warranty is your exclusive remedy Frontgate shall not be liable for any incidental or consequential damages for breach of any express or implied warranty on its products Except to the extent prohibited by applicable law any implied warranty or merchantability or fitness for a particular purpose on this product to the duration of the above warranty Some states do not allow the exclusion or ...

Reviews: