background image

STORAGE TIPS


Step 1. 

Unplug the cord connecting the tree lights to the 

remote and wall socket. 


Step 2. 

Unplug the lights connecting the tree sections. 


Step 3. 

Remove the tree top and middle section and place 

both in the tree top storage bag. If you find it diffi- 

cult to remove the tree top sections in this position 

you may wish to unbuckle the safety latch and tilt the 

tree slightly for easier access. 


Step 4. 

Check that front wheels are locked. 


Step 5. 

Unbuckle safety strap. 


Step 6. 

With your foot on the footrest begin pulling the tree 

up and away from the foot pedal. 


Step 7. 

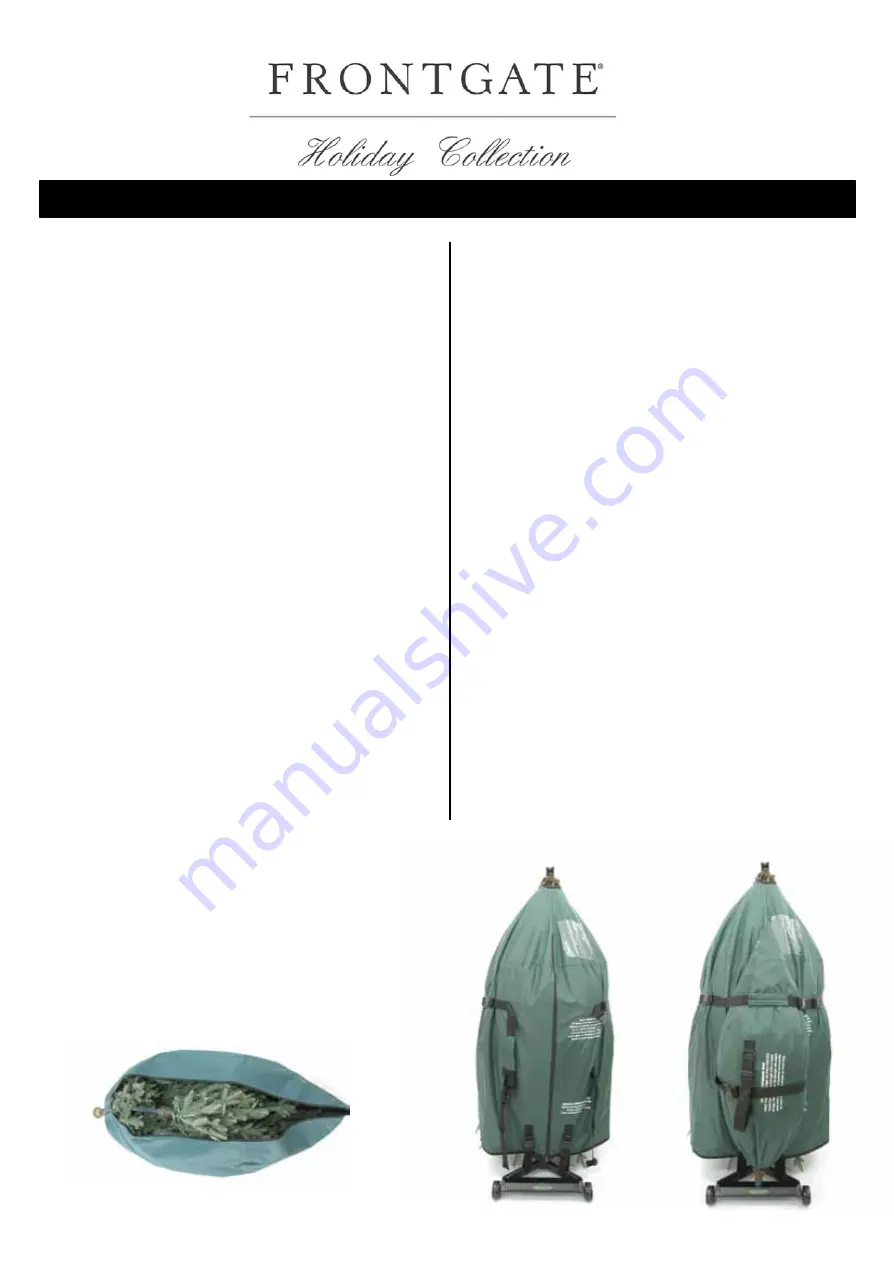
Place the main tree storage bag over the top of the 

tree making sure the zipper is aligned with the center 

of the footrest. 


Step 8. 

Gently pull the bag down over the tree until the bag 

nearly touches the floor. Then zip up the bag. 

Step 9. 

Loop each of the stability straps at the bottom of the 

main tree bag around the  back base leg before 

connecting buckle to the main bag. 


Step 10. 

Fasten the two cinch straps on both sides of the main 

tree bag. Connect the green handle strap located near 

the zipper of the main tree bag. 


Step 11. 

Unlock the front wheels, grab the green handle, tilt 

the tree back, and proceed to wheel the tree to its final 

storage location. DO NOT ATTACH TREE TOP TO 

MAIN BAG UNTIL THE TREE IS IN ITS FINAL 

STORAGE LOCATION. 


Step 12. 

To attach the tree top to the main bag, place the tree 

top pole in the footrest hole and connect using the 

straps found on the main bag. 


Summary of Contents for Holiday 61547

Page 1: ...7 5 ft ITEM ...

Page 2: ...S Step 1 Lay the carton flat remove the tree top instruction sheet and all remaining parts from the shipping container and put to the side until needed PLEASE READ THE ASSEMBLY INSTRUCTIONS CAREFULLY WHEN SETTING UP THE FLIP TREE Step 2 To make it easier to remove your FLIPTREE it is recommended to close the carton flaps and reposition the tree carton flat on floor with arrows pointing upright Ple...

Page 3: ...LOCATION Green Handle Step 4 Press down the locking tabs on both front wheels once the tree is in its desired location Locking Tabs Step 5 Remove the main tree storage bag Unbuckle both cinch straps located on the sides of the main bag Then unbuckle the two stability straps at the bottom of the bag before unzipping and removing the main bag Unzip the tree top and remove the bag Step 6 Your FLIPTRE...

Page 4: ... in the direction shown by the FLIPTREE Indicator towards you and down to the center of the foot pedal If you find it difficult to attach the tree top with the tree in the full upright position you may choose to tilt the tree slightly for easier access Indicator ...

Page 5: ...ection B into power strip TOP SECTION C GREEN PLUG MIDDLESECTION B BLUE PLUG REMOTE CONTROL and PLUG IN REMOTE CONTROL RECEIVER Wall Outlet FLIP BOTTOM SECTION A RED PLUG Step 9 Buckle the safety strap at the bottom of the tree Drawing not to Scale Step 10 Plug the light set of tree body A into power strip Plug power strip into the remote control receiver Plug the remote control received into wall...

Page 6: ...tree making sure the zipper is aligned with the center of the footrest Step 8 Gently pull the bag down over the tree until the bag nearly touches the floor Then zip up the bag Step 9 Loop each of the stability straps at the bottom of the main tree bag around the back base leg before connecting buckle to the main bag Step 10 Fasten the two cinch straps on both sides of the main tree bag Connect the...

Page 7: ... are growing towards the sun With each successive row make the upward angle of the branches more pronounced Position inner tips to hide the center of the tree 4 Arrange the uppermost section of the tree so that the tips are evenly spaced and pointing upward 5 Step back and review the tree Adjust branches and tips as neccessary to give the tree a fuller appearance The tree may be shape differently ...

Page 8: ...e product when leaving the house when retiring for the night or if left unattended 7 This is an electrical product not a toy To avoid risk of fire burns personal injury and electric shock it should not be played with or placed where small children can reach it 8 Do not use this product for other than its intended use 9 Do not hang ornaments or other objects from cord wire or light string 10 Do not ...

Page 9: ... fully inserted into base bend each lead up likeother lights in the light set so that the leads will touchthe contacts inside thelight socket TOREPLACE A FUSE CAUTION FIRST UNPLUG YOUR PRODUCT FROMANYPOWER SOURCE 1 Grasp plug and remove from the receptacle or other outlet device Do not unplug by pulling on cord 2 Open fuse cover Slide open fuse access cover on top of attachment plug towards plug s...

Page 10: ......

Page 11: ...9ft ITEM ...

Page 12: ...Step 1 Lay the carton flat remove the tree top instruction sheet and all remaining parts from the shipping container and put to the side until needed PLEASE READ THE ASSEMBLY INSTRUCTIONS CAREFULLY WHEN SETTING UP THE FLIP TREE Step 2 To make it easier to remove your FLIPTREE it is recommended to close the carton flaps and reposition the tree carton flat on floor with arrows pointing upright Pleas...

Page 13: ...LOCATION Green Handle Step 4 Press down the locking tabs on both front wheels once the tree is in its desired location Locking Tabs Step 5 Remove the main tree storage bag Unbuckle both cinch straps located on the sides of the main bag Then unbuckle the two stability straps at the bottom of the bag before unzipping and removing the main bag Unzip the tree top and remove the bag Step 6 Your FLIPTRE...

Page 14: ... in the direction shown by the FLIPTREE Indicator towards you and down to the center of the foot pedal If you find it difficult to attach the tree top with the tree in the full upright position you may choose to tilt the tree slightly for easier access Indicator ...

Page 15: ...ection B into power strip TOP SECTION C GREEN PLUG MIDDLESECTION B BLUE PLUG REMOTE CONTROL and PLUG IN REMOTE CONTROL RECEIVER Wall Outlet FLIP BOTTOM SECTION A RED PLUG Step 9 Buckle the safety strap at the bottom of the tree Drawing not to Scale Step 10 Plug the light set of tree body A into power strip Plug power strip into the remote control receiver Plug the remote control received into wall...

Page 16: ...tree making sure the zipper is aligned with the center of the footrest Step 8 Gently pull the bag down over the tree until the bag nearly touches the floor Then zip up the bag Step 9 Loop each of the stability straps at the bottom of the main tree bag around the back base leg before connecting buckle to the main bag Step 10 Fasten the two cinch straps on both sides of the main tree bag Connect the...

Page 17: ... are growing towards the sun With each successive row make the upward angle of the branches more pronounced Position inner tips to hide the center of the tree 4 Arrange the uppermost section of the tree so that the tips are evenly spaced and pointing upward 5 Step back and review the tree Adjust branches and tips as neccessary to give the tree a fuller appearance The tree may be shape differently ...

Page 18: ...e product when leaving the house when retiring for the night or if left unattended 7 This is an electrical product not a toy To avoid risk of fire burns personal injury and electric shock it should not be played with or placed where small children can reach it 8 Do not use this product for other than its intended use 9 Do not hang ornaments or other objects from cord wire or light string 10 Do not ...

Page 19: ... fully inserted into base bend each lead up likeother lights in the light set so that the leads will touchthe contacts inside thelight socket TOREPLACE A FUSE CAUTION FIRST UNPLUG YOUR PRODUCT FROMANYPOWER SOURCE 1 Grasp plug and remove from the receptacle or other outlet device Do not unplug by pulling on cord 2 Open fuse cover Slide open fuse access cover on top of attachment plug towards plug s...

Page 20: ......

Reviews:

Related manuals for Holiday 61547