background image

SQUEAKY BRAKES

The brakes may squeak before they are broken in. This is normal 

and will not affect the function or performance of the brakes. 

With continued use the squeak should go away.

The tire must be in

fl

ated to a maximum of 20 P.S.I(4.10-6. It is 

also recommended to use a tube additive like Slime, available 

from any motorcycle shop, to avoid inconvenient punctures.

Empty all air from the tire, prior to loosening the bolt to split the 

rim.

11

14

Adjusting the 

 Brakes

15

Tire Pressure

The Brakes on the E-ATV should come fully adjusted from the 

factory. However, it may be necessary to adjust the brakes from 

time to time.


To adjust the rear brakes:

For brakes that are adjusted too loose:

1. Adjust the tension screw on the right hand brake lever by 

rotating it counter-clockwise until the wheel spins freely.

For brakes that are adjusted too tight:

2. Tighten the tension screw on the right hand brake lever by 

rotating it clockwise until the wheel has a slight drag.

Summary of Contents for Electric Kids

Page 1: ...Electric Kids Mini Quad ATV...

Page 2: ...harger turns red green 5 DO NOT allow this unit to deep discharge the battery 6 For safety purposes DO NOT charge for over 24 hours 7 Turn the unit OFF when not in use BATTERY MAINTENANCE and CHARGING...

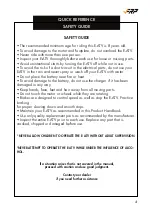
Page 3: ...ee Product Handbook for more information This product is recommended for riders 8 YEARS OF AGE and older SAFETY Persons without excellent vision balance coordination reflex muscle and bone strength an...

Page 4: ...way Keep hands face feet and hair away from all moving parts Do not touch the motor or wheels while they are rotating Brakes are designed to control speed as well as stop the E ATV Practice braking f...

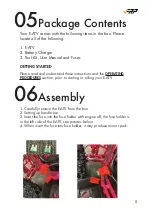
Page 5: ...and these instructions and the OPERATING PROCEDURES section prior to starting or riding your E ATV 1 Carefully remove the E ATV from the box 2 Setting up handle bar 3 Insert the fuse into the fuse hol...

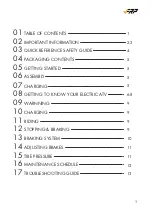
Page 6: ...UIDE 5 04 PACKAGING CONTENTS 5 05 GETTING STARTED 6 8 07 CHARGING 08 GETTING TO KNOW YOUR ELECTRIC ATV 5 09 WARNNING 5 10 CHARGING 9 11 RIDING 9 9 12 STOPPING BRAKING 9 13 BRAKING SYSTEM 10 14 ADJUSTI...

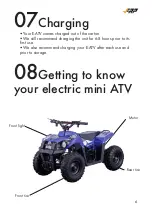
Page 7: ...n We still recommend charging the unit for 6 8 hours prior to its first use We also recommend charging your E ATV after each use and prior to storage 07Charging 08Getting to know your electric mini AT...

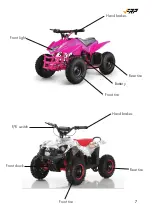
Page 8: ...7 Front light Hand brakes Hand brakes Rear tire Rear tire Front tire Front tire Battery F R switch Front shock...

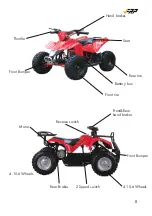
Page 9: ...8 Throttle Front Bumper Hand brakes Seat Front Rear hand brakes Reverse switch Rear tire Front Bumper Front tire 2 Speed switch 4 10 6 Wheels Battery box Motor Rear Brakes 4 10 6 Wheels...

Page 10: ...l outlet When first plugged in the charger has one red light that will illuminate at the same time indicating that the charging process has started Once the light on the charger turns red green you ma...

Page 11: ...the E ATV is ready to be re charged The E ATV uses a disc caliper system It is activated by a hand brake lever on the left and right side of the handlebar Squeezing the hand brake lever with your left...

Page 12: ...ir from the tire prior to loosening the bolt to split the rim 11 14Adjusting the Brakes 15Tire Pressure The Brakes on the E ATV should come fully adjusted from the factory However it may be necessary...

Page 13: ...will keep your E ATV running in top condition Daily Maintenance Perform each time you ride your E ATV Clean the exterior of the unit with a soft damp rag DO NOT WASH WITH A HOSE Check that all nuts a...

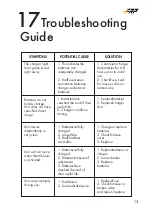
Page 14: ...end of their useful life 1 FuseBlown 2 Looseorbrokenwire 1 Replacebatteries or charger 2 Loosenbrakes 3 Replace batteries 1 ReplaceFuse 2 Checkforloose or broken wires and repair replace 1 Chargeor r...

Reviews: