22
Chapter 3: Operation of the Colt Audiometer
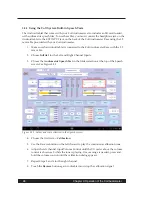
masking. That is, if the input level of the test ear is increased by 10 dB, it is often desirable for
the masking signal to also be increased by 10 dB. This is done automatically by enabling the
Tracking button. When Tracking is enabled, adjusting the hearing level button for one channel
will adjust the hearing level for the other ear by the same amount. The color of the Tracking
button changes from blue to gold when enabled.
There are two different ways to present the noise signal.
1. Use the Reverse button on the channel with the NBN selected. This will present a
continuous masking noise in the selected ear. The tone stimulus in the other ear can be
presented as desired.
2. Enable the Interlock button. When using masking, don’t enable both Interlock and Re-
verse buttons at the same time. The Interlock button will cause the input signal in both
channels (usually the tone in one ear and the masking in the other) to be presented
whenever one of the stimulus buttons is pressed. When Interlock is enabled, the button
color will change from blue to gold.
Note: NBN masking must use the same frequency as the test tone. Therefore the dual frequen-
cy slider option cannot be used when using masking. See Section 3.1.1 for instructions on how
to change the dual frequency selection.
3.1.3 Changing the Output Selection
Audiometric testing can be performed using TDH headphones, ER-3A Insert Earphones, a
bone vibrator, or sound field speakers. Use the Output selection for each channel.
Line: This is used if an external amplifier is connected, usually for the purpose of sound field
testing at levels above those allowed with the built-in circuitry of the Colt Audiometer Base.
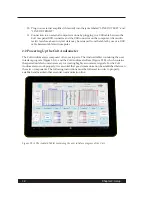
3.1.4 Plotting an Audiogram
When presenting a signal to the patient, the signal level is not immediately plotted on the pa-
tient’s audiogram. To plot the point on the audiogram do one of the following:
• Push the Response button at the top of the screen, indicating that the patient had a posi-
tive response to the signal.
• Ask the patient to use the Patient Response button. When pressed, the audiogram point
will be plotted at the selected frequency and hearing level.
Patient No Response:
Note: Please refer to Chapter 4: customizing the Colt Operation- The preferences menu for
information on control of the patient no response option.
There are several ways to indicate a “No Response” for the selected frequency.
1. With the Patient No Response option off, you can press the Response button on the
screen to toggle the graph data point between the Response symbol and the No
Response symbol.

